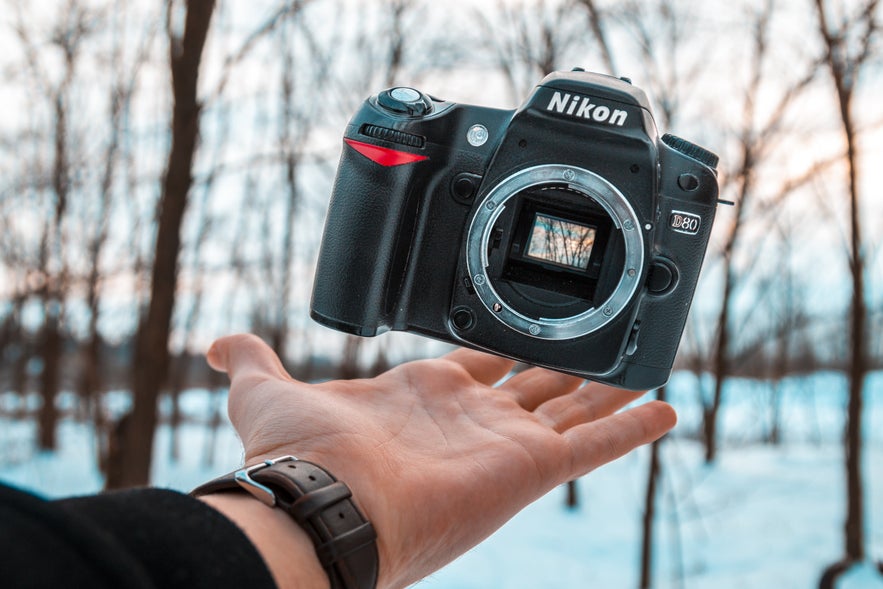
If you’re reading this, then it’s too late. You’ve probably been sucked into the world of photography and it will now take over your life. In the best kind of way, that is. You've probably just purchased your first DSLR camera, unpackaged it, switched it on and looked at all of the fancy buttons and dials. Sure, you can take some decent photos right away but you want to have more control.
- Check out these Camera & Gear Reviews
- Discover our Recommended Camera Settings for Landscape Photography
- Join us on this 2-Day Snaefellsnes Peninsula in Summer Photography Tour
Perhaps you're looking at your camera and feeling just a little confused. You realise that you have no idea how to use all of those crazy buttons and settings. Well, that’s totally okay because you really want to learn how to use your camera, which puts you a good step ahead.
Today’s modern digital cameras have tremendous amounts of power and are designed to help you achieve your vision by making photography easier and more efficient. You just need to learn how to use them properly. This article is aimed at teaching you all the basics of using a camera. From various shooting modes to focusing systems and white balance, this is your guide to the camera settings of a digital camera.
- See also: The Best Camera Bags for 2020
Depth of Field
Before we get into camera dials and functions, let’s briefly discuss a couple things that are important to understand when you're starting out in photography, the first being depth of field.
Depth of field is defined as the distance between the nearest and the farthest subjects that are in relatively sharp focus in an image. A “shallow” depth of field refers to that distance being very small, meaning that most of the frame will be out of focus. An extremely shallow depth of field can be only an inch before things become out of focus.
On the other hand, a “deep” depth of field means that the distance is very large. Using a deep depth of field, you can have everything in the frame in focus all the way to infinity.
The three things that affect depth of field are the focal length of your lens, the aperture, and the distance you are from the focus point.
 Shallow vs deep depth of field. Photo by: 'Sean Ensch'.
Here is a visual example above of a photographer taking a photo of a person standing in a field with mountains in the background. The subject is the person, so they are the focus point. With a shallow depth of field, the foreground will be out of focus, while the person will be in focus and everything beyond the person will be out of focus.
With the deep depth of field, everything in the frame will be in focus.
The Exposure Triangle
The second concept you should be familiar with is the Exposure Triangle. Exposure is determined by three factors: shutter speed, aperture, and ISO. The Exposure Triangle is the relation of how these three elements directly interact with one another.
Adjustments to your ISO, shutter speed and aperture are needed to achieve proper exposure and give you creative control while doing it. Understanding exposure is so incredibly important to creating great images. It is something that a lot of photographers just don’t grasp or overlook. I’ve seen preset examples and editing tutorials on Youtube correcting images whereby much of the problem was that they were just poorly exposed.
 It is important to familiarise yourself with the Exposure Triangle. Photo by: 'Unsplash'.
Improper exposure can also result in grainy or noisy images, loss of detail, colour shifts, colour dullness and more. This all may be overwhelming and sounds confusing right now but it is very simple to understand when explained properly. I highly suggest reading this article, “The Exposure Triangle: Aperture, ISO, and Shutter Speed Explained” for an in-depth explanation so that you can understand exposure properly.
Camera Setup
Alright, now let’s get your camera set up quickly. Every camera is slightly different with its interface, so I always suggest looking through the manual that came with your specific camera to familiarise yourself with its layout.
Date and Time
When you first unbox your camera and turn it on, it should prompt you to set the date and time. Be sure to set the proper date and time because this information will be stored in the image EXIF data and is great to have for records.
If you were impatient and skipped over this when you first got your camera so that you could use it straight away, don’t worry – you can still change the date and time in your camera settings.
Every camera has a different menu system but they are all fairly similar. Open your menu and find the settings area. Then, scroll through until you find “set date/time” and press that to open the prompt.
File Type
Selecting file type is very important. There are generally two file types for digital photography that you can choose for your camera to record in: JPEG and RAW. You can also choose between different sizes for each file type.
 Screenshot of RAW and JPEG file types in the Settings menu with different quality of recording. Photo by: 'Sean Ensch'.
JPEG files are commonly used for almost all photographic digital images and the Internet. They are compressed image files, so they are usually small in size and will take up less memory on your storage card. However, with that compression, they lose a fair amount of quality and detail. Also, with the in-camera compression, whatever automatic adjustments that your camera makes will be permanent in your JPEG image.
RAW files store all the image data when the photo is taken. Everything. With this file format, all the settings used to take the photo can be adjusted in post production with no issues. For example, if you took a photo on auto-white balance but for some reason, the photo appears to be too cold during post-processing, you can edit that photo with software such as Lightroom, Adobe Camera RAW or Capture One. You'll be able to adjust the white balance where you need it, as if it was still done in camera. When editing RAW files, the image data never changes, so you can make unlimited edits to the image and always go back to original.
RAW format is the best way to take your photos. I highly recommend that you set your camera to record in RAW. The only downside is that the file sizes are much larger, which means that they'll take up much more space on your memory card. It's a small price to pay in my opinion. You can also set your camera to record in both RAW and JPEG. This will save both file formats to your memory card. In some instances, this can be very useful.
File Naming
Each camera uses a different default file naming system, which can be changed in the camera settings. This can be useful for distinguishing your photos when using different camera bodies, if you want your files to have a unique filename, or if you work with multiple photographers on a project and will be sharing all of the files in the group.
Memory Card
To store the images you take, you will need a memory card. Before you put in your memory card, make sure that the camera is switched off. This is always good practice, as inserting a memory card while the camera is on can sometimes cause damage.
After the card is in, turn the camera on. If it is a brand new card to the camera, then you may be asked to format the memory card. Formatting the card will remove any data from it and ensure that the proper folders and filename conventions will be introduced to your card. Make sure that there is nothing on the card that you need before you format it, otherwise it will be lost. If you need to format your memory card, then you'll also find this setting in your camera's menu.
Copyright Information
In today’s digital world with social media and the Internet, images are passed around and plainly stolen left and right. A good practice is to embed your copyright information into the metadata of the images that you take. You can do this in your settings panel by completing a profile of information, so that every photo taken will have your personal copyright data stored automatically.
Camera Shooting Modes
Cameras today have several shooting modes to help you maximise your shooting efficiency. On most cameras, you'll find the Auto, Program, Shutter Priority, Aperture Priority, Manuel mode and Bulb mode. Some cameras have “Scenes” or custom programmed settings which you can store. Each one of these will give you more control over your camera, while still allowing you to work effectively.
You can locate each of these settings within your camera’s menu or by using the mode dial, which is usually located on the top left of most cameras.
 Canon mode dial. Photo by: 'Canon USA Support Centre'.
Auto Mode
Auto mode (A or A+) gives your camera full control. It will meter the exposure, set your ISO, shutter speed and aperture automatically and fire away. This is the easiest way to take photos, as it essentially turns your camera into a point and shoot. The downside is that you'll have zero control, both creatively and technically, so sometimes the photo can turn out poorly. It’s best used in well lit, outdoor scenarios for snapshots.
Program Mode
Program mode (P) is similar to Auto, however, it allows you some control over certain settings. The exposure is automatically decided for you but you can choose some settings to have control over. You can manually set the ISO so that the camera does not increase it to an uncomfortable level. You can also choose whether to use the on-camera flash or not and you can set the white balance.
This mode allows you to control pieces of your settings, while still allowing the camera to calculate your exposure.
- See also: Ultimate Guide to Long Exposure
Shutter Priority Mode
Shutter Priority mode (Tv or T) allows you to manually set your shutter speed and ISO, while letting your camera adjust the aperture automatically to properly expose the image.
This shooting mode is extremely useful in situations when you are photographing fast moving objects where you absolutely need a fast shutter speed in order to capture them sharply. If you were to try to photograph the same scene with Auto mode, then the camera may designate much too slow of a shutter speed, causing some degree of blur.
Aperture Priority Mode
Aperture Priority mode (Av or A) allows you to manually set your aperture (f-stop) and ISO, while allowing the camera to choose the shutter speed needed to properly expose the image.
 Aperture Priority mode. Photo by: 'Unsplash'.
The main reason to shoot in Aperture Priority mode is so you can control your depth of field. For example, if you are out shooting landscapes, then you might want to use a deep depth of field (high f-stop) to ensure that everything is in focus. On the other hand, if you are shooting portraits, then you might need a shallow depth of field (low f-stop) so that only the subject will be in focus. The camera will keep your desired aperture and depth of field, while adjusting the shutter speed for you to ensure a well-balanced exposure.
Manual Mode
Manual mode (M) gives full control to the photographer. In my opinion, if you are serious about photography, then you should eventually learn to shoot in manual mode. It is what it sounds like – fully manual. This means that you get to set your own ISO, aperture and shutter speed. You will have full control over each of these settings to achieve your desired result.
 Manual mode. Photo by: 'Unsplash'.
To use manual mode, you really must understand metering and exposure. Using manual mode will give you ultimate creative control over your photography.
- See also: Ultimate Guide to Panorama Photography
Bulb Mode
Bulb mode (B) is a special kind of shooting mode. All cameras have a limited setting for slowest shutter speed, which is usually 30 seconds. Sometimes, you need longer than that. This is where Bulb mode comes in.
Bulb mode allows you to set your shutter speeds to unlimited lengths. When you click the shutter button, it will open the shutter and keep it open for as long as you hold the shutter button down. You might be thinking that this sounds crazy! Who would ever need that, let alone longer than 30 seconds?! Well, there are some instances where you may want to take photos with shutter speeds longer than 30 seconds. Consider star trails, low light scenes and instances where you may want to smooth the movement of rough water. Experimenting with long exposures can create some beautiful, surreal effects.
Scene Modes
Scene modes are programmed settings in your camera that will allow you to achieve particular results. These modes can vary or not even exist, depending on what kind of camera you have. They generally consist of landscape, portrait, sports and macro settings, allowing you to capture these scenes in a pre-programmed manner. For example, landscape mode will use a high aperture to ensure a deep depth of field.
Focus Area Modes
Your DSLR will have a few auto-focusing modes, depending on the model. The most common are AF-S and AF-C.
AF-S
AF-S (Autofocus Single) means that when you press the camera shutter button down halfway, the camera will focus. When you press it down fully, it will take the photo. If you let go of the shutter button midway or when you go to take another photo, the focus will start over.
This mode is best used for stationary objects, such as landscapes, architecture or people that aren’t moving.
AF-C
AF-C (Autofocus Continuous) means that when you press the shutter halfway down and the focus locks, the focus will adjust as the subject moves, thereby keeping it in focus. This is the best way to photograph moving objects such as wildlife and sports.
- See also: Namibia Wildlife Photography Tour
Metering Modes
When you take a photo using any of the shooting modes, your camera makes a number of calculations to achieve the proper exposure. This is what is referred to as light metering.
Your camera has a meter built in to it that evaluates the light in the scene that you’ve framed. Based on the settings that you've selected, the meter will calculate the optimal exposure. It does this by looking at light in the image (shadow and highlights), determining an exposure whereby all the tones in the image average 18% grey or “middle grey”.
This is why if you take a photo of a bright white wall or white snow, the metered image will look a bit grey and underexposed. Similarly, a darkly-lit room may appear a bit brighter. As long as the scene isn’t pure white or extremely dark, then the camera’s meter will do a great job getting a proper exposure.
There are three basic metering modes: Average, Centre Weighted, and Spot Metering.
 The three metering modes. Photo by: 'Sean Ensch'.
Average metering means that the camera will evaluate the entire scene in frame from corner to corner, then average it all to 18% grey.
Centre weighted, or partial metering, means that the camera will only evaluate 80% of the centre of the frame, leaving the corners out.
Spot metering is when the camera only meters a small area of the scene, usually in the centre marked by a dot. This means that it will only set the exposure based upon this small portion of your frame. This is a more advanced metering, typically used for scenes with dramatic contrast between light and dark where you want your metering to be based off one or the other. Using spot metering in a situation like this will give you more creative and technical control.
To change metering modes, most cameras have a designated button on the top right or back of the camera. The button is labelled with a square that contains a broken circle, with a spot inside the circle. Press this button, then use the wheel to cycle through options.
As a beginner, it is best to stick with average or centre weighted metering modes before experimenting with spot metering.
How to Change Exposure Settings
How you adjust the shutter speed, aperture, or ISO on your camera will depend largely upon which camera model you own. Each camera has a slightly different button interface but there is usually a general layout that is adhered to by each manufacturer across all of their models.
Most DSLR cameras have two main wheels or dials on them that will control the exposure settings. The main one is located by the shutter button on the top of the camera. The secondary or rear dial is usually located on the back of the camera.
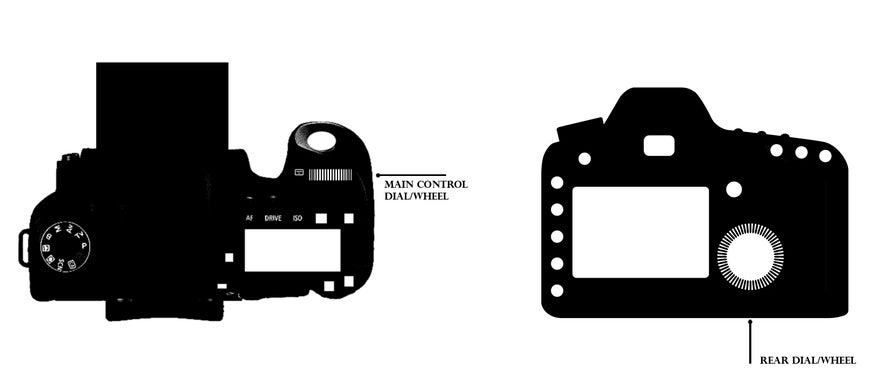 Location of the main two control wheels on most cameras. Photo by: 'Sean Ensch'.
Shutter Speed
To change your shutter speed, you will almost always use the main wheel on the top of the camera near the shutter button. Turn it to the right or left to adjust the shutter speed. Each click of the wheel will be ⅓ stop of light. This dial is in close proximity to your shutter release button. As such, it is also often used to adjust any other settings when you are using a priority shooting mode.
- See also: Ultimate Guide to Focus Stacking
Aperture
You can adjust your aperture in one of two ways, depending on which shooting mode you are in. If you are in Aperture Priority mode, then you can use the same main wheel on the top near the shutter button. In Manual mode you can use the rear wheel on the back of your camera. If you still can’t figure it out, refer to your camera’s manual.
ISO
There are a couple of general ways to adjust the ISO, depending on your camera model. Most modern, more professional DSLR cameras will have a designated, labelled ISO button on the top or upper back of the camera. Press this and an ISO panel will come up on the LCD display or in the viewfinder. Use the wheel to adjust the ISO, then press the ISO button again to set it.
 There are a few ways to adjust the ISO. Photo by: 'Unsplash'.
Some cameras do not have an ISO button and will require you to go into the camera settings menu to adjust the ISO.
Keep in mind that with ISO, the image quality can greatly be affected. The higher the ISO, the more grain or noise that will appear in your image. The quality is affected even more by an underexposed photo and in the shadows of an image.
White Balance
White balance refers to the colour temperature in an image and is measured in “kelvin”. Each light source – for example, the sun, fluorescent lights and diffused natural light – emits a unique colour of light due to its different wavelengths. It is because of this that a sunset appears to be a warm (orange) glow while a cloudy day may seem cooler (more blue) in colour.
 Colour temperature chart, showing warmest to coolest. Photo by: 'Sean Ensch'.
The human brain can compensate for the different colours of light naturally and our cameras can do the same, just not always as effectively. Your camera has a default automatic white balance setting, which evaluates the brightest tones throughout the image and calculates the white balance as best as it can. This works fairly well but can sometimes give inaccurate results. Some cameras also have white balance scene selection such as Daylight, Cloudy, Fluorescent, Tungsten and Flash. Cycling through these will adjust the white balance to the scene, such as using “Daylight” for shooting outdoors on a sunny day.
You may also manually adjust your white balance by using the custom white balance in your settings. This will bring up a panel with the lowest (coldest) to highest (warmest) white balance numbers in their kelvin values.
Shutter Release Mode
There are several different modes that change how the shutter is released when taking a photo. Each one has a benefit for certain instances out in the field.
Single Frame
This is the default mode. When you press the shutter button, the camera will take one frame. Continuing to hold it down will do nothing. Another photo isn’t taken until the button is released and pressed again. This is most useful for taking photos that do not take a lot of time to compose.
High Speed Continuous Shooting
When you press the shutter button down in this mode, the camera will begin taking multiple frames continuously at a high speed rate. The rate depends on your camera’s capabilities. Some can do 4 frames per second while others can go up to 10 frames per second. This mode is best used when shooting very fast moving objects, such as wildlife or sports.
Low Speed Continuous Shooting
Similar to above, low speed continuous shooting just lowers the amount of frames per second that the camera takes. This is beneficial for shooting quickly but with slower moving objects, such as lifestyle images of people. The slower frames per second save memory for unneeded bursts of images.
Self Timer / Remote Shutter Control
These modes give you a self timer delay for taking photos. Some cameras have a 2 second option, while the standard is 10 seconds. When the shutter is pressed, a timer begins. When the timer is up, a single photo will be taken. This is useful for group photos and is also the mode to put your camera in if you are using a remote shutter control.
Image Stabilisation
Image stabilisation (IS), or vibration reduction, is technology that enables photographers to take handheld photos at lower shutter speeds than before. As a general rule, you should never take a handheld photo at shutter speeds slower than the focal length equivalent of your lens.
This means that if you are shooting with a 35mm focal length, then 1/35th of a second is the slowest shutter speed you should use when handholding your camera. With a 500mm focal length, you shouldn't shoot slower than 1/500th of a second.
The reason for this is because when you are holding the camera in your hands, especially when you press the shutter button, you will always move the camera a bit. This tiny movement will result in blurry, shaky photos whenever you shoot with a shutter speed that is even just a little bit too slow.
To combat this, you can use a tripod. If your camera or lens has IS technology, then you can turn it on.
Image stabilisation comes either in your lens or in-camera. Lens image stabilisation uses a floating lens element that is electronically controlled and will shift with any movement. In-camera image stabilisation is similar, however, the camera will physically shift the camera sensor to movements.
Image stabilisation technology is hugely beneficial when photographing with high focal length lenses and/or in low light scenarios when you can’t use a tripod. Keep in mind that it will only help with shooting stationary objects as it reduces vibration from handheld cameras. It does not help capture fast moving objects in frame at lower shutter speeds.
The downside to image stabilisation can be a slight loss of detail, as it will never be as good as a photo taken on a sturdy tripod with no vibrations. Also, it is important to remember to turn Image Stabilisation off when you do not need it.
In-camera image stabilisation can drain your battery heavily. In addition, using it when it is not needed can sometimes confuse the IS system and make your photos appear to have jumbled edges. So if you have an IS system, remember to turn it off when it is not needed.
Conclusion
If you are reading this, then you have made it all the way to the end – congratulations! I know that was a lot of information but hopefully, you will now have a fairly good understanding of your camera’s functions. Of course, there is so much still to learn but when I first began photography, I found the best way to learn was reading articles such as this one and then just messing around with my camera.
The more you use your camera, the more familiar you will be with it. Eventually, everything will be second nature and your camera will become an extension of you. When this happens, you will truly be free to explore your creativity out in the field without worry of not knowing how to use a certain function. So go out and put all of this new knowledge to good use!
About the author: Sean Ensch is a landscape photographer based in the USA. You can find more of his work on his website or by following him on Facebook and Instagram.
Would you like to take your photography to the next level? Join one of our photography tours and workshops in Iceland. It's the best place to improve your photography skills!

