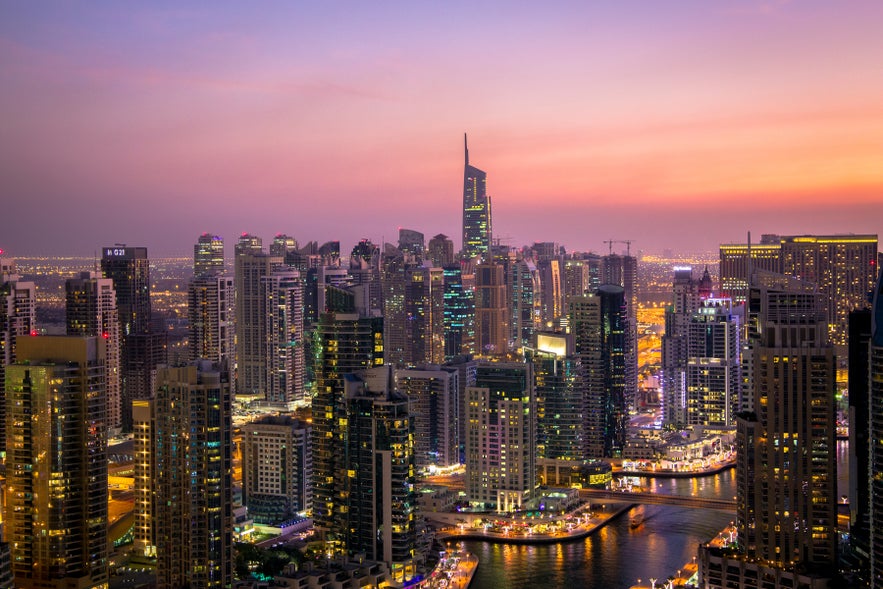
There’s something incredibly fascinating about city skylines. Captured in images, the soaring skyscrapers of cities such as Shanghai, Dubai and New York draw you into the midst of the world below, placing you right in the centre of the incredible hustle and bustle that makes up city life. You can almost sense all of the different sounds and smells, as well as the fast-paced action from people crossing the streets to cars whizzing by past you.
- Check out these Photography Tutorials
- Learn all about Chromatic Aberration – What it is and How to Avoid it
- Discover How to Use Complementary Colours in Photography
The most iconic shots of city skylines don't just transport you into the heart of the urban landscape – instead, they employ various photographic techniques to evoke a sense of atmosphere that we mentioned above, including unique elements such as monuments and buildings that make each location instantly recognisable.
While learning these techniques may take a bit of practice, we have a few tried and tested tips for photographing city skylines that will help to get you started. So whether you’re shooting Los Angeles downtown, the Eiffel Tower in Paris or the vibrant centre of Rio de Janeiro, follow these tricks and you’ll be on your way to improving your cityscape photography.
- See also: Japan Photography Workshop in Autumn
Tip #1. Choose the Best Lens for the Situation
Photographing the urban landscape isn’t quite as difficult as it seems. As long as you use appropriate camera equipment with the best camera settings, then you’ll already be taking a step in the right direction.
 Choosing the right lens will improve your cityscape photography. Photo by: 'Pxhere'.
When shooting cityscapes, it’s important that you pick the right lens for the situation. Wide angle and fisheye lenses are great for creating a sense of drama, though there can be quite a bit of distortion associated with these types of lenses. Rather than going all-out wide, try lenses with a mid-range focal length of around 28mm to 100mm, particularly if you’ll be focusing in on a single important landmark within the city skyline. This focal range is also great for capturing the expanse of the skyline, without making it seem too small or far away.
- See also: Best Lenses for Night Photography
Tip #2. Use a Tripod
While it can be annoying to have to bring your tripod along with you into the city, it’s a good idea to have one, particularly if your aim is to achieve sharp images. Using a tripod can help to reduce camera shake. It will also allow you to shoot with slower shutter speeds, which can be useful if you’ll be out in low-light conditions, practicing night photography, or when you want to get a little bit more creative with your exposure.
Despite the benefits of autofocus, there are a few reasons why you should focus manually when shooting cityscapes, even if you feel that your vision is not quite 20/20.
 Manual focus will produce sharper images. Photo by: 'Pxhere'.
Manual focus nearly always produces sharper images than the autofocus, especially when the lighting is poor. Focusing manually can also be much more accurate when you’re shooting buildings from a distance, where the autofocus may have difficulty deciding how far away the structures actually are. In addition, when it’s dark, the autofocus function of your camera may fail to work, meaning that you’ll have no other choice but to manually focus the lens. An easy way to do this is by switching to Live View, which will allow you to magnify the scene so that you can ensure that the area you want to have in focus is actually sharp.
If you’re having trouble deciding on where to set your focal point, simply place it on the centre of interest within the frame. For example, if you are shooting St Paul’s Cathedral in London, then make that your point of focus. If you’ll be shooting the Burj Khalifa in Dubai, then that should be the building that you focus on.
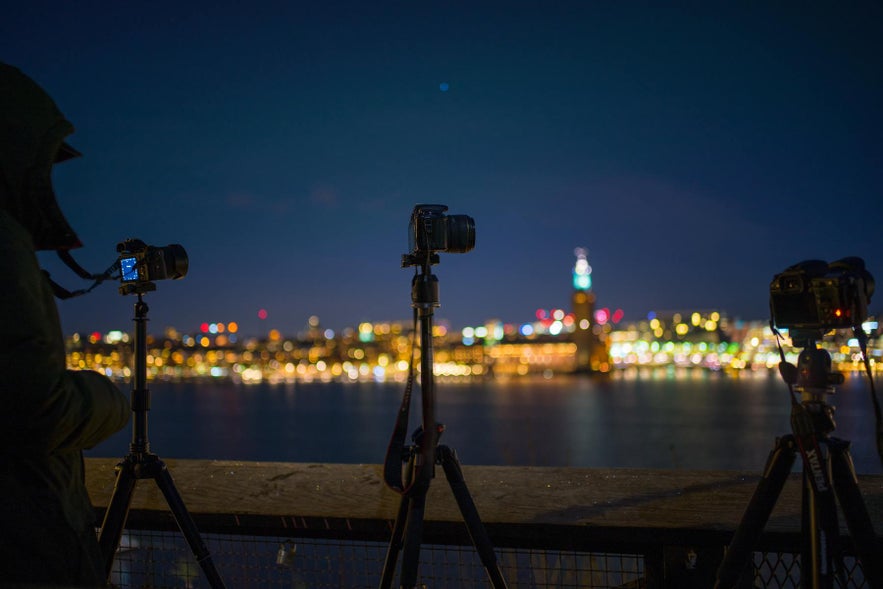 A tripod will allow you to take longer exposures of the city. Photo by: 'Pxhere'.
To get the most out of using a tripod, set your shutter release on a 2-second delay. This will give your equipment time to settle to reduce any movement between pressing the button and the shutter being released.
Unfortunately, there may be times when you’ll want to shoot where tripods are not allowed – for example, on the roof of a hotel or a business where there are great views of the city. When you can’t bring your tripod, try improvising instead by balancing your camera on a railing or some other part of the building which is safe and stable.
- See also: Camera & Gear Reviews
Tip #4. Set Your Shooting Mode to Aperture Priority
While it’s best to shoot in Manual mode where possible, photographing the city skyline is one situation when it can be useful to set the mode to Aperture Priority. This is because the Aperture Priority mode allows you to control all of the settings in your camera, apart from the shutter speed.
 Shooting on Aperture Priority mode allows you to maintain the best aperture for your lens. Photo by: 'Pxhere'.
What does this actually mean? Well, you’ll be able to set the ISO low to reduce noise whilst maintaining the best aperture for your lens to ensure sharpness and adequate depth of field. Meanwhile, the camera will automatically calculate the shutter speed, so all you’ll need to do is to exposure compensate for low light or very bright scenes. Shooting cityscapes can’t get any easier than that!
Tip #5. Use a Narrow Aperture for Better Depth of Field
We just mentioned the need to ensure an adequate depth of field, so you’re probably wondering what the best aperture is for photographing city skylines. This really depends on what you’re hoping to achieve though most of the time, the aim will be to capture all the details by having everything sharp and in-focus.
 Shooting with a narrow aperture will give you better depth of field. Photo by: 'Pxhere'.
To achieve this, use a narrow aperture of around f/11, which will result in better front to back sharpness. For nighttime cityscapes, you may need to open up the aperture to around f/3.5, in order to obtain a brighter exposure.
Tip #6. Low ISO
As with any other genre of photography, it’s best to use the lowest ISO possible for the situation when photographing the city. This will help you to reduce the risk of noisy and grainy images, as well as camera shake and motion blur.
 Shooting with a higher ISO is best for handheld daytime photography and at night. Photo by: 'Pxhere'.
When shooting cityscapes in the daytime on a tripod, you can get away with using ISO 100. If you’ll be shooting handheld, then you may need to use an ISO between 100 to 400. For night photography, anywhere from ISO 800 to 1600 may be appropriate on a tripod. Handheld photographs may require a higher ISO; simply experiment until you’re able to achieve a sharp and well-exposed image.
Tip #7. Straight Horizon Line
Whether or not the horizon line is straight can make or break a photo, particularly with cityscape photography... though you’d be surprised at how many photographers don’t pay enough attention to making sure that the horizon is level when taking a shot. The result can be a terribly skewed image that is aesthetically unsound. As such, after deciding on your composition, you should always check that the horizon is straight before pressing the shutter release.
 It can be difficult to see the horizon when it is obscured by buildings. Photo by: 'Pxhere'.
However, the difficulty with photographing the city skyline is that the horizon line may sometimes be obscured completely by skyscrapers and other buildings. When this occurs, simply take a look at the centre of your frame to ensure that the vertical lines aren’t curved. If the lines are not straight, then you may need to move or tilt the camera a little up or down until the horizon is level.
Tip #8. Get a Different Perspective
This brings us to the benefits of shooting with different perspectives. When you’re standing at ground level, it can sometimes be impossible to get the city skyline to look the way that you want, particularly if you are close to the buildings and the distortion effect makes them appear as though they are rising up before you at an angle.
 Cities look different from above. Photo by: 'Pxhere'.
Rather than capturing everything from the ground, try to locate other interesting vantage points, such as shooting from the Brooklyn Bridge for a remarkable view over lower Manhattan. Some buildings may have observation decks where you can get up high to see the city from above – think the Empire State Building in New York City or the Shanghai Tower in China.
- See also: Aerial & Drone Photography
Tip #9. Shoot During Golden Hour, Sunset and Blue Hour
One of the keys to producing stunning cityscapes is to shoot with the best light. City skylines look incredible during the golden hour right after sunrise or before sunset, when gorgeous colours light up the sky.
 Cities look beautiful when the lights come on right after sunset. Photo by: 'Pxhere'.
Cityscapes can also be amazing during the blue hour or twilight, when the sky is darker and the city lights come on. The ambient light will be enough to illuminate the buildings without too much contrast, giving them a kind of enchanting beauty.
To make the most of your shoot, make sure to get to your vantage point early and to take pictures from the beginning of golden hour right into the night. As the light changes, you’ll capture a myriad of different effects and see the atmosphere changing before your eyes.
Tip #10. Bracket Your Exposures
As the day transitions into night and the city lights begin to glow brightly, you may start finding it difficult to capture the skyline in a single image due to the wide dynamic range caused by artificial lighting. In some shots, the lights may be too bright, resulting in clipping of the highlights. When you try to compensate for this, you may end up with an image where the buildings are underexposed with clipping of the shadows.
 Bracketed exposures help you to keep the highlights and shadows in check. Photo by: 'Pxhere'.
To get around these strong contrasts, try bracketing your exposures. You can take a shot where the shadows are properly exposed, followed by a shot where the city lights are properly exposed. To create a balanced exposure, simply combine the best parts of both images by blending them together in Adobe Photoshop using luminosity masks.
- See also: Ultimate Guide to HDR Photography
Tip #11. Experiment with Long Exposure
Speaking of combining images, have you ever seen those amazing images of cities at night with light trails from trains, trams or cars snaking through the frame? They usually feature famous landmarks, such as train stations, buildings and monuments.
 Light trails can make for more dynamic shots. Photo by: 'Pxhere'.
The way to do this is by taking an image (or a series of images) of moving sources of light with a longer exposure. If you take a few shots of the same composition with a shutter speed of around 25 seconds with different lights, then you can layer the images in Photoshop to create strong light trails, which can sometimes serve as incredible leading lines.
 Light trails can highlight strong leading lines. Photo by: 'Pxhere'.
To capture successful long exposure images of light trails in the city, mount your camera to a tripod to reduce the risk of camera shake and movement. The trick to ending up with a great shot is to choose a good composition with a lot of trails. Shooting during the blue hour or twilight can result in some outstanding photos, as the ambient light from the sky can add a further dynamic of interest.
- See also: Ultimate Guide to Long Exposure
Tip #12. Make Use of Reflections
Whether you’re shooting during the day or night, capturing a city skyline reflected beautifully and symmetrically in a body of water can make for truly breathtaking photos.
 A perfect reflection can add further interest to the scene. Photo by: 'Pxhere'.
While capturing the city skyline in a reflection may seem difficult at first, all you need is the right mix of elements to get you started. First of all, you need to settle on a good location. Some of the most famous cities around the world are situated near rivers, harbours and bays – just think of San Francisco, Singapore and Sydney.
 A good composition goes a long way with reflections of cityscapes. Photo by: 'Pxhere'.
As with light trail photography, the key to capturing a great reflection is to choose a good composition with a strong focal point, such as the Golden Gate Bridge or the Sydney Opera House.
For the best reflections, make sure that there is balance and symmetry within the frame. You’ll also need to shoot when there is little wind, which can cause so much movement in the water that the reflection will be ruined. Don’t fret though if there is a bit of movement – blurred reflections can add visual interest in a dynamic way.
 Don't worry if the water isn't still. Blurred reflections can make a scene seem more abstract. Photo by: 'Pxhere'.
Photographing cityscapes may be challenging though also enjoyable and incredibly rewarding. There’s nothing more exciting than an eye-catching image of the urban landscape which can take you straight into the heart of a big city scene. With the right techniques and a bit of practice, you’ll soon be on your way to creating fascinating images of the city skyline… so get out there with your camera and start shooting!


