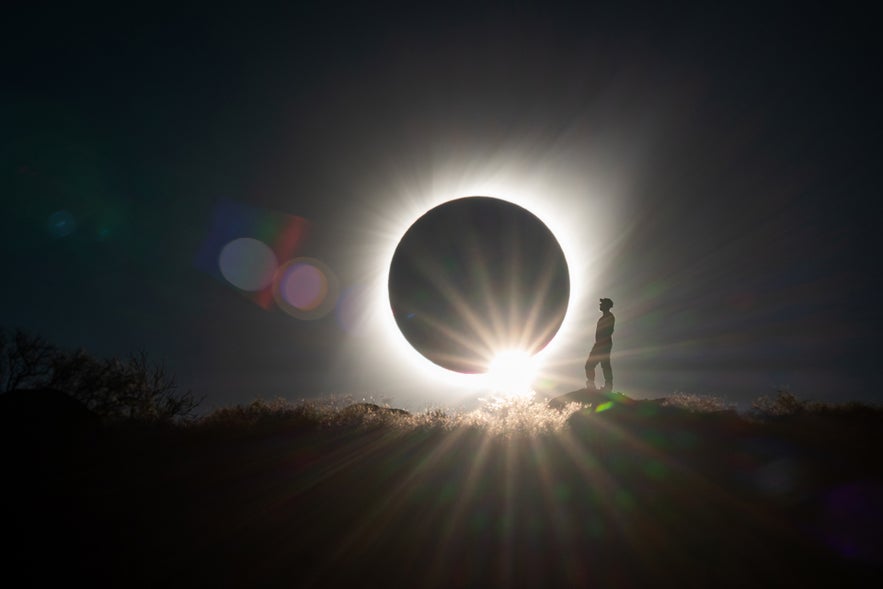
Have you ever even seen a solar eclipse? Seeing a solar eclipse is a magical experience. During a solar eclipse, the Sun, Moon and Earth are aligned. Seeing a total solar eclipse where the Moon completely covers the Sun is something that does not happen often and also lasts for only a very short time.
- Check out this Ultimate Guide to Photographing the Moon
- Learn more with this Beginner's Guide to Using Polarising Filters for Photography in Iceland
But seeing this amazing nature phenomena happen is something special. It’s like the world is standing still for just a moment. The temperature drops, the birds stop making noises, your heartbeat even changes and everything turns completely quiet for just that minute. Not only does it get quiet, it also gets very dark because of the Moon moving in front of the Sun. It’s hard to describe it into words but it will sound very familiar to people who have experienced it.
Seeing a total solar eclipse is one thing but photographing it is another. For a lot of people, it will be a once in a lifetime experience. When you decide to photograph it, it’s important to focus not only on your photo but more so on the whole experience.
In this guide, we’ll be talking about how to photograph a solar eclipse but not just the eclipse itself. We want to photograph the eclipse in combination with an object: a tower, person, anything will do. This requires some planning which we’ll go over in this article.
- See also: Ultimate Guide to Sunset Photography
When to Photograph a Solar Eclipse?
To see or photograph a solar eclipse, we have to know when they occur. In this article, we’ll work with PhotoPills, an app used for the planning of photos. It has some great tools regarding the planning of solar eclipse photos. In the planner, simply check the layers button (bottom right) and click ‘Eclipse.’

You’ll now see a whole list of Moon and Sun eclipses. The first total eclipse happening is on 14/12/2020 this year. After that, there is one in May 2021 and so on.
In the last tab, you can see if the eclipse is visible at the location of the red pin (to be placed anywhere on the map in the PhotoPills planner). In this example, the red pin is placed in the Netherlands. PhotoPills says that the eclipse of 12 December 2020 is not visible here. By tapping this solar eclipse, it will load into the PhotoPills planner.
NOTE: While Total eclipses are spectacular, Annular eclipses are also extremely nice to see and photograph. With an annular solar eclipse, the Moon is a bit smaller than the Sun, creating a ring of fire around the Moon during the eclipse. It looks very impressive.
How to Plan for Solar Eclipse Photography

In the planner, the date jumps to the date of the eclipse (in this example: 14/12/2020) When we zoom out we can see a big band going over South America. This band represents the part where we’ll be able to see the solar eclipse. Note that you can load different eclipses and see where they occur in the world.

When we zoom in, we can see a black band in the middle. This is the path of totality, meaning that it is only within this band that you can see the total solar eclipse happening. Now when we put the red pin anywhere in this band (press and hold) we’ll be able to check the directions and timing.

When we put the red pin inside the black band and scroll the toolbar on the top (where in the previous image you saw the red and black pin), go to the panel where you see all the phases of the eclipse. By tapping multiple times, you can select all the phases of the eclipse.
Note that the middle phases of the eclipse are super close to each other. The total eclipse only lasts about a minute, so if you want to get a shot of the total eclipse, timing is crucial!
Keep tapping until you see the icon of the full eclipse. You’ll now see the thin lines overlapping each other. These are the lines of the Sun and Moon. During the eclipse, they point northeast, meaning that you should stand somewhere on the line of the dashed line. Also, note that the eclipse happens at 1pm in the afternoon, in the middle of the day. This will be impressive to see, as it will go from very bright to dark during the eclipse.
However, we need to know how high the Sun will be in the sky during the eclipse. By swiping the toolbar on top again, we eventually come by the Sun and Moon elevation panel:

The Elevation of the Sun (and Moon) are 72 degrees. This angle is measured from the ground, meaning they are super high in the sky. This is not surprising as we already know that the eclipse happens in the middle of the day. Unfortunately, this makes it basically impossible to do anything creative with this eclipse because we can’t play with objects on the horizon in line with the Sun and Moon.
Of course, you can photograph the eclipse by itself (more on settings and techniques later), which is already spectacular. But this article is aimed at shooting an object in combination with the eclipse. Unfortunately, the 2020 eclipse will not work as the angle of the eclipse is too high up in the sky. So, it’s better to find another eclipse where the Sun and Moon will be closer to the horizon at the time of the eclipse.
An eclipse like this happened in South America in July 2019, where it happened close to Sunset, making it rather close to the horizon. Here is a sequence of shots that I captured during the 2019 eclipse:
 2019 Solar Eclipse in South America. Photo by: 'Albert Dros'.
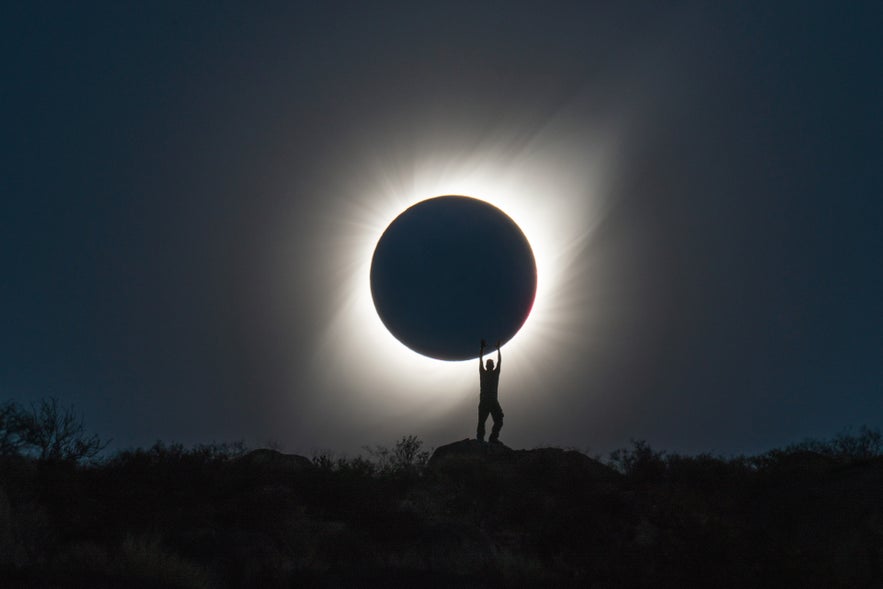 2019 Solar Eclipse in South America. Photo by: 'Albert Dros'.
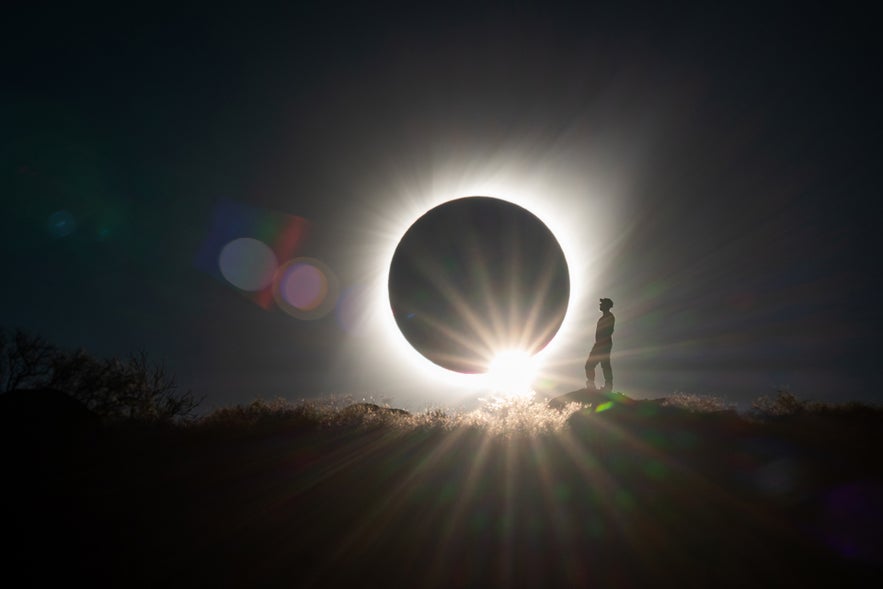 2019 Solar Eclipse in South America. Photo by: 'Albert Dros'.
So how do you plan something like this? As mentioned above, the elevation of the eclipse is important. Having it close to the horizon makes it easier to pull off these shots. This particular eclipse happened at an elevation of only 13 degrees.


The trick here is to find an altitude difference of about 10-13 degrees, in line with the view of the eclipse. This way, you can photograph an object at an angle, in line with the eclipse. The further away, the better, as it will increase the size of the eclipse compared to the foreground object. You do need a longer lens of course.
How to Check Elevation Between Two Points
As seen in the above plan, there is both the red pin and an extra pin: the black pin. We can ‘summon’ the black in in our plan by swiping the toolbar on the top until you see a little icon of the black/red pin. Click this and you’ll see the black pin appear. You can drag the black pin to any position and you’ll see a dashed line between the red pin and the black pin, as well as all information between them like distance, altitude difference and elevation.
By having all this information, you can try to find a spot to put both the red & black pin in line with the eclipse, with approximately the right elevation. In this example, we can see that the elevation is close to 10 degrees on this hill. By moving a bit back and forth on location during the event, I was able to capture multiple angles of the eclipse.
You can check out the PhotoPills website for an extremely extensive guide on how to plan to photograph a solar eclipse.
- See also: Ultimate Guide to Sunrise Photography
How to Shoot the Solar Eclipse
Knowledge on how to plan the eclipse is one thing, shooting it is another. As this is basically a once in a lifetime event, it’s important that you’re prepared when you want to photograph it.
Know Your Camera Well
Photographing a solar eclipse is not that hard but if you’re a ‘beginner’, then it’s important that you know how to handle your camera.
As the actual moment of totality is very short, you will want to be able to capture it properly. During an eclipse you’ll mostly shoot on Manual mode so that you can adjust the exposure on the spot. Just before and after the eclipse, the contrast will be extremely strong because of the filtered bright light from the Sun. It basically makes everything else a silhouette (if you’re shooting a foreground with it).
Eclipse Glasses
As we’re looking into the Sun a lot during an eclipse, you’ll need to protect your eyes. Eclipse events are always popular and you’ll be able to buy simple ‘eclipse’ glasses for a few bucks everywhere. They basically block a huge amount of light and make you see ONLY the Sun. The rest will be completely dark.
It’s very important to use eclipse glasses when looking into the Sun or it can permanently damage your eyes. You’ve probably looked straight into the Sun before, so you’ll know that even looking at it for a single second already completely blinds you. To look into the Sun for a longer duration, you’ll need the eclipse glasses.
Solar Filter
The same goes for your camera. If you’re using a telephoto lens and point it straight into the Sun, it’s very bad for your camera sensor. In fact: it can burn your sensor completely if you’re doing a longer exposure. To make sure your camera sensor stays safe, use a so-called ‘eclipse’ filter. These work the same way as eclipse glasses by blocking a huge amount of light and making sure that your sensor stays safe. Good solar filters are the Formatt-Hitech 18 stops (from my own experience) or any other filter that is rated as a ‘solar’ filter.
Camera Settings
With your solar filter on your lens, you can then set up your camera. Point your camera to the Sun, use manual settings and expose so that only the Sun is visible.
It will be a rather ‘boring’ image at first but the real fun starts when the eclipse is near totality. You will have to adjust your settings and exposure when that happens but it’s important to practise first and feel comfortable with your settings. As explained before, it’s not that hard but you need to be ready for the short moment of totality.
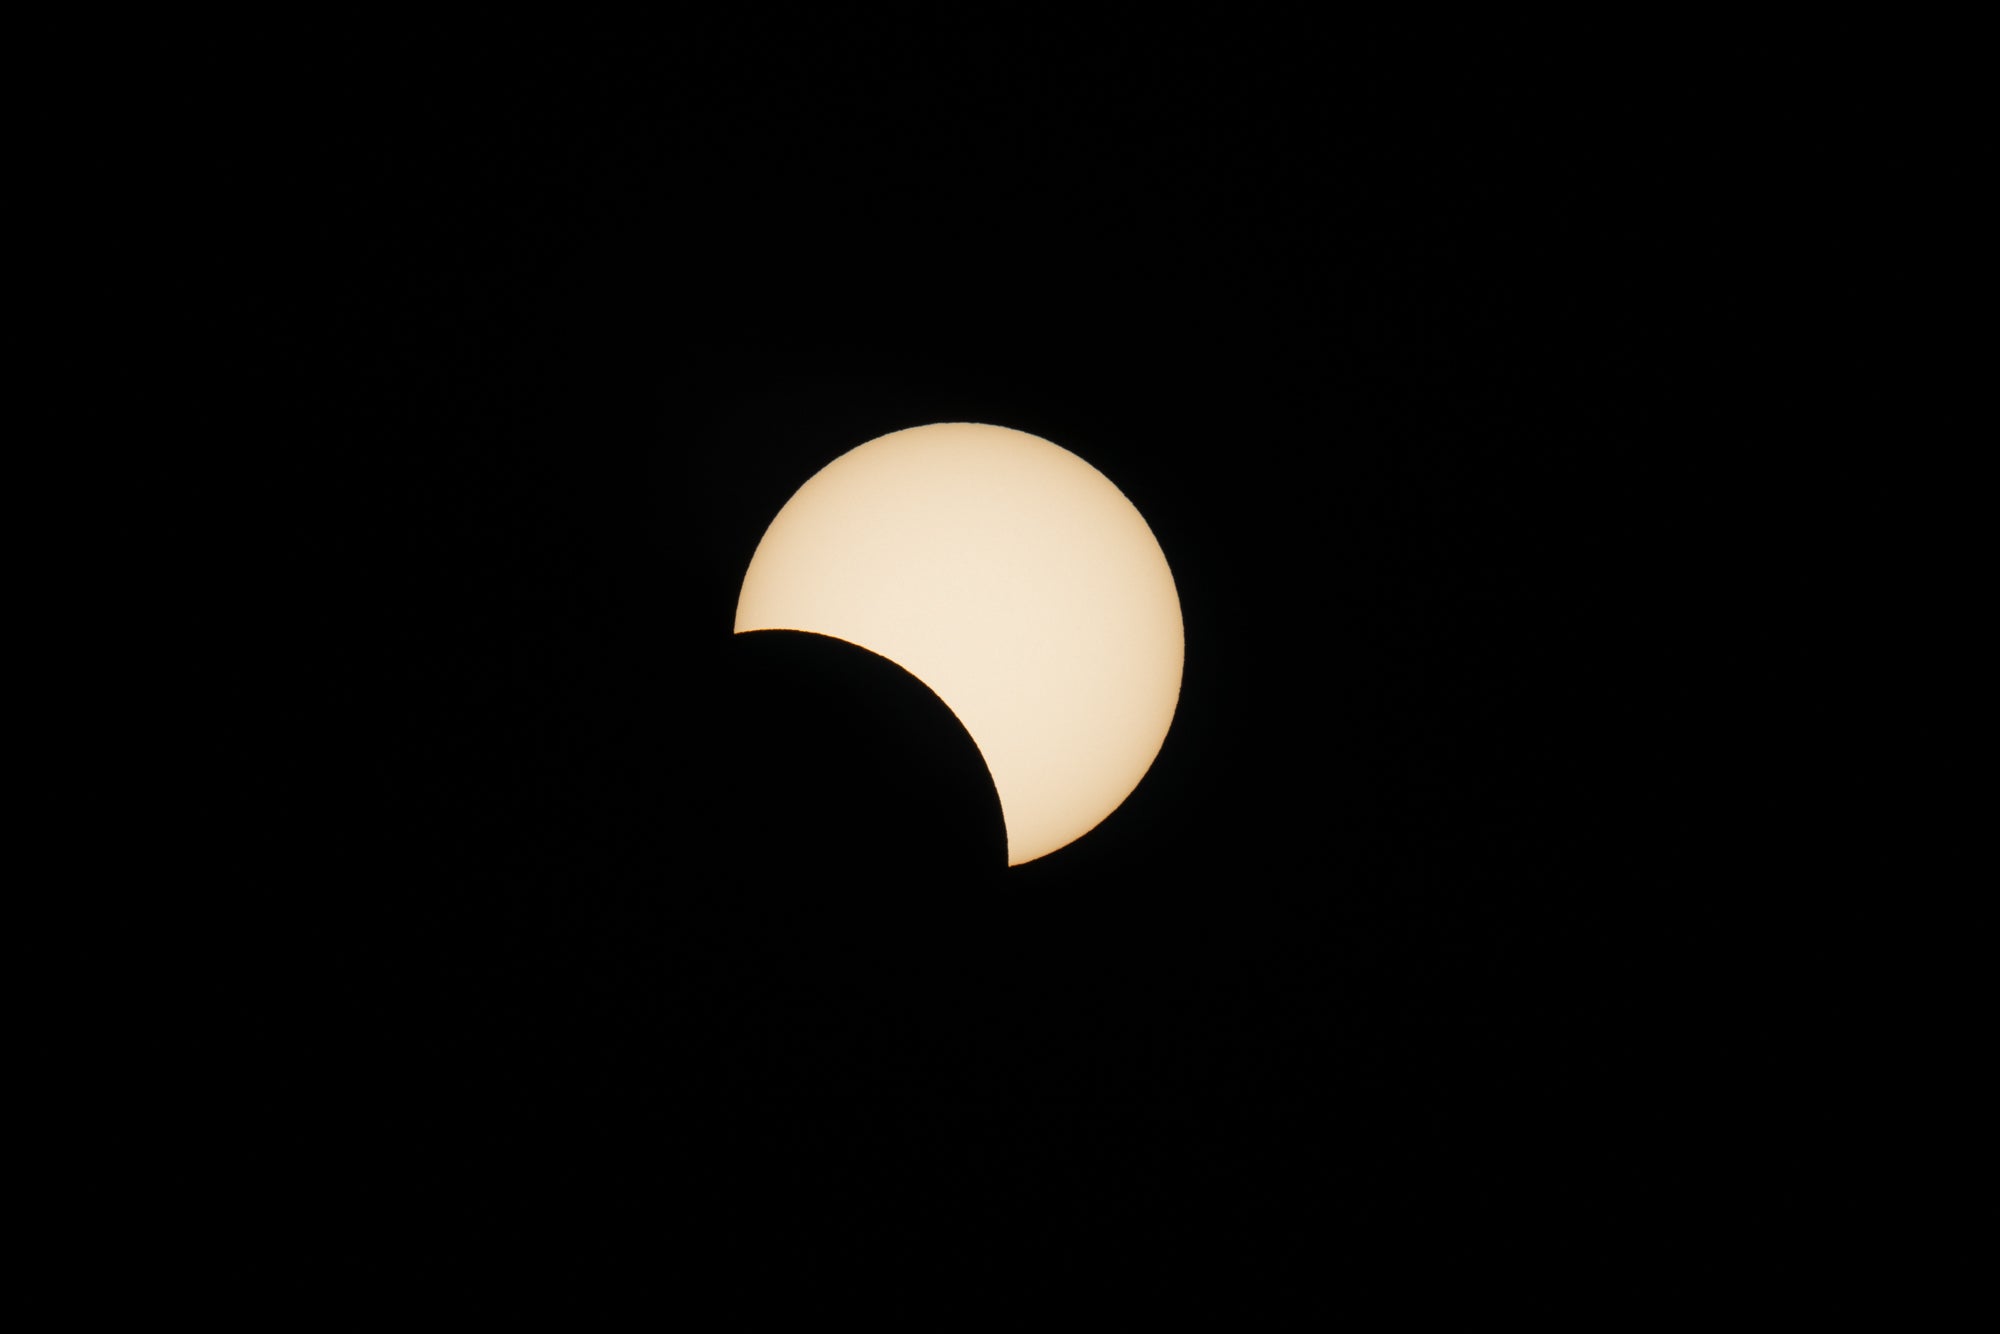 Moon moving in front of the Sun, taken with a solar filter. Photo by: 'Albert Dros'.
Also, shooting the Sun before the eclipse requires completely different settings than during the eclipse itself. During the total eclipse, it will be dark and the Moon covers the Sun completely, meaning you can actually remove your eclipse glasses and solar filter. This is the only time when you can look straight into the Sun without damaging your eyes. This is what we call the moment of ‘magic’.
As you remove your solar filter, you’ll need to readjust the exposure by reducing your shutter speed a lot until the scene is properly exposed. You may even use Aperture Priority for this. I would recommend an aperture of around f/8. Use a slightly higher ISO during the full eclipse, as the scene will be dark. ISO 200-400 will do fine. You need a relatively fast shutter speed to capture the eclipse, as the Sun and Moon will move slowly. A shutter speed of 1/50s or faster will work.
Of course, these settings are aimed at using a longer lens. If you want to photograph the eclipse relatively big in your frame, a lens of at least 600mm (full frame equivalent) is recommended. Playing it safe by just shooting the multiple phases of the eclipse is one thing to do but trying something creative, as earlier discussed in this article, is another.
You may also want to photograph the eclipse with a wide angle lens and have an interesting foreground element. As things turn dark during an eclipse, the landscape looks very surreal. There are plenty of options.
 Wide angle image of people photographing the eclipse. Even with the wide angle, the eclipse looks really cool! Photo by: 'Albert Dros'.
Bracketing
As mentioned above, you’ll familiarise yourself with your settings during the phases leading up to the total eclipse. Just before and after, or even during totality, you can also try bracketing a few shots.
By using bracketing on your camera, you’ll make sure to capture the full contrast of the whole scene. As the contrast of the scene is extremely big just before and after totality, it’s not that easy to nail the exposure exactly. Bracketing can help in this case. Simply use a lot of brackets (5 or 7) with one stop in between and shoot away. You’ll later pick the best exposure to use for your final image.
Even during totality, you can shoot a bracket. You can even shoot a high dynamic range image of the whole eclipse, where you can see detail in the Moon in a very bright exposure, and see all the rest during a very dark exposure. By merging them, you will be able to create a surreal image.
- See also: Ultimate Guide to HDR Photography
Crucial Moments to Shoot
The trick is to start shooting nonstop the moment you remove the solar filter and glasses. This is the moment when the eclipse is close to full. In PhotoPills, this is the phase before totality and the phase just after, so it basically refers to the 3 middle phases. They only last about 2 minutes in total. Just spam your shots to make sure you capture every moment of the eclipse, because all of the phases can look really cool on their own.
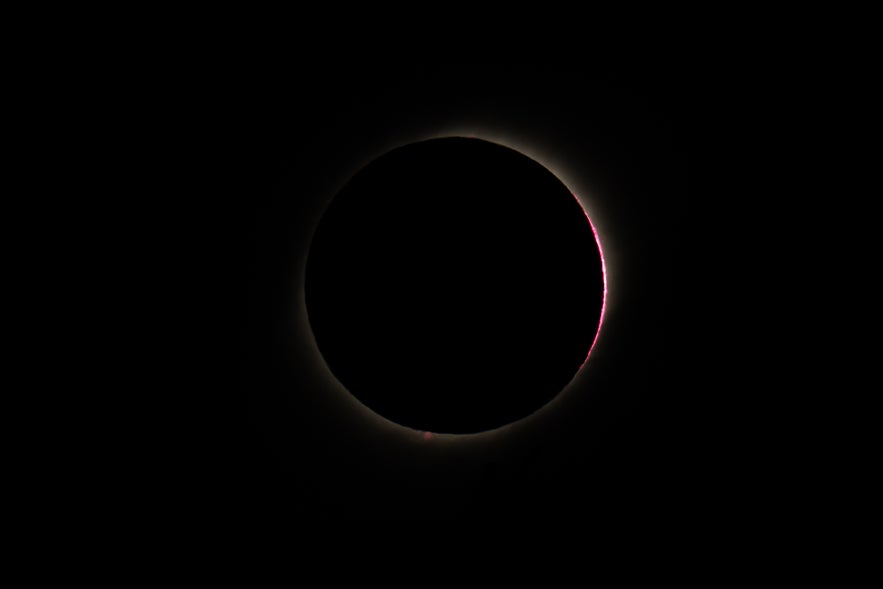 Seconds before the full eclipse you can see the ‘flames’ from the Sun. You only have about 1-2 seconds to capture this frame. Photo by: 'Albert Dros'.
Tripod Head
When you’re photographing the eclipse with a long lens, you’ll need to readjust your framing every time you take a shot, as everything in the scene will move quite quickly. For this, you may want to use a geared tripod head.
A geared head allows you to make precise adjustments to your framing with separate knobs for tilting and panning your tripod head. This is very convenient when photographing with long lenses in general. Recommended geared heads are Sunwayfoto and Benro, the latter of which is relatively light and can’t handle super heavy long lenses.
Compositions
As already mentioned earlier in the article, there are lots of possibilities to capture an eclipse. The easiest (and safest) way is to just use a long lens to capture the eclipse by itself.
To experience and capture the eclipse without the stress of having to try to line things up with a subject is nice, as the whole eclipse experience is really something special. The photos you get from ‘just’ shooting the eclipse by itself are already amazing.
Telephoto
 Different phases of the eclipse. Photo by: 'PhotoPills'.
- See also: How to Get Creative with a Fisheye Lens
Telephoto with an Object
Lining the eclipse up with an object is challenging but super rewarding. As seen earlier in this article, the result you’ll get can be absolutely stunning. Here is some inspiration:
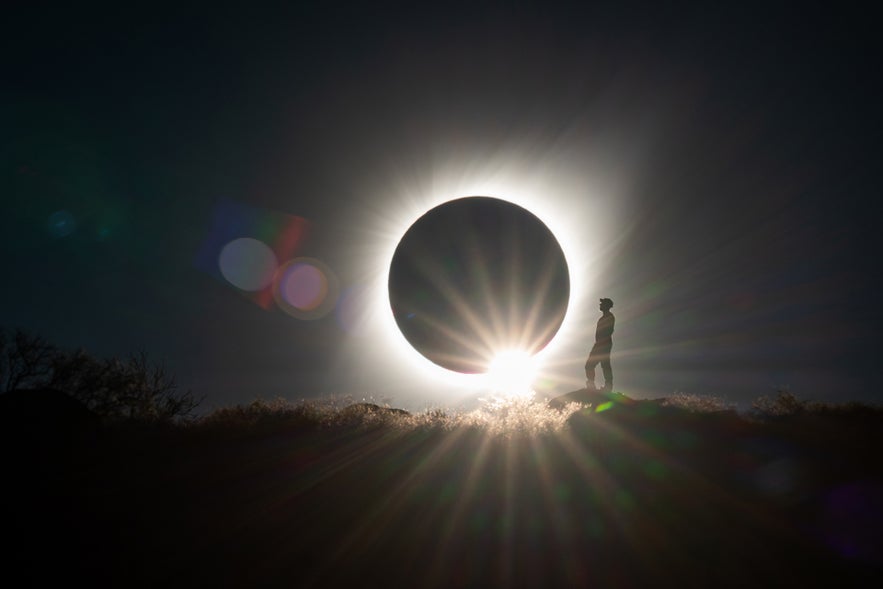 July 2019 Solar eclipse in Chile, model is Bart Lablans. Photo by: 'Albert Dros'.
View this post on Instagram A post shared by Andrew Studer (@andrew.studer) on Jul 6, 2019 at 9:38am PDT
View this post on Instagram A post shared by Josh Cripps (@joshuacrippsphotography) on Dec 26, 2019 at 2:59am PST
- See also: Best Lenses for Night Photography
Wide Angle
It can also be interesting to frame a cool foreground object with the eclipse with a wide angle lens. The eclipse will be very small in your frame but will still give a magical atmosphere to the whole image.
With this technique, you can also capture two great images at the same time if you have two camera bodies. Simply set up one body with a long lens for the close up shot, and one body with a wide angle for the wide shot.
 Wide angle shot of people shooting the eclipse. Photo by: 'Albert Dros'.
A nice technique is to composite all phases of the eclipse in the wide angle image. Simply make a timelapse and merge all the phases together in one frame later.
View this post on Instagram A post shared by Bart Lablans (@globart_photo) on Aug 26, 2019 at 6:49am PDT
In this image, my friend Bart set up his own camera to make a wide angle composite shot. At the same time, I captured him with the eclipse with the long lens.
- See also: Ultimate Guide to Time Lapse Photography
View this post on Instagram A post shared by Bart Lablans (@globart_photo) on Jul 4, 2019 at 7:36pm PDT
If you want do something really funny, you can even capture a solar eclipse with your drone! The image above was made by Bart using a DJI Mavic.
- See also: The Ultimate Guide to Drone Vacations
Extra Tips for Solar Eclipse Photography
-
Make sure your lens is super clean. Because you’re photographing into strong light, every little piece of dust will be seen on your image. Dust can also cause annoying flares. Be sure to clean your lenses properly.
-
Try to make use of lenses that have great flare resistance OR use flare to your advantage. In some of my above images, there is some very strong flare. I could’ve tried to use a lens that had more flare resistance but on the other hand, the flare looks quite interesting!
-
Practise with settings and using your solar filter a few hours (or even days) before your actual shoot.
-
Make sure to enjoy the moment even though you’re focused on getting the shot! This is a lifetime experience, so make sure to absorb it. Seeing and experiencing a full solar eclipse is really magical.
There are simply lots of compositions to be made. Get creative and show us your eclipse images next time this amazing event happens!
About the author: Albert Dros is a landscape photographer based in the Netherlands. You can find more of his work on his website or by following him on Facebook and Instagram.
Would you like to learn to photograph a real solar eclipse in-field? Join our expert photography guides on a Solar Eclipse Photography Workshop to Chile in 2020!


