Creating an epic photo of the landscape usually isn’t just a fluke. Some of the most amazing landscape photography in the world exists only because of meticulous planning.
- Check out these 25 Useful Tips to Quickly Improve Your Landscape Photography
- Discover this Ultimate Guide to Photographing the Moon
Spending the time to pre-visualise your images and plan out the details of your shoot can pay off immensely when you finally capture what you’ve had floating around in the back of your mind.
In order to maximise your chances of getting that incredible shot, here are 6 awesome tools that will help you to plan ahead for successful landscape photography.
- See also: Interview with Albert Dros
Research on Google
When you’re doing landscape photography, the first step to creating a spectacular image is to do some research. The Google search engine is one of the most valuable tools that you can have in your photography planning kit.
Google can help you to do a lot of planning without even needing to leave your house. No matter where you are, you can use it as long as you have a smartphone or a computer with Internet access. It’s a great way to scout for photography locations all over the world.
Starting with Google Maps, you can zoom in on a region that you might want to travel to for photography. For example, if you have an idea of a country or even a particular location in mind already, then you can open Google Maps and use its Satellite or Street View function to get a vague idea of what the area looks like.
Google Maps is also a great way to check how long it will take for you to get to the location, both by vehicle and foot. It will give you an estimated travel time, which you can adjust for other factors such as traffic and your own physical fitness. Taking all of these factors into account, you can work out when you need to leave so that you can aim to be at the location to shoot with enough time to spare for setting up your camera equipment and looking for a composition.
The next step in planning your image is to delve a bit further into the details of the location in order to pinpoint where would be a good place to shoot. You can do this by using the Google Earth browser plugin for a 3D representation of the area.
The best thing about Google Earth is that you can tilt the map to see what the topography is like and receive information about the elevation. The controls also allow you to adjust the view for a better understanding of the actual terrain, so that you can figure out whether it’s actually physically possible for you to get there.
Depending on where you are planning to shoot, you may need some extra information about accessibility and the like. There have been times when I’ve headed out to shoot a particular building, such as a castle or a cathedral, only to find that part of its facade is under construction. I’ve even headed out to nature reserves with the hopes of shooting the sunset without a clue that they would close the gates at 5pm!
Sometimes, it’s impossible to know this kind of information beforehand without thorough research. Google can also help you in this aspect. You can simply search for the information that you need and if it’s not online, then it doesn’t hurt to give the manager of the location a call. It’s better to know what’s going on beforehand than to invest your energy in getting to the location, only to be disappointed when you arrive.
Once you have done some initial research about the location, you can scout on foot by making a visit and having a look around for possible compositions or vantage points. This will give you a better idea of what the place actually looks like and confirm the information that you’ve gleaned from your online investigations.
Sun and Moon Calculators
 Pre-visualise what you want to shoot before you head out. Photo by: 'Albert Dros'.
Now that you know the area in which you want to shoot, the next step is to begin pre-visualising the image. Think about where the light may fall in the landscape and how you want your final shot to look. For example, you may want side-lighting during the Golden Hour, a blazing sunset that results in a sunburst, or to shoot the stars and the Northern Lights on a night when there is no moon.
Pre-visualising the image will help you to pick the right day and time of year during which you should head out to take the shot.
Keep in mind also that not all locations will work for every kind of lighting. Some places are best for shooting sunrise, while others will work solely for the sunset. On the other hand, you may want to shoot special occurrences like ‘Manhattanhenge’, when the sunset or sunrise is perfectly aligned with the grid of the streets in Manhattan, New York City.
To plan for the lighting in your shot, you can use suncalc.org and mooncalc.org to check the position of the sun or the moon on particular dates throughout the year. You can get quite precise with this, down to knowing exactly which minute of the hour that the particular lighting effect you are after is going to happen.
- See also: Ultimate Guide to Landscape Photography
PhotoPills
One of the best tools for landscape photography is the PhotoPills smartphone app. You can use it anywhere, even while you’re in-field, to help you to plan your shots. Not only that, but there are loads of articles and videos on the PhotoPills website about photography that will keep you inspired, particularly in relation to planning for incredible images.
 PhotoPills can come in handy for lots of applications. Photo by: 'Albert Dros'.
The PhotoPills app is an all-in-one package that allows you to calculate the position of the sun and the moon, including the moon phase, when the sun will rise, sunset times, moonset times and more. You can even use it to make calculations for star trail photography and astrophotography, like when you want to photograph the Milky Way.
What I love most about it is the augmented reality (AR) function, which allows you to see all kinds of information in real-time. You can use it when you’re in the location where you want to shoot in order to understand the angle of the light. All you have to do is to switch on the AR function, hold your phone in front of you and voila! You can check the scene to see where the sun or moon will be in relation to where you’re standing or the subject that you want to shoot, be it a mountain, a building or some other object.
While the PhotoPills app isn’t advanced enough yet to predict the Northern Lights, what it does do is help in planning for Milky Way photography. You can visit a particular location during the day and still use the AR function to see how the stars will be aligned with your subject later in the night, simply by changing the date and time in the app. This is a useful trick to help you plan for carefully aligned images of the sun, moon or Milky Way.
All in all, PhotoPills is a great little app that has some amazing functions. A few of the ones that stand out include:
-
Being able to see the exact times of sunset, sunrise, blue hour, golden hour and twilight on any given day.
-
Information on the exact locations and elevations of the sun, moon and Milky Way on any given day.
-
Moon calendar for figuring out when specific moon phases will occur, including the Supermoon and other special dates.
-
Augmented reality function which allows you to visualise the position and path of the sun, moon and Milky Way.
-
Exposure calculator for use with filters, in low light and at night.
-
Time-lapse function to help you collect sequences of images for creating time-lapse videos.
-
Star trails simulator for previewing how the stars will rotate throughout the night and the angle during a given exposure time.
-
Over 10,500 points of interest throughout the world, such as waterfalls, castles and monuments that you might want to plan to shoot someday.
There is so much more aside from these functions that I’ve mentioned, so it’s worthwhile downloading the app and having a look for yourself.
WeatherPro Smartphone App
The day before you head out to shoot, it’s important to check the weather. Planning to capture an epic photo involves knowing what the conditions are going to be like and being able to work accordingly.
 WeatherPro is a great way of forecasting the conditions! Photo by: 'Albert Dros'.
First of all, you’ll need to know what the temperature is going to be and how it will change throughout your timeframe for shooting so that you can dress appropriately. There’s nothing worse than freezing to death when you’re trying to photograph the Milky Way overnight!
Another reason for checking the weather is that you might have your heart set on taking a sunrise shot but on the morning of your shoot, it turns out to be cloudy or raining. If the weather has changed significantly, then you may need to prepare to take a different kind of shot or postpone the shoot for another day and time.
To get an accurate prediction of what the weather is going to be like, try using an app like WeatherPro for smartphones. This way, you can monitor the conditions well ahead of time, so that you can decide whether it’s worthwhile to go out.
The WeatherPro app comes in two forms – basic and pro. The basic version is free and will provide you with updated weather information every 3 hours. If you want hourly updates, then it’s better to download the pro version, which will set you back $9 for a yearly subscription.
If you’re serious about planning your shot, then it pays to have the pro version, as you’ll be able to get a more accurate reading of the weather. It features seven day forecasts for over two million locations worldwide and is run by Europe’s largest independent weather company.
Some of the standout features from this app include:
Cloud Cover
This is great for seeing what the cloud cover situation will be like on the day that you plan to shoot. While complete cloud cover isn’t great for photography, a layer of clouds is great for catching the blazing light during sunrise and sunset. WeatherPro gives a pretty accurate forecast of the cloud cover, which is great for deciding on when you’ll head out.
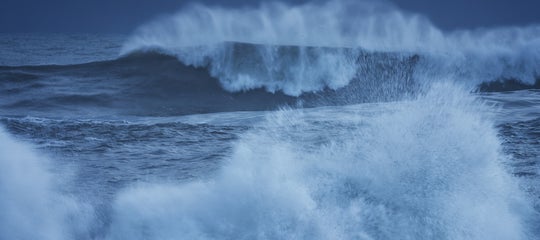
 You need to check the clouds to aim for photos like this. Photo by: 'Albert Dros'.
Fog and Mist
One of the most exciting features of WeatherPro is its ability to provide a reading for air pressure and relative humidity. High humidity overnight is a good sign for foggy or misty conditions in the morning.
Fog and mist can add an enchanting or haunting element to your shots, changing the atmosphere of a scene completely. If this is your aim for your photos, then using WeatherPro is a great way of planning ahead for these kinds of conditions.
Wind Direction & Wind Speed
Wind plays a major role in planning for an epic shot. If it’s too windy and your goal is to take a photo of a reflection in water, then you may not want to go out. On the other hand, you may check the wind speed and find that it’s lower than 20km/h (~12.5mph), which means that you’ll be able to capture some decent reflections with a longer exposure.
Before I head out, I always check the wind direction, as it will influence the direction of the clouds. You can use clouds to convey a sense of motion in your images, making for a much more dynamic composition. If the wind is coming towards you or from behind, then there will be a vortex-like effect that can draw the viewer’s eye into and around the frame. Side wind can lead to the clouds being streaked horizontally which can either be a good thing for your composition or a bad thing if it happens to lead the viewer’s eye out of the frame.
 The vortex effect. Photo by: 'Albert Dros'.
Thankfully, the WeatherPro app displays wind speed and wind direction information, which is useful for planning your shots.
- See also: How to Take Great Photos in Bad Weather
Cloud, Rain and Fog Radars
As the weather can have a significant impact upon the success of your shot, it’s important not just to rely on the weather forecast but also to look at detailed radars.
Your ability to access cloud, rain and fog radars will depend largely upon where you plan to shoot. Some locations provide real-time radars, while others will have only limited information updated every few hours or so, or no information available at all. Fog and visibility radars are great for planning ahead in your landscape photography. They can mean the difference between wasting your time and making the most of your shoot.
If you have checked the weather forecast the day before you plan to head out, then it pays to check a real-time radar in the morning so you can be aware of the current conditions. For example, if fog has been predicted for the morning and your aim is to shoot it during sunrise, then you’ll want to be certain that it’s actually there before you leave the house at 4am to make your way to the location. So check the fog radar – if visibility is lower than 3km, then you’ll definitely know that there is fog out there; it’s time to get out of bed and click into action!
 Clouds can make for interesting images. Photo by: 'Albert Dros'.
- See also: Ultimate Guide to Forest Photography
Webcams
Last but not least, one of the most helpful tools for planning your landscape photography is webcams. A lot of locations in the world have webcams that stream visuals in real-time or which provide updated images on a set schedule. Some examples are in the Dolomites and even Arctic locations, such as the Lofoten Islands.
By viewing webcams in the place that you want to shoot, you can see exactly what the weather is like, whether there’s a snowstorm, sunshine or the Northern Lights.
If you can’t find any webcams in the area, then try looking up traffic cameras instead. The number of webcams that are available online are astounding and they are a very valuable resource when planning for landscape photography!
About the author: Albert Dros is a landscape photographer based in the Netherlands. You can find more of his work on his website or by following him on Facebook and Instagram.
Have you got any other tips for planning a successful landscape photography shoot? What have you tried that works and what doesn't work? Leave a comment below!

Albert is a Dutch photographer with an extreme passion for landscape photography. He aims to capture places and certain moments in the best way possible by using his own vision and unique style. His style consists of strong vibrant, sometimes fairytale like images in which he expresses himself. Albert has a background in Design, Video and Animation. He has worked for himself his whole life and has as a Master Degree in Multimedia & Entertainment Technology.
Albert loves to travel. Next to photo tours and workshops he likes to explore the world on his own or with friends. He has a passion for visiting the most beautiful spots in the world, whether known or unknown. Challenging himself is what keeps him motivated. Albert loves planning his shots carefully.
He does this with great detail to make sure his efforts have the highest chances of success. He sometimes plans days, weeks, months or even years to get that particular shot he wants. Challenging himself combined with planning and writing a story of the whole process is Albert’s specialty. He is always looking for new challenges and adventures. He is able to find beauty anywhere in the world: from misty mornings in the forests minutes away from his home to rooftops of the highest buildings in Dubai to remote locations in Iceland or the US. Next to taking photos, Albert also likes to teach and write about photography.
He occasionally writes for the most well known Photography magazines both on - and offline. Along that he has worked with many brands in the photography industry and is an official Sony Ambassador of Imaging.
His work has been featured in some of the biggest news outlets & magazines worldwide, like TIME, National Geographic and Adobe.