If you have ever tried to shoot in the direction of the sun or some other strong light source, then you have probably already noticed a weird effect occurring in some of your shots.
I'm talking about those colourful circles or rings that may appear all over your picture, giving a sort of soft colour cast all over the frame. This effect is called “lens flare” and it can either make or break your shots.
In this article, we'll explore what lens flare actually is and why it appears, how to deal with it as well as how to use it to your advantage in landscape photography.
What is Lens Flare in Photography?
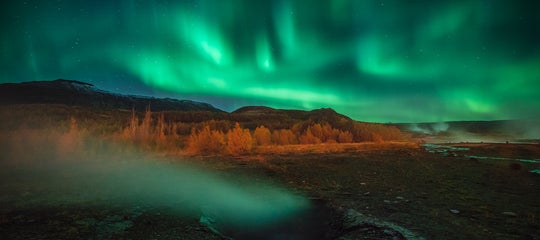
 lens flare can occur during the day or night. Photo by: 'Leonardo Papèra'.
Lens flare is an effect that occurs when a strong source of light (generally the sun in landscape photography) hits the lens. This light is then scattered across the glass, creating some unpleasant artefacts to appear across your images.
Generally, lens flare is due to unwanted reflections between the layers of glass within your lens. That's why lenses with more elements tend to be more likely to cause flare.
This type of flare can also occur with imperfections within the lens. While it is usually an annoying effect that photographers try to avoid at all costs so as not to ruin their shots, other times, it can be a very pleasant effect that gives a nice, soft colour cast to the whole scene, adding atmosphere and drama to your images.
Lens flare can present in two ways in your pictures: either as small circles and rings all across the frame, or as a spread-out “hazy” effect that will give a washed-out look to the whole image.
When Can Lens Flare Occur?
 Lens flare most often occurs when you shoot directly into a light source. Photo by: 'Leonardo Papèra'.
Lens flare often occurs when you shoot directly into the sun. In the photo above, you can see the "washed out" effect that I mentioned earlier on. In this case, I was shooting in the lavender fields of Provence. Lavender fields are normally blue or magenta in colour and definitely not red or orange.
This sort of warm cast all over the shot came about because I was shooting in the direction of the sun when the sun was low on the horizon.
If you are hoping to achieve a warm and soft atmosphere, then this is the type of lens flare for you. However, if you are looking for sharp, detailed images, then you'd better try to avoid this type of lens flare at all costs!
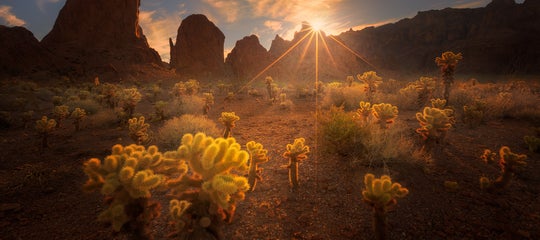
Starbursts and Sun Stars
 Star bursts are an interesting way of harnessing lens flares. Photo by: 'Leonardo Papèra'.
One of the most common ways that a lens flare occurs is as a “starburst” or “sun star”. These happen when you close down the aperture to the minimum (generally f/22 on a wide angle lens), making the flares appear as rays of light around the sun. An example of a sun star may be seen in the picture above.
The more that you close down your aperture, the more that these rays will become visible in your images when shooting directly into the sun.
This is one of those cases where having a sun flare may not be all that annoying, as it can add a lot of interest to your shot. However, sun stars aren't for everyone and there are quite a lot of people out there who don't like this effect.
Luckily, there are a few techniques that we can use to avoid or enhance lens flares, which we'll explore below.
How do You Prevent Lens Flare?
 Sometimes, you really need to prevent lens flares from occurring. Photo by: 'Leonardo Papèra'.
While sun stars can be interesting, lens flares in the form of circles and rings that spread over your frame are not. Sometimes, they may be easy to clone out, whereas other times you may find yourself spending hours trying to get rid of them in post-processing.
In the image above, you can see a few of these lens flare circles in the area close to the sun, especially on the mountain. While they may not be noticeable at first, beauty is in the eye of the beholder and once you see them, it can be difficult to un-see them. So here are a few techniques and tips with which you can avoid – or at least control – the lens flare.
Bracketing
Lens flare is easy to deal with by taking a bracket of different exposures when you are shooting with a strong source of light in your frame.
Whenever you shoot into the sun, you are exposing for the light source, which means that you'll end up with a really dark image. There will often be close to no details in the rest of the landscape (or at least in the shadowy parts of the frame). Meanwhile, if you expose for the landscape and the shadows, you'll probably end up with a very bright shot and clipped out highlights, especially near the sun.
By bracketing, you'll be able to get around this by capturing the entire dynamic range of the scene.
The procedure to make a multiple exposure (or exposure bracketing) when shooting with the sun in your frame is to:
-
Take a shot exposing for the highlights at f/22, so that the light rays become very visible;
-
Then change the aperture to a wider setting, in the f/9-f/13 range, and take as many shots as you need to get the whole dynamic range of the shot. Sometimes, you'll just need two shots, whereas other times, you might need five or six!
The Hand or Finger Method
 There's a finger in my shot! Photo by: 'Leonardo Papèra'.
Now that you know how to properly bracket, let’s talk about a commonly-used technique amongst landscape photographers for avoiding lens flare, which is called the "hand" or "finger method". Basically, it involves taking a shot with a finger or your hand (depending on the size of the flare) over the sun. By covering the light source, the lens won't be affect by flares and you won't get any circles or colour casts in your image.
You are probably thinking, “okay, you are right, now I don’t have any flares anymore in my shot.. but I have a finger in it! What can I do with a photo of a finger?” We'll talk about the process to merge these photos together a bit later on.
Use Live View and a Tripod
This is a very simple tip. With the Live View mode turned on, you'll be able to better see all of the artefacts created by the lens flare. With the tripod, you'll be able to bracket multiple shots without moving your camera and subsequently, the composition.
Shooting hand-held in the direction of the sun is really difficult, as you won't be able to see the artefacts in the viewfinder (unless they are really big) and you also won't be able to bracket or use the finger technique.
- See also: Bright Ideas for Shooting in Daylight
Clean the Lens
Another quick tip on how to avoid lens flare is to keep your lens as clean as possible when shooting in the direction of the sun.
Don’t get me wrong, there isn't a situation where you shouldn’t have your lens clean, but here it’s really important because every imperfection and every bit of dust will be enhanced by the light hitting the lens. So make sure to have a cloth with you and clean the front of the lens before you start taking any photos!
Aperture and Exposure
If you are trying to achieve a sun star, then the best way is to close down your aperture to the range of f/16 to f/22. I normally tend to underexpose a lot in order to retain the details in the highlights, so play around with the exposure times. To capture the rest of the scene, you can then open up the aperture to around f/10 and slow down the shutter speed, taking as many images as you need to record the full dynamic range.
Making Use of Lens Flare to Enhance a Photo
 Lens flares can be used to enhance your images. Photo by: 'Leonardo Papèra'.
In the image above, you can see that this is one of those cases where having the sun flare isn’t annoying, since it can add a lot of interest and atmosphere to an otherwise dull shot. Generally, having such a strong light source in your background creates a sort of visual path between your foreground subject and the light source. The observer will be projected much more into your photos if you play nicely with your foregrounds and the sun!
Here, I experimented with the sunlight during a very cold sunrise in Lapland to get that warm glow in the higher part of the frame; that glow is “natural” and was not added in post-production. This is what happens when you are able to control the lens flare.
- See also: Ultimate Guide to Sunrise Photography
Basically, this technique consists of closing down the aperture to around f/16 or f/22. The more you close down your aperture, the more these rays will become visible in your photo. You also need to position the sun right at the edge of your photo, so that the glow will appear in your shot. You don’t need a specific aperture or shutter speed in this case; the only thing you'll need to control is the position of the sun in your frame.
The “beauty” (sharpness, length, etc) of the rays generally depends upon the lens that you use and the elements that are inside it. Some lenses will produce an incredibly sharp sun star, while other lenses may produce a sun star that is not that nice with rays that are not well defined.
 Lens flares can create interesting atmospheres. Photo by: 'Leonardo Papèra'.
How to Get Rid of Lens Flare in Landscape Photography?
Removing lens flares from your shots isn't all that difficult. It can be done quite quickly during post-processing, especially if you used the finger method which I talked about earlier on in this article. I’ll try to help you by showing a few Photoshop screenshots of the process, so that you can visually see what I’m doing.
Let's examine these two unedited pictures below.
As you can see in the shot with the finger (well, the hand in this case), there isn’t a single flare visible. Meanwhile in the other shot, the whole landscape is compromised. You can't expect to clone out all of these circles!
Step 1. Select Your Images
Select the shots that you want to work with. In this case, I’ll work with two files – one exposed for the sun star at f/22 with the flares and one exposed for the landscape with no flares and the hand over the sun.

Step 2. Align the Images
Duplicate one of the two shots as a layer over the other.
Select the auto-align option from the top bar (“edit” button) and apply a white mask over the top layer. In this case, I selected the sun star shot to be on top.

Step 3. Masking
Then, with a black brush that you can find in the left tool bar, you have to paint on the areas affected by the lens flare.
You won’t be able to take out all the flares with this technique, but you’ll take out a good part of them. You’ll then have to deal with the remaining flares by using the clone stamp tool or the spot healing brush tool.
As you can see in the screenshot below, a part of the mask is painted in black. That's the part that I took from the “finger shot”.

It’s not that hard, is it? This is a 5-minute technique that will help you save a lot of shots where you have the sun in the frame and lots of artefacts from lens flare.
 Lens flares can make or break your shots. Photo by: 'Leonardo Papèra'.
Hopefully, you'll now have a better understanding of lens flares and how they can impact upon your photography, as well as how they can be used to your advantage and how to avoid them. Sometimes, they can create a beautiful atmosphere, while other times, they can break your shots. By understanding when to include some flare in your frame or to exclude it at all costs, you'll be on your way to better landscape photography in no time.
About the author: Leonardo Papèra is a landscape photographer based in Italy. You can find more of his work on his website or by following him on Instagram.
Have you tried any of the tips listed above? What are your tricks for reducing lens flare or using it to your advantage? Leave a comment below!