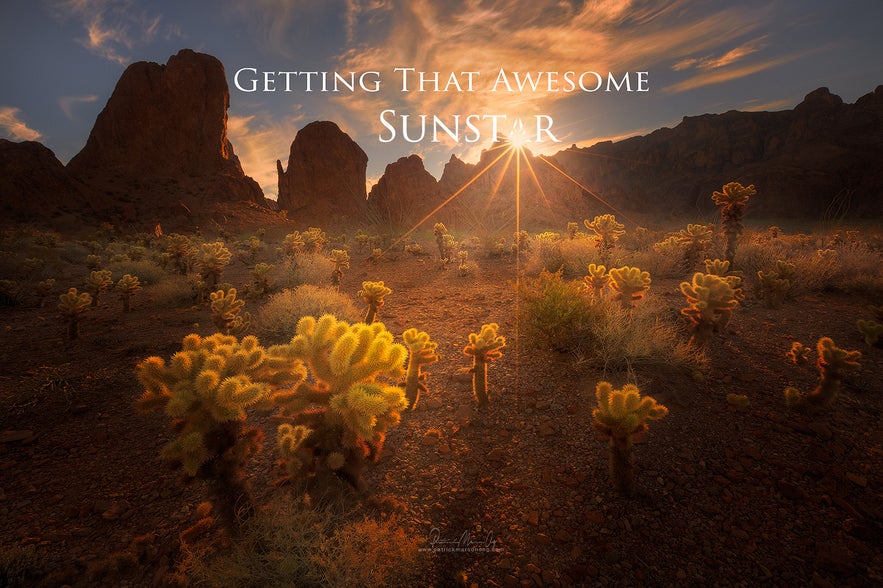
Would you like to know the secrets of photographing sunbursts? Any keen photographer will know this magical effect as the sun peers around an object in the foreground, illuminating everything in its wake. It’s also known as a sunstar, though whatever you like to call it, there’s no doubt that it’s one of the elusive pleasures of every landscape photographer.
- Discover The Best Landscape Photography Lenses for Sony E-Mount Cameras
- Here are 5 Key Reasons to Use a Wide Angle Lens in Iceland
- Learn all about What is Aperture? An Introduction to Aperture in Photography
If you enjoy shooting sunstars, then you’re in luck. Here’s our guide to capturing a sunburst effect in your landscape photography perfectly... so well in fact, that you might even want to try this photography technique when you visit Iceland!
What's So Great About Sunstars in Photography?
Sunstars are great for bringing an extra layer of light and vibrancy to any landscape photo. They add a touch of magic, and are certainly worth the wait for patient photographers. There’s something really rewarding about waiting for the sun to peak around an edge or corner, and the end result is always spectacular.
The photo below is a great example, taken at Rialto Beach, Washington. At exactly the right moment, the sun hit the rocks to produce a glorious sunstar effect. Without it, the image would seem somewhat flat, devoid of that certain magic that the sunstar brings to the overall scene.
 Photographing into the sun can be difficult. Photo by: 'Patrick Marson Ong'.
Steps for Capturing a Sunstar
Do you want to capture a sunburst like this? Although it may seem difficult at first, particularly if you've already tried it in-field, there's a simple technique that you can learn to master the perfect sunstar photograph. To begin with, you just have to follow these easy steps below:
-
Get rid of those filters and make sure that the front lens is free from dust! Tiny dust and scratches are the main cause of those hard to remove flares! So make sure that you have a lens cloth or some trusty lens wipes at your disposal when the sun is about to set.
-
Set your camera to Manual mode. You'll want to have full control of your settings to be able to capture the perfect sunstar. There's no use shooting in Auto here.
-
For a sharper and more distinct hands of the sunstar, shift your aperture to f20 – f22.
-
Make sure to hide part of the sun on any edge within the landscape, then opt for 1-2 secs shutter exposure. This will ensure that you get a big, sharp burst.
-
Compensate on your ISO to achieve a balanced exposure. You want as a little noise as possible, so try to keep your ISO low.
So that’s the secret of capturing the perfect sunstar. It sounds pretty easy, doesn’t it? But, assuming that you’ve followed those steps, your image will probably look a little lacklustre like this:
 Starburst photography isn't easy! Photo by: 'Patrick Marson Ong'.
So maybe photographing a sunstar is not so easy after all. There’s one major challenge that often comes with shooting directly at the sun: our cameras simply can’t handle the scene’s dynamic range in light.
This means that ultimately, we'll be left with a picture of extremes, without the subtleties of light present in reality.
There are two ways this can go. Either you get a properly exposed foreground with an over exposed sun, or a properly exposed sun with an overly-underexposed foreground. The balance just isn’t quite right. How can you even begin to fix an image like this?
You’ll probably try to bring back details from the clipped highlights, which is impossible, or open up the dark and shadowy areas, which will in turn sacrifice the image’s quality.
So What's the Solution to the Sunburst Problem?
 Take multiple exposures. Photo by: 'Patrick Marson Ong'.
While some people like to argue that they want to take the entire image "in camera", the fact of the matter is that most landscape photographers shoot in RAW. Anytime that you shoot in the RAW format, you'll need to do some post processing to bring your image back to how you saw it at the moment that you captured it.
Post processing will also allow you to put your own creative twist on things, so it's not all bad. In addition, it will allow you to capture the perfect sunstar.
The trick is in exposing multiple shots and then combining them later on. I’ve found that this is the best way to achieve a clean, crisp, detailed and properly exposed image, complete with a perfect sunstar. So here are the steps I take to catch those brilliant sunstars in the act. As ever, timing is the key.
I start with something that might seem fairly difficult, but with practice, should be a piece of cake. I’m talking about anticipating where the sun will be as it rises or falls, depending on the time of day.
With this in mind, you also have to predict which corner it will peak from; that is – where the sunstar will form. Once in position, you just have to wait for the right moment. When that perfect sunstar creeps around the corner, begin taking multiple exposures from brightest to darkest, until you’ve captured the whole dynamic range of the sky, like in the example below.
Next up comes the real magic, but it’s a pretty simple idea. What you have to do is to refocus on the foreground, placing a single finger in front of the lens, in order to cover the sun and its direct impact on the exposure levels. This way, the foreground will be beautifully balanced and perfectly exposed.
 Place a single finger in front of the lens while focusing for the foreground. Photo by: 'Patrick Marson Ong'.
Of course, you'll then be able to process your images such that you won't have a pesky finger in any of your shots. All in all that’s six images, five for the sky and one for the foreground. The next step is to merge the best bits together in post-processing to create one awesome photograph.
To do this, I use a few different tools. The first bit of software I use is called ACR (Adobe Camera Raw). In it, I open up all six images at the same time, before making the standard white balance adjustments, chromatic aberration removals and lens corrections. For the perfect sunstar photo, this is the first stage, before I synchronise all of the adjustments made across all the images and open them up in PS (Photoshop).
In Photoshop, I stack all the sky images as layers. The next step is to apply the preferred masking techniques and actions, to develop a properly exposed image using the combined images.
I use the TKActions panels by Tony Kuyper Photography’s luminosity masking as a tool to easily combine all of the exposures together (TKActions Panel is available here). Once that’s done, don’t forget to flatten the image.
 Luminosity masking helps you to easily blend your images together. Photo by: 'Patrick Marson Ong'.
Next, you will have to blend the foreground with the sky. To do this, I copy my foreground image and paste it over the flattened sky image as a layer. I then use Photoshop’s Auto-Align layers feature.
This ensures that everything I have worked on so far is properly aligned before I proceed with my masking. This prevents any ghosting effects when the sky and foreground are eventually combined together. Here is an example of PS’s auto-align feature in action:
 Blend the foreground with the sky. Photo by: 'Patrick Marson Ong'.
Once both layers are accurately aligned, it’s relatively straightforward to combine the well lit foreground with the sky.
You can choose how much you would want to bring back from the foreground exposure. Personally, I like to use a low level opacity to keep everything looking natural, but this might vary from picture to picture or your personal preferences.
 Combine the well-lit foreground with the sky. Photo by: 'Patrick Marson Ong'.
The images are not all the same, so in the masking process you will have to work things out based on your taste, using the histogram as a guide. Just make sure that there is no clipping in the highlights or the darks, so that you'll have a perfectly exposed final image.
And here you go! The final, fully-processed image:
 The final sunburst image! Photo by: 'Patrick Marson Ong'.
Conclusion
That’s all folks! Hopefully you’ve learned something here that will help to improve your photography skills. Sunstars are worth the patience required to achieve and they'll really bring another dimension to your landscape photography.
So keep on shooting, practising this method and loving every second of it! And feel free to share this post with anyone photography friends who might be interested in photographing a sunburst!


