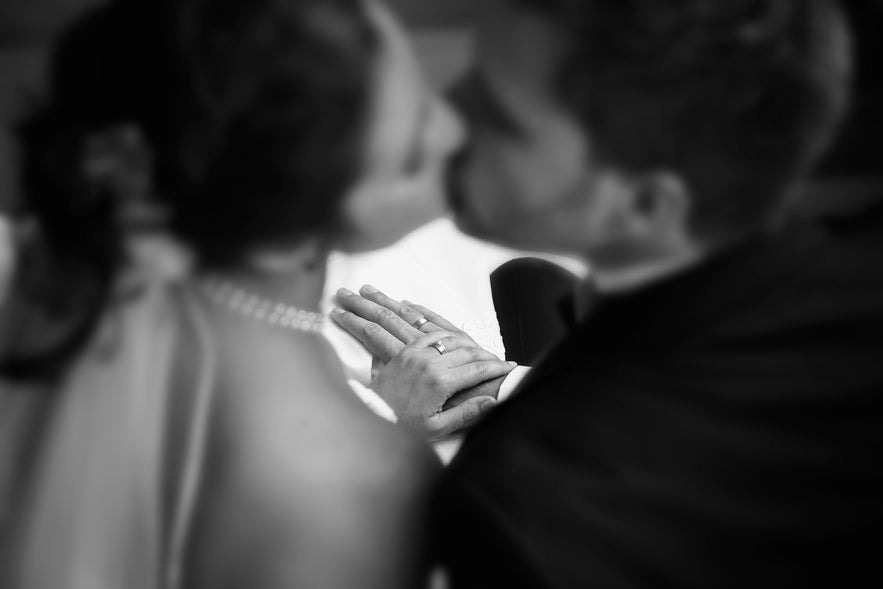
If you are interested in photography or even work in the photography business, then you have most probably stumbled across wedding photography already, since this genre is becoming more and more popular. I would say wedding photography is one of the most challenging fields in photography, because you literally have only one chance to get the shots that you want.
- Check out these 10 Tips for Stunning Portrait Photography
- Discover How to Create Portraits with a Black Background
- Learn these 15 Tips for Monochrome Photography
I have been photographing weddings for around 7 years now. Over the years, I have learned a lot – sometimes the hard way, through many mistakes. In this wedding photography tutorial, I'll share with you some of my experiences, important advice and wedding photography tips to ensure that you'll be well-prepared for the most important day in the life of the people you are going to photograph.
What is Wedding Photography?
So, let's have a closer look at what your actual task is, if you are booked as a wedding photographer. Of course it's about taking the best pictures possible of the whole day. This includes getting ready with the bride, the ceremony, a wedding shoot and the party.
While the wedding shoot is the only part of the wedding that you can actively control, the other parts are more like a reportage. Your job is to take pictures of what is happening in front of your lens, without interrupting anything. Nothing is worse than a photographer trying to get people to pose for the camera during a wedding. Always try to stay invisible and let people act naturally. Don't make them feel watched. That's how you'll usually arrive at the best shots.
But it is not only about the photographs. As a wedding photographer, you'll also find yourself on an intimate level, acting as an advisor for the bridal couple. This is because you are the one with the most experience in weddings, or at least you should be!
- See also: The Beginner's Guide to Videography
What Equipment do you Need to Photograph a Wedding?
There are no fixed rules for what camera gear you will need to bring to a wedding day but some parts of the equipment are obligatory, while others are more optional. First things first, let's have a look at the most important things in your camera bag.
Cameras
Of course, you will need a camera that is capable of high ISO speeds. Most churches are not very bright and have dim lights. Also, if it gets late at night, you will have to push your ISO high up in order to capture the scenes you want.
Sometimes it happens that I have to use ISO 6400 if I don't want to use a flashlight. So in terms of cameras, the ISO speed goes over resolution. High resolution cameras are also very shake-sensitive if you go for longer shutter-speeds, such as 1/30 sec for example. So cameras with 40+ megapixels are not the weapon of choice here. Your hard drive will also be very thankful by the way.
I usually work with a Canon EOS 5D Mark III and an EOS 5D Mark IV as a backup. Of course, Sony and Nikon have great solutions for wedding photographers a well. The mirrorless cameras are nice because they are more silent while shooting, which comes in handy if you are trying to be low-key during the ceremony.
For wedding photography, I recommend the Sony Alpha 7 MK III, Nikon Z6, Canon EOS 5D Mark III or IV or the Canon EOS R.
- See also: The Best Camera Bags for 2020
Lenses
When it comes to lenses, opinions tend to differ sharply. Usually you will hear only about prime lenses with wide apertures for wedding photography. Of course, this is right; prime lenses have a much better image performance in terms of sharpness and bokeh and they are much faster than zoom lenses. However, they are not as flexible.
Over the years, I have shot weddings with a lot of different lenses, including both zooms and primes. For me, a good mixture works best. While I am in a church, I will use a 24-70mm f/2.8 lens most of the time, for a simple reason: I don't have to move that much. It's particularly useful in moments when you have to be quick, for example – during the first kiss. It is much easier to have a zoom lens for obvious reasons. I also use other lenses for portraits, close ups and still life images.
Here is a list of the lenses that I usually take with me to a wedding. With this setup, I have a grand variety of focal lengths and lots of options for different compositions. Whether you will make use of all of them usually depends on the location.
-
The allrounder: Canon 24-70mm f2.8 L MKII.
-
For portraits and people shots: Canon 85mm f1.2 L MK II
-
For close ups and portraits: Canon 100mm f2.8 L, Canon 70-200mm f2.8
-
For group pictures and moods: Canon 16-35 f4 L
Lighting Equipment
To be honest, I am not a big fan of flashlights for wedding photography. Why? Because they kill the mood! Not only it is disturbing for the guests but it also kills all 'natural' light sources from chandeliers or disco balls, even if used indirectly and bounced against the ceiling or a wall.
Sometimes though, you'll simply have to use them. The first dance is one of these occasions. Usually, there will be a romantic light setting, lit up by lighters or candles. In order to not destroy this beautiful scenery, I try to work with two cordless flashlights that are gently used and only help me to get some details in the shadows. In general, you should always try to work with the available light and use the flash only as a support and never as your main light source.
Sometimes, a flashlight is very useful for the wedding shoot with the bridal couple, in order to set some accents to the eyes or to brighten up faces. I use two types of flashlights: two Canon Speedlights for the reportage with small bouncers attached and a big battery-powered studio flashlight with a softbox for the portraits.
In terms of lighting, a reflector can be very helpful for the wedding-shoot itself, especially if you have an assistant with you. It is a nice way to model the available light without using a flash.
Besides a camera bag, memory cards and batteries, that's it for the must haves. Things like reflectors or light-meters are optional, depending on what you are planning to do. A tripod can be useful if you want to take some night-shots or group pictures without changing the frame.
 Scenes like this are much easier to capture if you have a tripod with you. So carefully plan what you will need for the wedding location. Photo by: 'Felix Röser'.
What I do always have in my bag though are some blister-plasters for the bride, tissues, make-up powder and a candy bar. As I mentioned before, you are there for the bridal couple and also have to make sure that they feel comfortable and very well taken care off.
Working with Different Lighting Set-Ups
Working with a Reflector
As mentioned before I like to work with natural light more than with artificial light-sources. So a reflector or sunbounce can be a really nice tool to create nicely lit pictures without using a flash.
 Shooting with backlight situations creates depth and makes the picture look more interesting for the viewer. It can be tricky sometimes, but if you master your light setups your pictures will improve drastically. Photo by: 'Felix Röser'.
In the picture above, you can see that my main light source is the sun. It comes from behind the couple, so the light defines their outlines and makes them stand out against the background. Backlight usually creates depth as well, so your picture is more interesting for the viewer. I used a small sunbounce to lighten up the groom's dark jacket and get some details back. Without the sunbounce, his jacket would appear to be way darker.
In order to have the reflected light appear not too strong or harsh, you have to vary the distance between your motive and the reflector. So in this case, the reflector was placed around 5 metres away from the couple, so that there would be only a slight brightening. Keep in mind that if the reflected light is too strong, just move the sunbounce further away until you achieve the intensity you like.
Reflectors can also be used to make eyes look more vivid when you shoot close-ups. When you place the reflector under the chin of the person you photograph, you can create nice reflections in the lower part of the eyes. This gives a wonderful, vivid glow to the eyes and also brings out eye colour much better. This works best with diffused light on a slightly overcast day or in combination with a softbox and a flashlight.
Working with a Flash
You won't always be in the comfortable situation of having available light during a wedding photography shoot. If the available light is too weak due to an overcast day or if the sunlight is too strong, then the contrasts may be too hard and you'll have to compensate with a flash.
In the picture below, we were shooting nearby when the couple spontaneously wanted to sit down for a moment in front of this old hut. The sunlight was shining harshly through the crown of trees, creating a lot of contrast and light spots.
To get rid of the hard contrasts, I used a big flashlight with a 120x80cm softbox directly behind me to flatten out the light a bit. I really like the mixed light in this shot, as it has an almost surrealistic feel to it because of the light and the whole setting.
 The flash and the softbox are placed right behind me, so it points directly to the couple. In this case, the flash was really helpful to brighten up the shadows between the light spots. Photo by: 'Felix Röser'.
When it comes to lighting however, I think it is really important to be creative and to think outside the box. Before you go on your first wedding shoot, you should practice a lot in order to master the light and have all the knowledge about what your equipment does, as well as what you can achieve by using certain techniques. Watch tutorials on lighting on YouTube or read articles about it and try to build upon what you have seen or read. The information in this guide is only a fraction of what you'll need to know about lighting. Keep experimenting and playing around with different kinds of light-sources. It is fun and you will learn really quickly.
- See also: Bright Ideas for Shooting in Daylight
Changing Wedding Plans
Planning is always necessary for a wedding. You will have to meet at least once with the bridal couple before the wedding, in order to get to know each other and talk about expectations and wishes, including which of these expectations you can fulfil and which you cannot.
Always be honest in these meet-ups. If you feel that you can't keep up with some of their wishes, then let them know and try to find a compromise. Nothing is worse than high expectations that are unable to be fulfilled. In the end, everybody will be upset. So be honest with yourself and think about what you are willing to and able to do.
These meet-ups are important for you for another reason: You will get a schedule for the day and you'll have the opportunity to find out how the church looks, what the location will be and all of the important times during which important events will occur. This will help you immensely with your packing-list for the day. However, you should expect these schedules to be just a rough guide. Weddings demand a lot of flexibility!
I have literally never photographed a wedding that stuck exactly to the plan. There were several reasons for this. Most of the time, family and guests may have planned something as a surprise that the couple isn't aware of. Other times, it happens because the ceremony or wedding reception dinner may take longer than expected. However, this should not unsettle you. Always be prepared for the unexpected.
The Wedding Shoot
If you have the schedule for the day, then it is time to think about what you want to shoot with the couple. Here, it is also necessary to have a rough schedule for the wedding shoot itself. The schedule should depend on how much time you have with the couple for the shooting. In the best case scenario, I recommend that you have at least one hour between the ceremony and reception in the late afternoon. This way, the tension from the ceremony will be gone since the "official part" of the wedding is over and the couple can hopefully relax in front of your camera.
For this schedule, it is also really helpful to do some wedding photo location-scouting in advance. You can do this before the wedding day or even on the wedding day itself, that is if you know roughly what to expect. It is necessary for you to have a plan of what to do and which perspectives you'll want to shoot, to guarantee that you can use the time in the most effective way.
- See also: 15 Tips for Monochrome Photography
Wedding Photography Poses for Couples
Have you got everything carefully planned? Good! Let's talk about wedding photography poses.
When you search this topic online, you will find thousands of recommendations for poses. All of them are more or less the same. So instead of telling you the same stuff that you might find on Google anyway, I want to focus a bit more on natural wedding photo poses.
Instead of forcing the bridal couple into poses that they might never do in real life, let them be themselves. Let them talk, let them hug, let them kiss, let them dance... whatever you think fits the mood. This way, you will be able to take unique pictures that represent the people as they are and not what you have seen on Instagram a thousand times before, only with different faces.
That is the essence of people photography: showing someone as they really are. This also makes the couple feel understood by you and that you appreciate who they are. As you can see, photography is also a lot about psychology.
Of course, you should correct their positions from time to time, such as by instructing them to place an arm or a foot in a more aesthetically pleasing way. Overall though, just let them be and try to find poses that really suit them or which encourage them to be comfortable the way they are.
Besides that, you can try to find some cool perspectives and make use of the stuff around you like reflections, foregrounds or the bridal bouquet.
 Some posing and perspective ideas with different couples. Work with what you find on location and make the best out of it. Photo by: 'Felix Röser'.
- See also: Patagonia Photo Workshops
The Wedding Reportage
While the wedding shoot needs to be directed by you, the reportage is more about you being directed by the things that will happen around you. You have to be very attentive and spontaneous to capture the special moments that often happen when nobody is watching. It is about capturing the mood and showing all the happy faces of the day.
 Capturing real moments is not always easy and they often happen when nobody (except you) is watching. Like in this picture. The bridal couple is enjoying the moment after the ceremony while the guests are in the background and not noticing them. Photo by: 'Felix Röser'.
Taking pictures of little details is also important. However, to be able to see these things takes some practice and needs a bit of experience. For candid wedding photography, it helps to try to be invisible, so that the people do not feel as though they are being watched – at least until you have the picture you want. Try to be sneaky and hide behind objects or other people. You can also use other people in the foreground to add some depth to your images.
 Here are some ideas for details you can capture during a wedding. Photo by: 'Felix Röser'.
While this may sound a bit strange, it really helps to make others at a wedding feel comfortable. Using longer lenses can also help you to be low-key and may result in some nice bokeh.
- See also: Depth of Field in Photography
Wedding Photography Tips for Beginners
So we've talked about the gear stuff and what you will actually do when you are booked as a photographer at a wedding. Now you might be wondering how you should get started with your wedding photography business. Well, the start is not so easy to be honest. You have a lack of experience, knowledge and most importantly, you probably do not have a wedding photography portfolio as yet.
If you do an apprenticeship as a photographer, all of this will come naturally over the years, since you will learn everything from scratch. However, if you decide to do this as your side business, it may be a bit more difficult.
Finding a mentor is the easiest way to get your foot into wedding photography. Look for good photographers you admire and find out if they need an assistant or if you may join them as a second photographer on one of their jobs. Building up a portfolio this way is much easier and you will profit from the experience of your mentor. Also, you will not have that much pressure on producing the best images and can learn slowly by getting hands-on with the process.
As a matter of course, you will have to take it seriously and you will need to help out the photographer whenever help is needed. I suggest that you assist up to 5 or 10 times before you photograph your first wedding on your own, depending on how fast you learn and how confident you feel about everything.
Calculating a Price for a Wedding Shoot
When you feel confident enough for your first job as a wedding photographer, you can start to think about what you want to earn with your photography. Most people struggle with their pricing and in the beginning, it can be really hard to set your worth.
Your pricing will also depend on where you live and where you work. For example, I would say it is totally different in the United States than in Germany. Despite this, it can be quite easy to figure out how to price your wedding photography shoots – you'll just have to do a little math to find out what your expenses are in comparison to the profits that you hope to achieve.
Let's say you have 1500€ of monthly expenses, including everything you spend your money on in a month. That makes 18,000€ worth of expenses in 12 months.
Now think about what you want to earn per year before taxes. Let's say you want to make 45,000€ a year.
Add 18,000 to the 45,000€ and you'll get 63,000€. Now you know what you have to earn to take home your 45k at the end of the year.
And that brings us to the last part of the equation: How many weddings do you want to photograph in a year? Perhaps you do not want to work as a full-time wedding photographer. Perhaps you want to do portrait or even advertising photography as well.
To make things easier in this example, let's say you want to photograph 25 weddings a year.
Now you have to divide 63,000€ by the number of weddings that you'll cover.
63,000 ÷ 25 = 2520€
And there you go. That should be your base price for your wedding photography packages.
It sounds like a lot, right? However, if you really think about how much you have to invest into one day of wedding photography, it won't seem like that much anymore. Think of all the hours of post-processing that you'll have to do after the wedding, all the equipment you will need and which you might have to buy, the insurance and so on.
Even if you do wedding photography as a side business, you will still have to make accurate calculations. What you should never forget is that you have a responsibility to the rest of the market. Maybe you are in such a comfortable position that you don't have to make a living from photography. However, you should always keep in mind that there are others out there who are trying to make a living from it, so you can't take 1000€ less than a full-time photographer for the same job. It simply ruins the market. If you plan to do it as a side-business, that's great news for you because you can earn a lot more, maybe more than you initially thought.
Wedding Photography Post Processing Techniques

After a successful wedding day, you will come home with a lot of pictures and by a lot, I mean a lot. Somewhere in the vicinity of 3000-4000 pictures is my average number. Sometimes, it can be even more, depending on how long I was booked.
Of course, you will not end up processing all of these images. Make a selection of only the best ones and try to avoid redundant pictures. When you have completed your selection, you should come out at around 400-600 pictures which you can finally process.
The easiest way to handle greater numbers of RAW files is to use Adobe Lightroom. You can process a lot of images at the same time and it is really easy to give all of your pictures the same look and feel. Speaking of which, you should try to develop your own post-processing style, to make your pictures stand out.
- See also: Ultimate Guide to Luminar by Skylum
Developing your own Wedding Photography Style
Developing your own style in Lightroom is easier than you might think. In the beginning, you can start off using wedding presets, which you can usually find on Etsy and other websites. These are not expensive and can set the base for your style.
Pastel colours are really state of the art for wedding photos at the moment, so you will literally find thousands of tutorials and presets for this kind of post-processing. As I said, you can take these presets as your base and adjust them until you like them or to which they suit your own style.
There is no golden rule for post-processing, so be creative and feel free to do what looks best in your own opinion.

A Message for my Fellow Photographers
So, I hope I was able to give you some helpful advice to get you on your way to running your own wedding photography business. If you still feel comfortable and you are still motivated, then go out and shoot your first wedding!
Just remember the key attributes you need for this job, which are patience, flexibility, empathy, an open mind, creativity and strong biceps (damn, those cameras can get heavy after a while).
I wish you good luck and thanks for reading!
A Message for all the Brides
The last words of this article are dedicated to the future brides of this world.
I want to give you some advice on how to choose the right photographer for your wedding. Don't worry, I will keep it short.
As I mentioned before, the photographer should be more than just the guy or the girl that takes pictures on your special day. He or she should also be an advisor and it should feel like they are a good old friend to you. They will be around with you all day, trying to make pictures that show you and your loved ones as how you all really are! So make sure that your photographer is sympathetic and fits well within your friends and family. In my opinion, this is one of the most important things about choosing a photographer for your wedding. Of course, image quality also matters but I think you get my point.
All the best!
About the author: Felix Röser is a photographer based in Germany. You can find more of his work on his website or by following him on Facebook and Instagram.
Learn photography in-field from the landscape photography professionals! Join one of our photography workshops and tours in Iceland!


