Monochrome photography has always had a major role in the photographic history; many people think it has only been a trend within the last few decades but the truth is that it’s been a common practice, since the moment that photography was born.
- Check out this 6 Day Photo Tour in Slovenia | Autumn Colours & Mountain Views
- Find out all about How to Use Complementary Colours in Photography
- Discover these 8 Tips for Photographing Fall Colours in Iceland
I could easily name black and white photography as the monochrome photography “par excellence” but even without considering black and white photographs, think about the “sepia effect” or cyanotype photos: these are just two examples of monochrome photography techniques that have been employed since the early ages of photography.
If you thought that monochrome photography was just black and white, then this article will no doubt give you some better insight into what it actually is and how it compares to black and white photography. You'll also learn a handful of tips about how to master this photography technique so that you can begin taking superb monochrome photos, starting from right now!
What is Monochromatic Photography?
To truly understand the meaning of monochromatic photography, let's go back to the ancient Greek language, from where this term has been derived. The word “μονό” (“mono”) means “single" or "one”, while the word “χρωμος” (“chromos”) means “colour”. In effect, 'monochromatic photography' literally means photos that have only a single colour, with variations of that hue in different tints and shades.
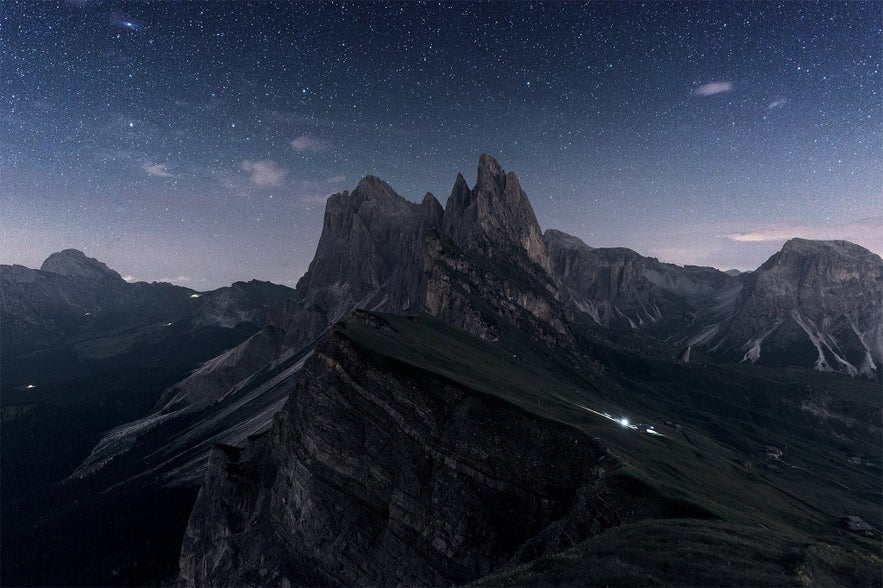 Monochromatic image of Seceda in the Italian Dolomites. Photo by: 'Leonardo Papèra'.
It’s not that rare to capture monochromatic photos in our everyday life – you may as well have already taken dozens of them without even knowing it! Take as an example the photo above of the majestic Seceda, a mountain in the Italian Dolomites. At the time that I took this image, it was a really dark summer's night with no moon and no lights to light up the landscape. As such, I decided – both when I was shooting in the field and later in post-production – that I would go for this blue-ish monochromatic look.
You may be thinking, “Hey, that’s not monochromatic, there are colours in that shot!”. However, if you look closely, you’ll notice that all the colours are just different tints and shades of blue, from the lightest in the highlights to the darkest in the shadows.
As you can see, monochrome photos can be found everywhere and they are not necessarily made-up special effects created with complex techniques in the field or in post-production.
The Difference Between Monochrome and Black & White Photography
Take a look at the differences in the split image below. On the right side, you can see the black and white version. Meanwhile, on the left, you'll find the original version of the image, with its monochromatic appearance. Both of these versions of the same image may be defined as monochromatic but only one is black and white.
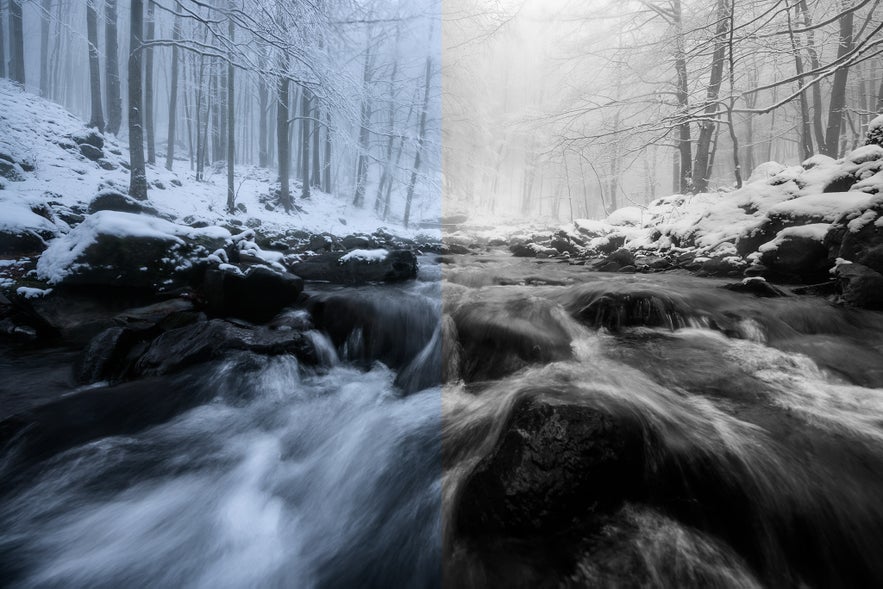 Split image of monochrome on the left and black and white on the right. Photo by: 'Leonardo Papèra'.
When we talk about monochrome photography, we are actually talking about all kinds of photographs which are composed of different tints and shades of a single colour. On the other hand, when we refer to black and white photography, we are only talking about photos that have no colours in them, just different shades of black and white.
So, to make things easier for you: a black and white photo is a monochrome photo, while a monochrome photo is not always black and white. This is the main difference between monochrome and black and white photography.
Now that you've got a basic understanding of what monochrome photography actually is, let's take a look at some of our best tips and advice for creating stunning monochrome photographs, both in-field and in post-processing.
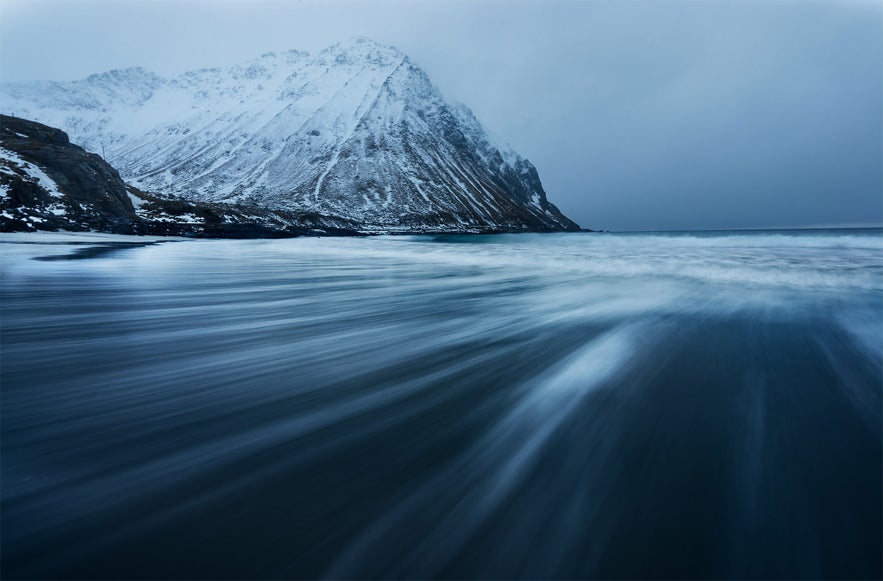 Follow these tips and you'll be on your way to creating stunning monochrome photographs. Photo by: 'Leonardo Papèra'.
Tip #1. Study the Scene
Even before going out to actually shoot, you’ll have to do some planning, particularly if you want to capture some great monochrome photos.
The truth is that many photographers see monochrome versions of their photos as the “back-up” version in case the sunset or sunrise isn’t great, as well as if the sky is not interesting. These pictures have obviously not been created with monochrome in mind. As such, most of the time, you’ll find them to be not all that interesting.
So, what’s the solution? Well, it’s quite easy. When you plan a golden hour shoot, you'll want to know where the sun is going to set, which parts of the environment or your subject will be illuminated by the light and which parts will be in the shadow. You'll also need to know where to place your subject. This is the perfect moment for thinking about about how your pre-visualised frame will look in monochrome rather than in colour.
Does the composition work without the colours? Does the frame get messier or cleaner? Are there any strong leading lines to capture the attention of the viewer? These are just some of the questions that you should ask yourself, along with many others, before you take a monochrome shot. Remember that an amazing, colourful scene can make for a boring monochrome image and vice versa.
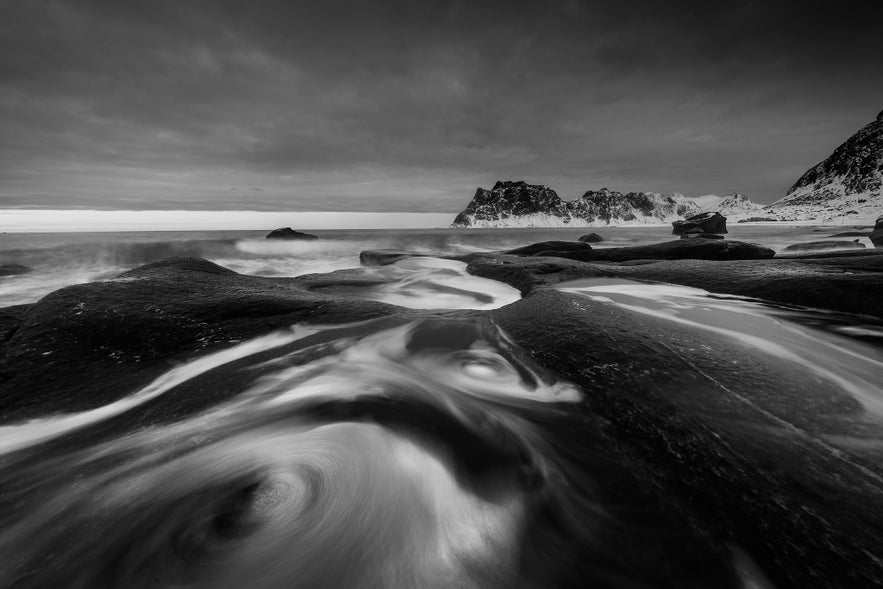 A black and white conversion of the Lofoten Islands in Norway. Photo by: 'Leonardo Papèra'.
As an example, the shot above was taken during a cloudy sunset at one of the most popular beaches of the Lofoten Islands in Norway. To be completely honest, I was hoping for some incredible colours to appear during the sunset, so black and white was definitely not my first choice for an image. As such, I decided to transform this image into black and white with post-processing. The reasoning behind this was that 1) the look was already monochromatic with blue clouds all over the sky and shades of blue in the landscape due to the beginning of twilight, and 2) the swirls in the foreground created a nice contrast.
This shot is almost one year old and now that I have the time to think about it, I know why it hasn't really grown on me. Put quite simply, the sky isn’t right for a monochrome shot – there are some details but not too many and the only thing that captures the viewer’s attention is the foreground swirl. With hindsight, I probably wouldn't convert this image into black and white again, as these shades don't really add anything in terms of aesthetic beauty or the ability to convey emotion. As you can see, even though I thought the scene was great for a black and white conversion, it actually wasn’t.
Tip #2. Look for Scenes that Fit
If I could take that photo again, I'd probably do it with monochrome in mind and look for a composition within the scene that fits. Training your eyes to see in monochrome requires a lot of practice and may include failures in the interim but the goal here is to always look for scenes that work better in monochrome than in colour. Of course, it won't be easy since we are so used to seeing in colour but with time and experience, you’ll be sure to achieve some outstanding results!
Some compositions will be easy to spot since, as I showed you earlier, they are almost natural monochromes. Other compositions will look good in monochrome due to a combination of contrasts and strong leading lines.
There isn't a general rule to follow unfortunately, so the only way to become adept at spotting great monochromatic frames is to get out there and exercise!
Tip #3. Shoot RAW
This is more of a practical tip which extends beyond shooting monochromatic photos. By shooting in the RAW format, you’ll be able to work more on the file later in post-production whilst maintaining image quality and reducing the risk of artifacts.
The RAW format stores a lot more details and information than JPEG does, with the latter being an already processed file format.
Tip #4. Experiment with Long Exposures
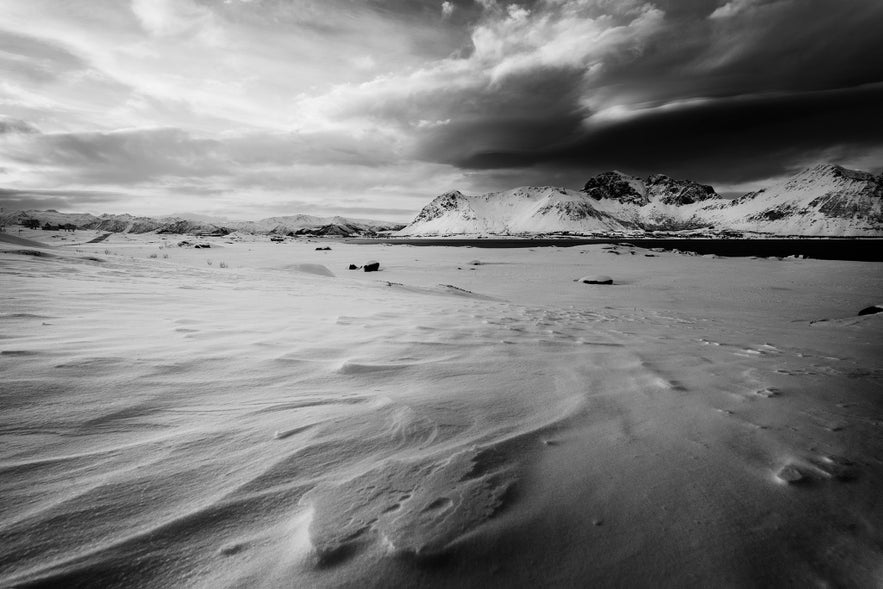 Long exposures can make a scene appear more dynamic. Photo by: 'Leonardo Papèra'.
Long exposures can introduce a dynamic atmosphere to monochromatic shots by adding movement. In order to create stunning monochrome images, try playing with your exposure times for visual impact that goes beyond pretty colours. Use whatever is moving in your frame to your advantage, such as water, clouds, people and vegetation.
- See also: Ultimate Guide to Long Exposure
Tip #5. Use Filters
This tip is the natural consequence of the previous one: to allow you to play with the shutter speed, you may need to use some graduated neutral density (GND) or solid neutral density (ND) filters. My recommendation is to have a kit of ND filters in your bag at all times. An ND8, ND64 and ND1000 are great places to start, so that you'll have a wider choice when it comes to selecting an exposure time.
Tip #6. Focus on Lines, Textures and Patterns
While colours can help to make an image pop and to capture attention, a successful monochrome shot requires a strong composition that focuses on intriguing patterns, such as strong leading lines and textures.
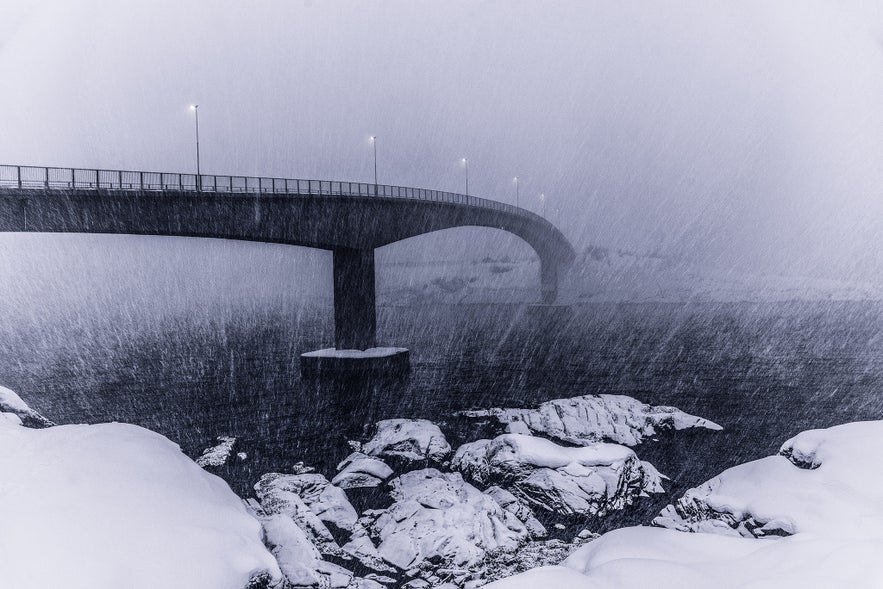 Lines, textures and patterns can elevate a monochrome image from mundane to fascinating. Photo by: 'Leonardo Papèra'.
Tip #7. Use the Black and White (B&W) Camera Preview Mode
Pretty much all camera models on the market nowadays will allow you to set the JPEG preview mode on black and white so that you can immediately see your shot as it was meant to be: in monochrome!
Remember that when using this preview mode, you should set your camera to record in “RAW + JPEG". This way, your camera will also save a RAW file and not just the JPEG one; you just need the JPEG to get an idea of what the final shot will look like. The RAW file is what you will use later on during post-production to finish the image.
- See also: The Best Camera Bags for 2020
Tip #8. Enhance the Contrasts
With monochrome images, try to stretch the histogram as much as you possibly can. Sometimes, even clipping a bit of the highlights or keeping the shadows really dark will be effective. I know it may sound unconventional but with the monochromatic look, it is recommended to give a lot of contrast to the image, in order to place the emphasis on the lines and shapes of the subject.
Tip #9. Use Adobe Lightroom “Split Toning” and “HSL” Features
When it comes to transforming a colour image into a monochrome, the first things you should think about are the Split Toning and the HSL functions in Adobe Lightroom.
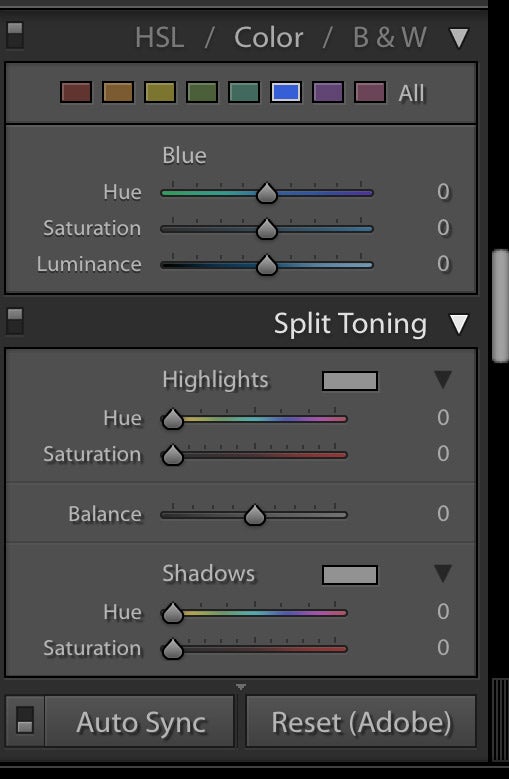 Adobe Lightroom split-toning and HSL window. Photo by: 'Leonardo Papèra'.
With these two windows, you can select what colour tone to give the image, the saturation and the hue of it, as well as thousands of other possible combinations. You can spend hours tweaking these settings to arrive at the best possible monochrome look for your photo: there is not a general rule to follow, the only thing that can stop you is your imagination!
Tip #10. Look for Silhouettes
This tip strictly applies to monochrome photography. For colour photos, I recommend using the high dynamic range (HDR) technique or taking multiple exposures to keep the exposure well-balanced and all the details visible. However, in terms of monochrome images, I love to shoot silhouettes: all you need is a strong source of light and an interesting subject with a recognisable shape. By keeping the subject completely dark, you’ll enhance the shape of the subject with the help of the backlight.
Tip #11. Give the Right Amount of Emphasis to Your Subject
If you generally shoot in colours, then you might be used to thinking that your subject naturally stands out because of its colour. Obviously in monochrome, this is not possible, so you'll have to make sure that the subject of your photo is given the right amount of emphasis so that everybody can easily understand where to look.
Try to isolate the subject by placing it closer or further in the frame such that the light will impart different shades of colour in an interesting way.
Tip #12. One Colour, Endless Shades
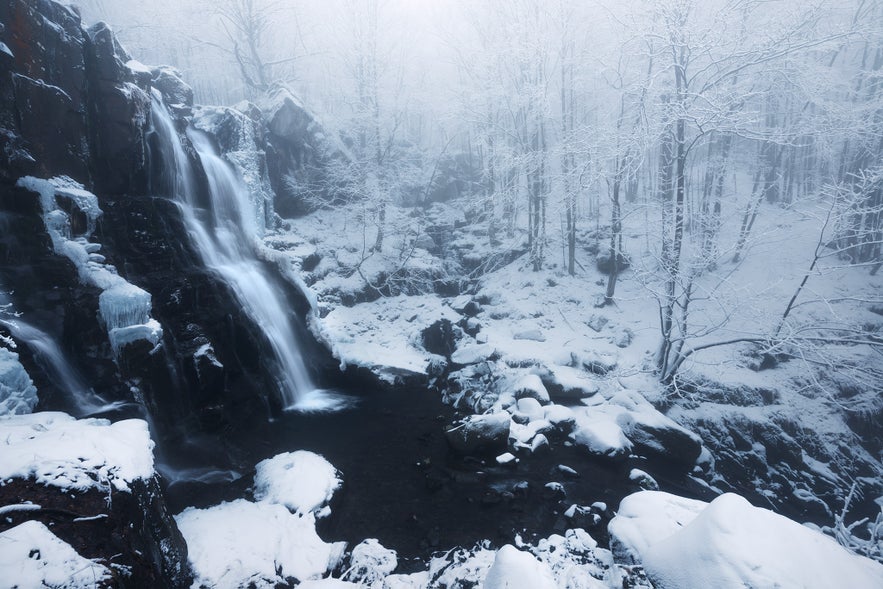 Endless shades of blue. Photo by: 'Leonardo Papèra'.
Even when shooting monochrome images, it doesn’t mean that everything should be of the same exact colour. Let me explain myself a little bit better here: every colour has thousands of possible different shades, from the darkest ones to the brightest. In the shot above, you can see that the whole scene rotates around one single colour but that there are many different shades of this hue all around the frame.
Tip #13. Take Out the Colours to Convey Emotion
It may seem obvious but colours take a lot of attention from the viewer. By reducing the amount of colour in the frame, you give the viewer the opportunity to focus more on the message and the emotions rather than the aesthetic beauty of the image.
My recommendation is to go for a monochromatic photo when you want to arouse some particular emotion into the spectator.
- See also: Patagonia Photo Workshops
Tip #14. Not Confident with the Adobe Suite? Try to Use Nik Silver Efex Pro
If you don’t use the Adobe Suite to post-produce your photos, this software from the Nik Collection by DxO might be your solution. It comes along with all the other software in the Nik Collection but is made just for monochrome conversions. You don’t need to spend ages learning how it works, since the whole conversion process is really easy and user-friendly. At the same time, it gives you plenty of options to choose from!
Tip #15. Practice!
I know, this might sound more like a general suggestion rather than a specific tip but this is also probably going to be the wisest thing you’ll read in the whole article! Making enchanting monochromatic photos is not an easy thing, so you can’t expect to go out there and get that perfect shot on your first try. You’ll need to practice a lot to nail the technique and finally become a great monochrome photographer!
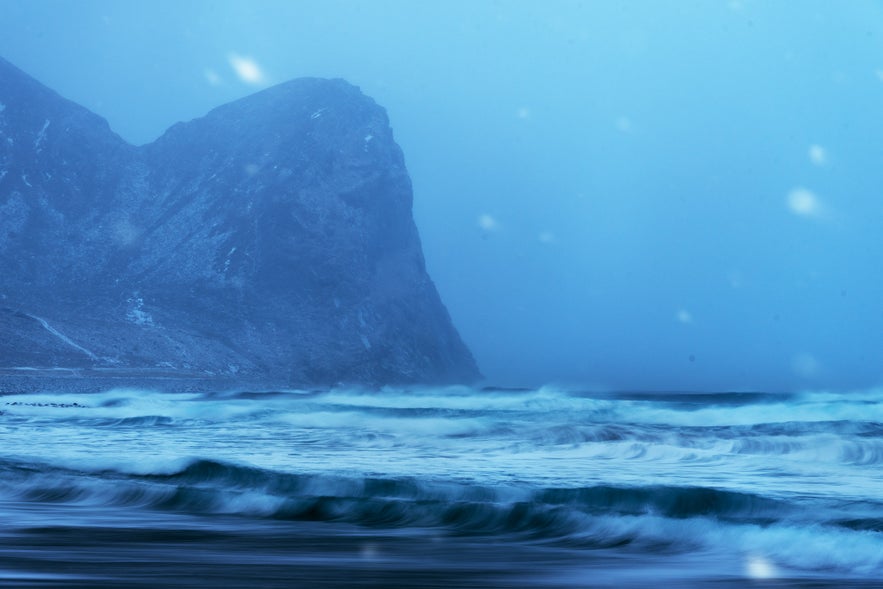 Practice makes perfect with monochrome photography. Photo by: 'Leonardo Papèra'.
As you can see, monochrome photography is one of the most interesting techniques to look at when it’s done well. It gives you the chance to convey more emotions, play with lights and shadows and endless shades of a single colour. I seriously hope that you have learned something by reading this article and that you'll be convinced you to get out there with your camera. Go wherever your heart is taking you to start to capture these incredible monochromatic shots because in the end, that’s the only thing that matters!
About the author: Leonardo Papèra is a landscape photographer based in Italy. You can find more of his work on his website or by following him on Instagram.
Are you ready to start practicing new photography techniques and skills? Learn how to improve your photography on one of our Winter Workshops in Iceland!

