Ah, the Golden Hour. It’s that magical time of the day when warm, glorious hues light up the surrounds, making for spectacular photography in Iceland. Vast, barren volcanic plains and undulating rhyolite ridges come alive with the low angle of the sun, as it casts a softly diffused light over the brooding landscape. There is no doubt that the Golden Hour is the best time for landscape photography in Iceland. The photos that you can take during these moments capture a certain atmosphere that is almost impossible to replicate during any other time of the day.
- Explore these articles on Photography Techniques
- Discover 5 Composition Techniques That Will Improve Your Landscape Photography
You’ll notice that as the sun gets closer to the horizon, the shadows in the environment will become longer and less defined, enhancing the shapes and lines of mossy lava fields while the clouds in the sky take on brilliantly blazing tones.
Don’t be fooled by its name though, as the term ‘Golden Hour’ actually refers to the timeframe shortly after sunrise or just before sunset. Depending on where you are in the world, these periods can last anywhere from 30 minutes up to the course of several hours.
 Icelandic horses lit up by the Golden Hour. Photo by: 'Iurie Belegurschi'.
How Long is the Golden Hour in Iceland?
Due to Iceland’s northerly location in the world, it experiences some of the longest Golden Hours on the planet. This is particularly so during the summer Midnight Sun season, when instead of a clear transition between day and night, the sunset blends seamlessly into sunrise over the course of many hours.
The result is that Iceland becomes a veritable playground for photographers, revelling in the exciting opportunity to extend their shooting hours… and what could be better than that?
There are a number of challenges that come with Golden Hour photography though, which can either make or break an image. When the golden light takes hold, it can do so rapidly and change very quickly before your very eyes. As such, preparing to shoot during the Golden Hour in Iceland is of the utmost importance, in order to ensure that you’ll take home stunning photos that you can be proud of later.
 Golden Hour at Dettifoss. Photo by: 'Iurie Belegurschi'.
In short, there are three main factors to consider when you’re getting yourself prepared for landscape photography in Iceland during the Golden Hour.
First of all, you need to have good camera and post-processing techniques.
Next, you’ll need to combine these techniques with visually interesting locations to really create a beautiful shot.
Last but not least, you need to plan your time effectively, so that you will be ready to shoot from the moment that the golden light arrives to the second that it gives way to Blue Hour and ultimately the night.
Equipment for Shooting During the Golden Hour
Camera Gear
As with any photography in Iceland, it pays to have a reliable camera that can take high-resolution images. This will ensure that you’ll be able to capture all the little details within the landscape.
Another benefit of having a camera with high-resolution capabilities is that you’ll be able to turn your photos into large prints, which can be useful if your aim is to sell your landscape photography.
 High resolution cameras are important even with drone photography. Photo by: 'Edwin Martinez'.
Aside from that, it’s worthwhile having a camera with a wide dynamic range that is able to record all of the details within the shadows, making for clearer landscapes with less noise and images that are easier to process later on.
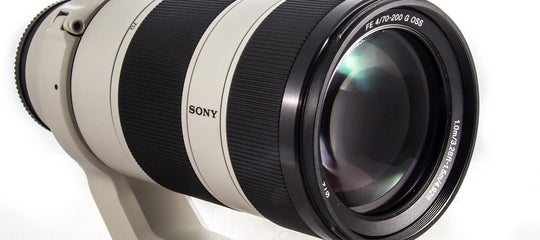
Wide Angle Lens
Wide angle lenses are preferred for landscape photography, as they allow for a broader view of the scene. Furthermore, these types of lenses can distort elements within the foreground, making for interesting effects that can strengthen your composition.
 Wide angle lenses are perfect for landscape photography. Photo by: 'Albert Dros'.
Filters
When shooting during the Golden Hour, it can be useful to have some graduated neutral density filters on-hand. These can help you to expose properly for the landscape, balancing out the light in the sky to create a more even exposure.
Tripod
Keep in mind that although the light may seem like it’s blazing, it’s not nearly as strong as the light during the day. Although it is entirely possible to shoot landscapes in the Golden Hour by hand, using a tripod will ensure that your camera remains stable as the light begins to fade and your shutter speeds get slower.
 Using a tripod will help ensure sharp shots during Golden Hour. Photo by: 'Iurie Belegurschi'.
Headlamp or Torch Light
Take into account that while you’re out there shooting the Golden Hour, it’s inevitable that the light will change and eventually it will get dark… that is, unless you’re out shooting during the Midnight Sun. So be prepared and bring along a headlamp or a torch light, in case you run into any environmental dangers when you try to leave.
Best Settings for Golden Hour Landscape Photography
It can be difficult to shoot in Iceland during the Golden Hour, particularly as the light changes within the environment. As powerful as your camera may be, typical camera sensors are not yet advanced enough to capture the entire tonal range that you’ll often witness with your eyes. As such, you may need to work differently during the Golden Hour to how you’re used to working in order to capture a stunning image.
 One of the most important aspects of shooting during Golden Hour is depth of field. Photo by: 'Iurie Belegurschi'.
As with landscape photography during any other time of the day, one of the most important aspects of shooting is the depth of field. You can control this by setting the aperture using Aperture Priority mode or Manual. Most of the time, you’ll be aiming to get everything in focus, from your subject in the foreground of the frame to the majestic mountains in the back. As such, try using a smaller aperture such as f/14 or f/16, which will give you a greater depth of field.
The benefit of shooting at smaller apertures during the Golden Hour is that you will inadvertently achieve the perfect conditions for creating sunstars. When the sun is low on the horizon, try placing it so that it touches something else within the landscape, like the edge of a mountain or a tree. Doing so will create a really big sunburst when you press that shutter button!
 Sunburst during Golden Hour. Photo by: 'Iurie Belegurschi'.
The trick with properly exposing a Golden Hour shot in Iceland is to balance the aperture with the ISO for the correct shutter speed. As always, try to keep your ISO as low as possible. This will help to ensure that your images are clear and sharp, with as little noise or camera shake as you can manage.
Another tip is to set your white balance to “cloudy” mode during the Golden Hour to make the most of the warmer tones of light. However, you can always just leave your white balance in auto if you prefer to adjust the white balance in post-processing later on.
Exposure Blending for Tonal Range
Sometimes, no matter how hard you try, it will be almost impossible to capture all of the gorgeous light and tones created by the Golden Hour in just one exposure. You’ll either end up with completely blown out highlights in the sky or awful shadows that you won’t be able to rescue in the foreground. If this occurs, you may need to blend a couple of different exposures together to achieve the complete tonal range.
 Exposure blending is important for well-balanced shots during the Golden Hour. Photo by: 'Iurie Belegurschi'.
Make the most of this post-processing technique by bracketing your exposures while you’re in-field, so that you’ll have enough data to work with later on. You’ll then be able to blend the exposures together for more balanced tones in your final image.
Plan Ahead and Scout Locations
When the golden light takes hold, the last thing that you’ll want is to arrive late to the scene without any ideas for a composition. Not only is this a waste of time, but it’s also a waste of the beautiful light.
To ensure that you’ll take home stunning photos of Iceland, scout your shooting locations during the day so that you’ll have workable compositions when you return later on.
Plan ahead to arrive back at your shooting location at least an hour prior to time that Golden Hour is predicted to begin. There are a number of apps that you can download to your mobile phone which will tell you what the time frames of the Golden Hour, Blue Hour, sunset and sunrise will be, which will no doubt help you to be better prepared.
 Plan your compositions ahead of time so you can return when the light is golden. Photo by: 'Iurie Belegurschi'.
If you already have a great location in mind, look for an interesting subject that you can feature in the foreground, such as a branch that may be used as a leading line, a reflection in a puddle, or a rock that will serve as an anchor for your scene. Elements like these enhance the power of your image by adding perspective and a sense of depth.
Once you’re in position to shoot during the Golden Hour, stay there until the warm tones completely fade. Doing so will increase your chances of capturing that enchanting, magical moment in the landscape that you’ve been waiting for. The only exception to this is if you’ll be in Iceland for landscape photography during the summer, when you’ll have more than enough time to make your way to two or more locations due to the length of the Golden Hour.
About the author: Serena Dzenis is a landscape photographer based in Iceland. You can find more of her work on her website or by following her on Facebook and Instagram.
During summer in Iceland, the Midnight Sun results in hours upon hours of perfect golden light. It's the best time to visit Iceland for landscape photography! Check out our range of summer photo workshops for a chance to capture the Land of Fire and Ice awash with warm, golden hues.

Serena Dzenis is an award-winning photographer, author and journalist who is based in Iceland. She has written numerous articles for the Iceland Photo Tours website, both about photography in Iceland as well as the more general aspects of using a camera.
Well-known for her uniquely romantic photographic style and love for the winter season, Serena is not afraid of harsh conditions and in making the most of what this planet has to offer. Her open and friendly nature has seen her embracing challenges each and every day, teaching others to make their own future and to turn their dreams into reality.