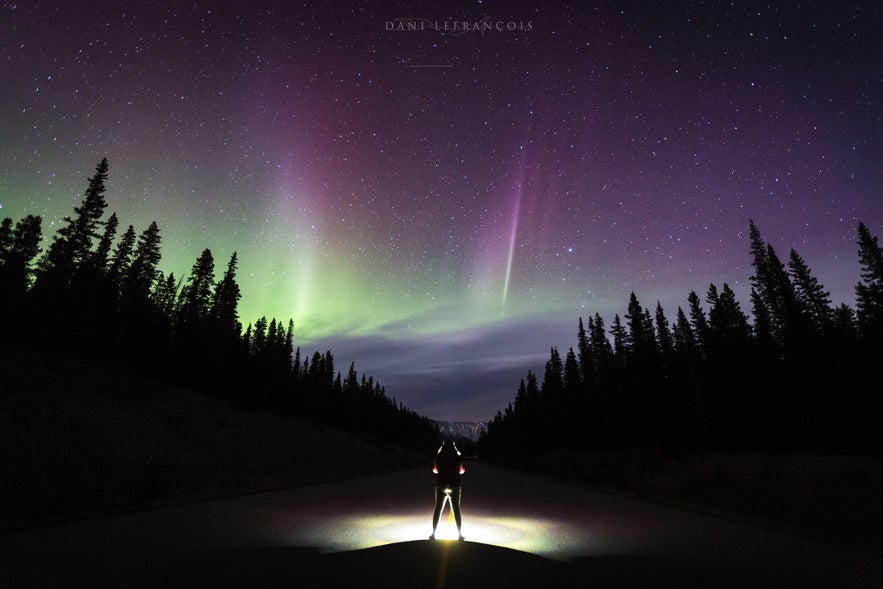
Imagine yourself standing outside in the cold for hours upon hours and being completely content and happy. That is what it is like to witness and photograph an Aurora Borealis display.
- Learn all about How to Use Complementary Colours in Photography
- Check out this 8 Day Azores Spring Photo Workshop
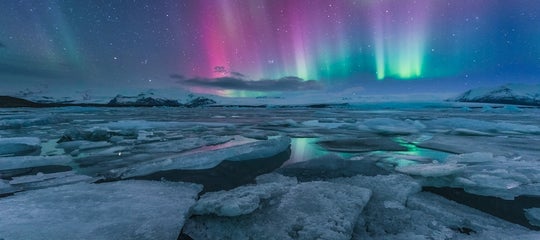
- Discover What to Photograph in Iceland Through the Seasons
You’ll want to capture the awe-inspiring scene but photographing the Northern Lights can be challenging. The lights can be fairly unpredictable and you have moving subjects at night. In this article, I will cover many of the things you need to-know and some things you didn’t know you needed to know in order to help you to successfully capture the Northern Lights.
Pre-Planning
Step 1: Weather & Finding Clear Skies
One of the main details of photographing the Northern Lights is understanding weather apps and websites that give you clear sky or visibility information.
Within North America, a very handy graph website is The Clear Sky Chart. Globally, I’d suggest Accuweather as there is a sky section under each location that gives you percentage of cloud cover at an hourly rate.
By referring to these types of charts and data you will be able to plan out locations with the best weather potential to photograph the lights.
 Understand weather apps and websites for your best chance of photographing the Northern Lights. Photo by: 'Dani Lefrancois'.
- See also: Guide to the Aurora Forecast in Iceland
Step 2: Aurora Activity and Alerts
One of the best resources out there for predicting aurora activity is the NOAA website and NOAA Auroral Oval.
However, one of my favourite websites for tracking the Northern Lights in Canada is the AuroraWatch site. You are able to get email alerts when the lights are active. The website is based in Edmonton, Alberta, Canada which is fairly south to many well-known Northern Light photography locations such as Alaska, Northern Canada, Faroe Islands, Iceland and Norway's Lofoten Islands. So, if the yellow alert email goes out, then you know it’ll be a great show in the north.
Step 3: Finding A Dark North-Facing Sky
This step requires either plenty of map searching and a good deal of on-the-road scouting. As the Northern Lights can be so unpredictable, it can be very beneficial to have a few different locations in mind with a dark, north-facing sky. Light pollution is something you will want to avoid if possible. The darker your chosen location, the better. There is a handy little website called Blue Marble that has a map of light pollution across the world.
 A dark, north-facing sky is essential for viewing the Aurora. Photo by: 'Dani Lefrancois'.
Camera Gear
You will need the right camera gear to capture the Northern Lights. Cellphone cameras are becoming increasingly capable of capturing the lights, but they still do not match the image quality of a DSLR or mirrorless camera.
-
First, you will need a dSLR or mirrorless camera that has the ISO capability of between ISO 2000 & ISO 12,800.
-
A wide angle or ultra-wide-angle lens. 10mm on a cropped sensor or 14-16mm on a full frame. Fish-eye lenses are also great to add something different.
-
Make sure your lens is fast! Ideally it should to be a f2.8 lens or faster (You can use an f4 lens, but it is not as ideal).
-
You will need a sturdy tripod with a flexible tripod head that will allow you to shoot horizontally and vertically, as well as the ability to point the straight lens up. Ball heads are perfect!
-
Get yourself a remote. Corded remotes are great when it isn’t windy, but wireless remotes are best for most situations. (No need to get the expensive wireless remotes, most camera companies have native remotes that are wireless and under $15)
-
Both long exposures and cold temperatures can cause your batteries to die faster than normal. A great tip is to always keep a battery in your inside jacket pocket while out shooting. Your body heat will keep the battery warm. When the battery in your camera “dies”, stick it in your jacket pocket to warm it up and it will come back to life. You can keep switching batteries back and forth as needed on those extra cold nights.
 Long exposures can cause your camera batteries to die faster than normal. Photo by: 'Dani Lefrancois'.
How to Focus at Night with Manual Focus
Finding your focus at night can be one of the most difficult things about photographing the Northern Lights. Some lenses make finding your focus easy and have a small focusing window on the lens that has an infinity symbol (∞).
If your lens has a focusing window
On some lenses (like Nikon, Tokina & Tamron), there’s simply the infinity symbol. “True infinity” should be when you line up the fixed line on the lens barrel at the very center of the symbol.
On other lenses like Canon & some Sigma, the infinity symbol has a line beside it. The “true infinity” on that lens should be when you line up the fixed line on the lens barrel with the line coming from the infinity symbol.
Some lenses may vary. Always take a test shot and zoom in to confirm.
If your lens has electronic focus (Sony)
On cameras that have an onscreen electronic focusing system (like the Sony mirrorless cameras and some Sony lenses), you have a different way to focus. When trying to find the focus for your lens for the first time, it requires taking a few test shots to find it. First, start out with focusing the lens to the infinity symbol and taking a photo. If the photo is not in focus, then continue to focus to a smaller distance. For example, go from the infinity symbol to 10m and then take another test shot. If that photo is still not in focus (but is slightly less unfocused then the first one), then keep focusing to a smaller and smaller distance until you find your sharpness. Once you find what distance value your lens wants for its “true infinity”, then you can feel confident when switching locations that your photo will be sharp when your lens is set to its infinity point.
An additional way to try and find your “true infinity” is to turn live-view on and to bump up your ISO very high (12,800ISO or above) This should allow you to see some bright stars within your live-view and allow you to focus. However, this technique does not work for all cameras and is often more useful for people using Nikon systems.
 Learn how to focus on the stars at night. Photo by: 'Dani Lefrancois'.
Camera Settings
Now onto the camera settings that you will want to start with, and why you’ll want to use them.
Camera Mode
You will want to set your camera to Manual mode. That way, you’ll have full control over all of your settings.
Pro tip: Set your camera to BULB. I know this is going to sound weird but stick with me. While using a remote, use the bulb setting to give you a variety of shutter speeds. Set your Aperture to f2.8 and ISO to 3200 and play around and experiment with shutter speed.
File Format
Make sure you are shooting in RAW format. Shooting in RAW format allows you the freedom to make changes and edits to the photo without damaging and degrading the quality of the file. It also guarantees the best possible image quality which is essential for night photography. Use editing software that can read the RAW format; Programs like Lightroom, Photoshop and Photoshop Elements are great tools to have.
White Balance
If you are shooting in RAW, white balance is something that is non-essential. Within the editing software you can adjust the white balance after to fit the colour you want or shoot at Auto White Balance or Daylight.
Metering Mode
Make sure you are using the Evaluative (Canon), Matrix (Nikon & Sony), Multi-Pattern (Pentax) or Multi- Segment (Fuji) mode. This is usually the default setting for most cameras. The camera is able to sample and evaluate the light and give better exposure and a more balanced photo between the light and dark areas.
 Make sure to use Evaluative metering when photographing the Northern Lights. Photo by: 'Dani Lefrancois'.
Histogram
This histogram is one of the most important things when shooting at night. Your camera screen will lie to you. It’s night time and the camera screen is the brightest thing around, so the stars and the Northern Lights may look brighter on the screen than they will on the computer. It is harder to recover darker photos, because recovering the shadows tends to bring out more noise. The histogram will help you avoid these types of mistakes. Make sure you refer to the histogram through your shoot.
An ideal histogram for the Northern lights will be fairly left leaning. There will likely be a peak in the far left for shadows, as well as other peaks in the dark mid-tones continuing into the brighter mid-tones if you have some really bright auroras. Unless you include the moon or have an additional light source or something reflecting the light source (like a snow-covered mountain) you will likely not have much (if any) information in your highlights (right side) section of the histogram. The biggest thing to watch out for is to make sure your histogram is not all in the shadows.
Aperture
One thing that many people struggle with is deciding on what f-stop to use. This is where I like to make things simple. Open up your aperture as wide as possible. Having a fast lens like f2.8 is ideal for most nights when there is no moon and the aurora is dancing. If the moon is out, then you’ll have a bit more freedom to shrink your aperture and incorporate closer elements like rocks, waves or people within a single photograph.
 A fast lens is best when shooting the Northern Lights. Photo by: 'Dani Lefrancois'.
Shutter speed
I have found that shutter speed preferences can change depending on who you talk to. I prefer to keep my shutter speed around 5 seconds or less. The Northern Lights are moving, so one of the challenging things is to try and capture the movements. If you are taking a photograph for 20 seconds, you can easily mush the movements and not capture the shapes within the light display. The Northern Lights dance at different speeds which can allow a bit of an extended shutter speed if they are moving slowly.
 Keep your shutter speed around 5 seconds or less. Photo by: 'Dani Lefrancois'.
ISO settings
Nowadays, with camera technology-as well as with noise reduction software in programs like Lightroom, we have less and less to worry about when it comes to noise and its damaging effects on image quality. Let this be a big encouragement to stop worrying about using a higher ISO! (My camera is 6 years old and I get wonderful shots with 12,800 ISO, with proper exposure.)
While shooting the Northern Lights, you will want to adjust your ISO as needed. If your aperture is maxed at f2.8 and you have your shutter speed at 5 seconds, play with your ISO settings and find the right histogram reading. I will usually start at 1600 ISO on nights with a moon and start with 2500 ISO on new moon or moonless nights. If the aurora is exploding, you may need to lower the ISO to avoid overexposure.
In-Camera Long Exposure Noise Reduction (NR):
Turn it off.
The Experience
Every Northern Lights display is different. The brightness of the lights, the behaviour of the lights can change and the colours of the lights can change. Oftentimes the photographs we capture are a brighter version of what our eyes see. This is because of the long exposure which allows the camera sensor to capture more of that colour that our eyes are unable to see. Sometimes when the aurora display is strong enough our cameras are able to accurately depict the colours we see.
 Remember to enjoy the experience. Photo by: 'Dani Lefrancois'.
 The Northern Lights can dance above you. Photo by: 'Dani Lefrancois'.
Depending on the strength of the display, the Northern Lights could be dancing on the horizon in front of you, dancing above you or covering the entire sky. If the lights are on the horizon it’s a wonderful opportunity to create a panorama. Make sure your panorama skills are fresh, because you may have to do it quickly.
 Panorama of the Northern Lights. Photo by: 'Dani Lefrancois'.
There is one continuing theme amongst photographers who have seen and photographed the Northern Lights. They all agree on how much of an addicting rush it is to photograph and capture the experience. So, one thing I always try and remind myself to do is to go out and capture new aurora scenes which may even include a little bit of clouds.
- See also: How to Take Great Photos in Bad Weather
 The Aurora is beautiful even when it's cloudy. Photo by: 'Dani Lefrancois'.
Lastly, here are some non-camera related tips to help make capturing the Northern Lights more enjoyable. Hand warmers and toe warmers are essentials when photographing the Northern Lights in cold climates. Some choose to attach a hand warmer to their camera to avoid batteries dying too fast (only use this option on VERY cold nights). If you are keen on a particular composition and don’t want to move as you wait for the aurora to explode, then consider bringing a camp chair. It is also a wonderful idea to bring a friend along with you, especially one who has never experienced the Northern Lights before. It is so wonderful to share that magical experience with someone. Also, make sure you don’t forget to bring snacks and a warm beverage!
About the author: Dani Lefrancois is a landscape photographer based in Canada. You can find more of her work on her website or follow her on Instagram.
Would you like to photograph the Northern Lights in Iceland? Check out our 8-Day Aurora and Ice Caves Photo Workshop in Iceland!


