Have you ever taken a picture in misty or foggy conditions? One of the most intriguing things about this weather phenomenon is that it can add an interesting dimension to your photography. The sense of atmosphere and light that scatters through a foggy haze can create fascinating effects, no matter what genre of photography you practice.
- See these 8 Tips to Improve Your Landscape Photographs
- Find a wide range of Photography Tutorials to improve your photography
If you’ve ever tried your hand at fog photography, then you might already know that it isn’t always as straightforward as it seems. Capturing a great image of fog requires a good understanding of when and where fog will appear, how it can impact upon your photographs and what you can do to utilise it to your advantage.
To help you improve your fog photography, we’ve compiled a list of ten easy tips that will make a big difference once you get out and about in-field. Read ahead to learn what fog is as well as how you can plan for a successful shoot!
 These ten easy tips will get you started with fog photography in no time! Photo by: 'Unsplash'.
Understanding Fog
The first step towards achieving great fog photography is to understand what the fog actually is. Once you have a good understanding of fog and the conditions under which it may appear, you’ll be able to predict when and where it will occur.
 Fog is the suspension of tiny liquid particles in the air. Photo by: 'Unsplash'.
So what is fog? In science, fog is understood as a suspension of tiny liquid particles in the air, kind of like a low-lying cloud. The only difference between the two is that fog tends to be near to or touching the ground.
How does fog form? Well, there is always some amount of water in our atmosphere. The reason that we don’t see it is because it is in gas form, rather than liquid. This is what we refer to as ‘water vapour’.
 When there is a drop in temperature below the dew point, condensation occurs. Photo by: 'Unsplash'.
The air can only hold a certain amount of water. When there is a drop in temperature below what we call the ‘dew point’ (the temperature at which dew is able to form), condensation occurs. This is when the water vapour transforms into droplets of liquid. These droplets float through the air and spread out in a suspension near the ground. This is what we see and refer to as fog.
 Fog can occur near bodies of water close to forests. Photo by: 'Unsplash'.
The most common types of fog that we see are advection and radiation fog. The former is caused by moisture moving over a cool surface, such as the sea, whereas the latter sets in overnight when air that is carrying a lot of water vapour cools down. Other types of fog include steam fog, which forms when cold air moves over a warm surface (such as a lake in winter) as well as upslope fog, which occurs when moist air is forced up the side of a hill or mountain range.
How Fog Can Affect Your Photography
 Fog can make your photography more enchanting. Photo by: 'Unsplash'.
Fog doesn’t just limit our ability to see what’s in front of us; it can also have a significant impact on your photography. Foggy conditions can reduce contrasts within the scene and be so dense that visibility is reduced even when looking through your camera’s viewfinder. They may even result in distortion of the direction and intensity of light. While this may seem negative at first, it’s actually a good thing! You can use the fog to change the way that others might perceive your images by adding a dynamic layer of mood and atmosphere.
 Fog can elevate a mundane scene into something more interesting. Photo by: 'Unsplash'.
- See also: Interview with Michael Shainblum
10 Tips for Better Fog Photography
Now that you have a good idea of what fog is and how it can affect your photography, let’s take a look at our ten easy tips that you can use to improve your fog photography.
#10. Plan Your Fog Photography
It’s always best to do a little bit of planning before you head out for a shoot. In the case of fog photography, planning is all the more important as you’ll need to know when and where it will be foggy, as well as what you’d like to shoot when the fog finally turns up.
 Think about possible compositions that you might want to shoot. Photo by: 'Unsplash'.
As we mentioned earlier, there needs to be a lot of moisture suspended near the ground for fog to form. One of the best times to see fog is just after the rain, when there is a large volume of water on the ground as well as a lot of water vapour in the air. You will most likely encounter foggy conditions in the morning, over large bodies of water such as lakes or in low-lying areas such as valleys – provided that there has been a drop in temperature below the dew point.
 Fog often occurs near bodies of water. Photo by: 'Unsplash'.
To get an idea of where it might get foggy, you can look at other people’s images online. Otherwise, you can do some research on Google Maps or Google Earth to come up with your own spots. If possible, head out ahead of time to do some location scouting so that you’ll know what kinds of compositions await you.
 You'll need to plan ahead of time for successful fog photography. Photo by: 'Unsplash'.
Once you’ve picked a location, it’s time to plan for the light. Use an app such as PhotoPills to figure out the direction that the sunrise light will take.
From there, you’ll need to monitor the weather closely so that you can head out at the drop of a hat when foggy conditions are likely. For this, we suggest the WeatherPro app, which will give you a reading of the air pressure and relative humidity. Look for high humidity and air pressure overnight in addition to cold temperatures – this combination is often a good sign for foggy or misty conditions in the morning.
 Fog doesn't happen all the time but when it does, it's magical. Photo by: 'Unsplash'.
#9. Focus Manually
While you may be hesitant to shoot in manual focus, this is an important switch that you’ll have to make to ensure that you’ll end up with sharp and usable shots. The fog will reduce the contrasts and scatter the light in the scene, turning it effectively into a low-light situation. Fog also doesn’t tend to stay stagnant – rather, it will constantly be on the move. In these conditions, it may be very difficult for the autofocus function of your lens to find and lock in the focus.
 Manual focus will help you to achieve sharper images. Photo by: 'Unsplash'.
As such, it’s best to work with manual focus when photographing fog. With all the haze in the frame, you’ll need a sharp focal point to draw the viewer’s eye into the scene. The accuracy of your focus will help to improve your compositions. Once you’ve switched to manual, just look for something in the frame that is sharp or has a bit of contrast. Switch to Live View, zoom in with the magnifier and adjust your focus accordingly. After your focus is set, simply lock the focus so that you won’t need to set it again unless you decide to change the composition.
 Set your focus on the point of most contrast. Photo by: 'Unsplash'.
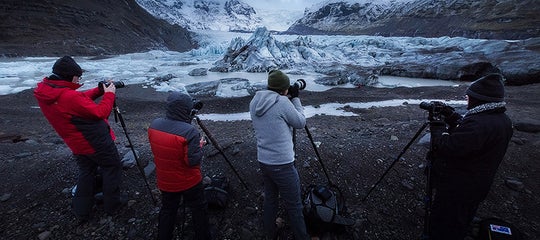
#8. Use a Tripod
As you’ll be shooting with manual focus in difficult lighting conditions using Live View, it’s a good idea to mount your camera to a tripod. This vital piece of equipment will be particularly useful in helping to reduce camera shake and blur.
 Use a tripod to reduce shake and blur. Photo by: 'Unsplash'.
By using a tripod, you’ll be able to shoot at a lower ISO, which will result in less noise in your images. You can also use faster shutter speeds to freeze the motion of the fog without having to compensate for other values in the exposure triangle in order to produce a well-balanced and sharp exposure.
 You'll need a tripod in low light environments with fog. Photo by: 'Unsplash'.
If your aim is to capture the motion of the fog or fog flows with a long exposure, then you’ll definitely need a stable tripod to keep your camera in place for the duration of your shots!
- See also: Ultimate Guide to Long Exposure
#7. Switch to Manual Mode & Exposure Compensate
Getting your exposure right when photographing fog can be downright challenging. If you’re shooting fog during the day, then the amount of light being thrown around may confuse your camera’s automatic light meter and lead to overexposed images whereas at night, there may not be enough ambient light for it to pick up on.
 Manual exposure will help you to achieve a well-balanced shot. Photo by: 'Unsplash'.
As such, it’s a good idea to switch your shooting mode to Manual, which will give you complete control over your ISO, aperture and shutter speed. Whenever possible, try to keep your ISO as low as possible to prevent introducing unnecessary noise. Use an aperture that is close to natural human eyesight, such as f/5.6, and set your shutter speed according to the effect that you want to achieve. If you want to freeze-frame the fog, then use a faster shutter speed. For silky, smooth fog, use a slower shutter speed for a longer exposure.
 Use the histogram to ensure there aren't any blown-out highlights or shadows. Photo by: 'Unsplash'.
Take care to refer to your camera’s histogram as you’re taking your images. If there is any clipping in either the shadows or the highlights, then simply exposure compensate with either one or two stops in the appropriate direction.
#6. Harness the Fog to Demonstrate Depth
If there’s one thing that we know about fog, it is that it reduces contrast within the scene. This can make it difficult to create any sense of depth in your shots, resulting in flat and boring compositions.
 Fog can be used to demonstrate depth between the foreground and background. Photo by: 'Unsplash'.
You can work around this by getting closer to your subject. How close you’ll need to get will depend largely upon how dense the fog is. The more distance you place between yourself and the subject, the less contrast that you’ll achieve and the more it will seem as though it is fading into the fog.
 Fog can separate the trees and reduce clutter in a forest. Photo by: 'Unsplash'.
Another way to demonstrate depth with fog is to layer it between foreground elements and the backdrop, as is most often done with forest photography. It involves using the fog to reduce the clutter in the background, create separation between the trees and to make the entire scene appear a bit more three-dimensional.
- See also: Depth of Field in Photography
#5. Use the Light
Have you ever seen light rays or pockets of light streaming through the fog? These short-lived moments often occur just after sunrise and can result in haunting, mysterious and even breathtaking images.
 Sunlight is magical when there is fog around to catch the rays. Photo by: 'Unsplash'.
To make the most of this kind of light, you’ll need to position yourself so that the light is coming from behind the fog. This way, it will illuminate it, creating a mystical and dreamy effect. For an even stronger composition, find an interesting subject to focus on, which has enough contrast to stand out from the density of the fog and the bright layers of light.
 Artificial lighting can be used at night to light up the fog. Photo by: 'Unsplash'.
If you’ll be shooting at night, then try using artificial light sources to illuminate the scene. Street lamps, neon signs and traffic lights are perfect for this purpose. Keep in mind that it will be a lot easier to expose as the fog will scatter the light, making it appear brighter at night. This is a good thing, as you may be able to get away with using a lower ISO, narrower aperture, faster shutter speed or even shooting handheld.
- See also: Best Lenses for Night Photography
#4. Make Use of Shapes and Silhouettes
 Shapes and silhouettes can make for haunting photographs. Photo by: 'Unsplash'.
We’ve already mentioned that one of the best ways to photograph fog is to position yourself so that you are facing towards the light. This is also the perfect time to emphasise shapes and silhouettes within the scene, which can make for interesting subjects.
 Use the fog to create silhouettes at night. Photo by: 'Unsplash'.
Using a person as a silhouette can add an eerie or creepy element to your fog photography, particularly when shooting at night.
- See also: Ultimate Guide to Winter Photography
#3. Keep an Eye on the Fog as it Moves
Once you’ve set up your camera and framed the composition, it’s a good idea to keep an eye on the way that the fog is moving through the scene. At times, it may obscure your subject, rendering the composition useless. During other times, it might be in the perfect position, creating a whimsical and fascinating effect!
 Fog is continuously moving, so make sure it doesn't cover up your subject or any important elements. Photo by: 'Unsplash'.
To make sure that you don’t miss out on any possible shots, keep shooting as the fog makes its way through your camera’s frame. When you look back on the images later, you may find one that you particularly like, which you may not have noticed occurring when you were out in-field!
#2. Experiment with the Texture
The shutter speed that you choose to use for your fog photography will have an impact upon the texture of the fog in your images. If you want to maintain the realistic look of fog, then it’s best to shoot with a faster shutter speed for a shorter exposure time.
") Your shutter speed will affect the texture of the fog. Photo by: 'Unsplash'.
Your shutter speed will affect the texture of the fog. Photo by: 'Unsplash'.
On the other hand, if you want to capture gorgeous, silky fog flows, then you may need to employ the use of neutral density filters to achieve longer shutter speeds.
#1. Avoid Condensation
Last but not least, when shooting in the fog, it’s likely that you may end up with some condensation on the front element of your lens or even inside your camera. This is due to the level of moisture in the air and can be problematic if you want to continue your shoot.
 Take care to avoid condensation when shooting in foggy conditions. Photo by: 'Unsplash'.
To avoid condensation on the front element of your lens when shooting in fog, bring a lens cloth so that you can wipe it away if it occurs. It’s much more difficult to defog a lens that has condensation on the inner elements, so make sure to put your camera back in your bag before transitioning between humid and cold areas (such as from the outdoors to your car). Check out this article for more information on how to prevent condensation, as well as what to do if you end up with fog forming inside your camera or lens.
About the author: Serena Dzenis is a landscape photographer based in Iceland. You can find more of her work on her website or by following her on Facebook and Instagram.
Have you got any other tips for fog photography? What have you tried that has or hasn't worked? Share your thoughts by leaving a comment below!

Serena Dzenis is an award-winning photographer, author and journalist who is based in Iceland. She has written numerous articles for the Iceland Photo Tours website, both about photography in Iceland as well as the more general aspects of using a camera.
Well-known for her uniquely romantic photographic style and love for the winter season, Serena is not afraid of harsh conditions and in making the most of what this planet has to offer. Her open and friendly nature has seen her embracing challenges each and every day, teaching others to make their own future and to turn their dreams into reality.