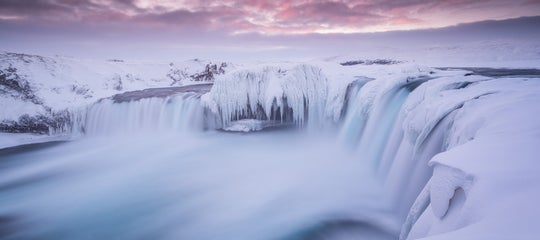
One second, you’re happily shooting at Gullfoss waterfall on the Golden Circle in Iceland, getting completely drenched by the spray as you huddle in the snow. Your hands are numb from the cold and you can’t even feel your nose.
- Check out these articles on Photography Techniques
- See these 11 Tips to Help You Capture Stunning Landscape Photographs
The next second, you’re back in your vehicle trying warm up with the heater up full-blast. You reach for your camera and attempt to play back the images when suddenly, you realise that there’s something different with the viewfinder. The centre appears to be almost white.
On closer inspection, it’s not actually a problem with the viewfinder at all; there seems to be a layer of fog all over your lens. You can see it as you look into the front element of your lens, trying your best to wipe it away. However, the fog doesn’t budge.
It soon becomes clear that the fog is deep within the elements – an area that you can’t immediately get to without disassembling the entire lens. Although it may feel like the end of the world, your camera is not destroyed and it’s not time to put landscape photography aside just yet. You’re about to learn a very valuable lesson in science that will help to improve the way that you use and care for your camera from hereon.
What is Lens Fog?
The fog that you’ve noticed inside your camera isn’t fog at all. It’s actually a layer of condensation.
Condensation is the opposite of evaporation; rather than water molecules transforming from liquid into a gas in a process known as vaporisation, the water changes instead from a gas in the air back into a liquid form.
The moisture that you’ll find inside your lens occurs when there are dramatic changes in the air temperature or humidity. It can happen when you go inside after being out in the cold, when you take your camera from a relatively cool environment such as your hotel out into a hot and humid geothermal area, or during any moment when your camera is unprotected in the way of atmospheric conditions such as rain, sleet, or rogue spray from a waterfall.
 Spray from a waterfall on a humid day can result in condensation on the front and inner elements of your lens. Photo by: 'Iurie Belegurschi'.
In general, condensation happens when the outer casing of your lens is cooled below what is known as the ‘dew point’ of the air inside. The dew point is simply the temperature at which the air inside your lens is no longer able to hold all of the water vapour, meaning that some of it will need to be released back into its liquid form. As such, the water vapour changes back into moisture, causing beading and fogginess to appear on the inside elements of your lens.
Can Condensation Ruin Camera Equipment?
Condensation itself will not ruin your camera. A fogged up lens also does not immediately mean that you will have sustained any permanent damage to your equipment.
What you do need to be worried about though is a build-up of condensation behind the lens over a period of time, which may result in the growth of mould. Needless to say, mould can and will destroy the internal workings of your equipment.
Having said that, the best thing to do is to try to prevent condensation from forming inside your camera or lenses whenever you can, and to remove the moisture as soon as possible once it has formed inside.
Easy Steps to Prevent Camera Condensation
The key to avoiding condensation is to keep the temperature of your camera and lens above the dew point. This may sound overly scientific and technical to begin with, but you don’t even have to have any knowledge of what the dew point is to be able to put these steps into action.
As we explained, exposing your camera to different temperatures – such as when you move from the blustery, rainy cold conditions of winter in Iceland back into your vehicle or hotel – can result in a change of temperature on the inside of your camera or lens. If your camera has been outside in a cold environment for a prolonged period of time, then moving it immediately back into a warmer environment may cause condensation to form.
Similarly, if you’ve been out shooting in a hot and steamy geothermal area such as the Icelandic Highlands, then upon moving immediately back into the cold environment of your vehicle, the dreaded problem of condensation may form.
To prevent camera condensation from forming in your camera or lens, simply follow these easy steps:
Step 1. Protect Your Camera
 It's easy to get moisture in your lens when shooting at a place like Skogafoss waterfall. Photo by: 'Iurie Belegurschi'.
If you already know that the conditions outside will be overly cold or warm and humid, or that there may be the prospect of getting wet – such as when you’ll be shooting in the mist at Skógafoss waterfall or getting in amongst the steamy fumaroles around the volcanic landscape of Lake Mývatn – then the best thing to do is to make sure that your camera is covered.
You can make a DIY rain cover yourself or buy one from a camera shop or online. A rain cover is basically a thin piece of plastic that covers your camera to prevent it from getting wet. You could also use a plastic bag or a sandwich bag from your own lunch.
Step 2. Keep Your Camera Warm
 Take steps to protect your camera when shooting in winter in Iceland. Photo by: 'Iurie Belegurschi'.
Although a rain cover will help to keep your camera dry, it won’t be very much help when it comes to protecting your camera from the cold conditions in Iceland. You could use your waterproof ski jacket as a cover instead, but that’s if you’re willing to part with it.
An alternative is to keep your camera close to your body, which will help to keep it warm.
This may be difficult though, as the last thing you’ll want to do is to knock it off the tripod as you’re taking a shot. Some people say that handling your camera without your gloves on may transfer some heat from your skin to the camera itself, though when it’s cold in Iceland, you’ll hardly want to reveal your fingers to face the true extent of the biting wind.

One solution to this problem is the Camera Duck All Weather Cover, which is waterproof and designed to fit most DSLR cameras.
It has 4 small internal pockets into which you may place large air-activated heat packets, which will help to keep both your camera and your fingers nice and warm while you’re using it.
This device is primarily used for telescopes and by stargazers, though it will work just as well for winter landscape photography or when shooting the Northern Lights in Iceland. The only dilemma is that it requires a power supply which you may not necessarily have as you travel around to remote places.
Step 3. Allow Your Camera Gear to Acclimatise
 Let your camera acclimatise when moving from snowy conditions outdoors back into a warm hotel room. Photo by: 'Iurie Belegurschi'.
The final step to preventing condensation from forming inside your camera gear is to allow your equipment to acclimatise.
That means that as you move between one environment to the next where there are drastic changes in temperature or conditions – such as from shooting the Northern Lights outside to the warm confines of your van – you should make sure that you place your gear securely inside your camera bag with all the zippers and compartments closed. This will provide some degree of insulation for your camera, which will help to regulate temperature changes within the internal components.
This process of acclimatisation will allow your camera and the internal air to reach the same temperature as the surrounding environment without condensation forming. So rather than whipping your camera out of the camera bag as soon as you get back into your vehicle, slowly introduce it to the temperature change instead and make sure that any hot hair blasting from the heater doesn’t blow directly into your lens.
Depending on the temperature differences, you may need to leave your gear in your camera bag for a few hours to fully acclimatise. Although this may be a drag, it’s a good way to prevent condensation from occurring.
What if the Condensation Has Already Formed?
If condensation has already formed inside your camera or lens, don’t panic! There are a few things that you can do to remove the condensation so that you can be back out shooting in the landscapes of Iceland again in no time. The most important thing though is to not detach your lens from your camera. Doing so may introduce more condensation into other parts of the elements.
Warming Your Camera Equipment
If your lens is foggy but you’re still out and about shooting, then try hopping inside your vehicle and turn the heater on. Make sure not to put it on full blast – you want just enough heat to gradually bring the core temperature of your camera and lens back up in order to remove the condensation. This might take some time, from 15 minutes to an hour.
If you’re near your accommodation, then you could head there and try using a hairdryer on low heat. Be careful to wave the hairdryer around, so the heat is not concentrated on any one spot.
Although warming your equipment may be helpful, sometimes the fog disappears, only to come back a little later. So keep in mind that warming your equipment quickly may not always be a sure-fire fix.
Silica Gel Packets & Dehumidifiers
Some people travel with silica gel packets; we take it a step further and travel with ziplock bags of silicone kitty litter. Both are great, in that they are made of the same substance – sodium silicate – which absorbs around 40 times its weight in liquid.
Try placing your gear inside your camera bag with a few silica packs tucked near the camera and lens. Make sure to remove the battery and memory cards, as well as to leave these compartments open, to allow better airflow and for moisture to be completely absorbed from within your camera.
You can also invest in a Hydrosorbent silica dehumidifier tin, which works in much the same way. The silica gel is enclosed in an aluminium canister and will protect around 3 cubic feet of space. This is most suited for use in smaller areas such as bags, suitcases or lens cases. Simply wait until your gear comes back up to the surrounding temperature and all of the condensation has dissipated before you take it out to use again.
By following the steps above, you’ll be able to prevent condensation from occurring inside your camera or lens in the first place. If disaster happens and it does occur, then you’ll be in a position to speed up the process with which the moisture transforms and dissipates back into the air, so that you’ll be able to use your equipment to capture the spectacular landscapes of Iceland once again.
About the author: Serena Dzenis is a landscape photographer based in Iceland. You can find more of her work on her website or by following her on Facebook and Instagram.
Have you got any tips for managing condensation when you’re out shooting in-field? Share them in the comments below!


