How many times have you taken a photo of a sweeping scene, only for it to seem like it’s missing something crucial when you view it later on?
- Learn about The Best Lenses for Landscape Photography in Iceland
- Discover this Interview with Alexandre Deschaumes
- Check out this article on Understanding Histograms in Landscape Photography
Without any frame of reference, it is difficult for our brains to process how small or large the surrounding world is. This includes the immensity of landscapes, particularly the expansive locations that can be found in Iceland.
To put the depth back into a monumental Icelandic vista that seems larger than life, we need an object of a known size to give us clues about the ‘scale’ of what we are looking at.
Scale is a key compositional technique that is used in landscape photography to convey the size of a scene. When utilised appropriately, it can make the various components of your photo look their natural size again, without you having to reframe the entire composition.
In a more creative sense, this technique is especially useful for creating depth and can even add a visual element of drama to an otherwise flat scenario.
So how is it possible to add scale to a photo when you are on location in Iceland?
Introducing Yourself or Another Element to the Scene
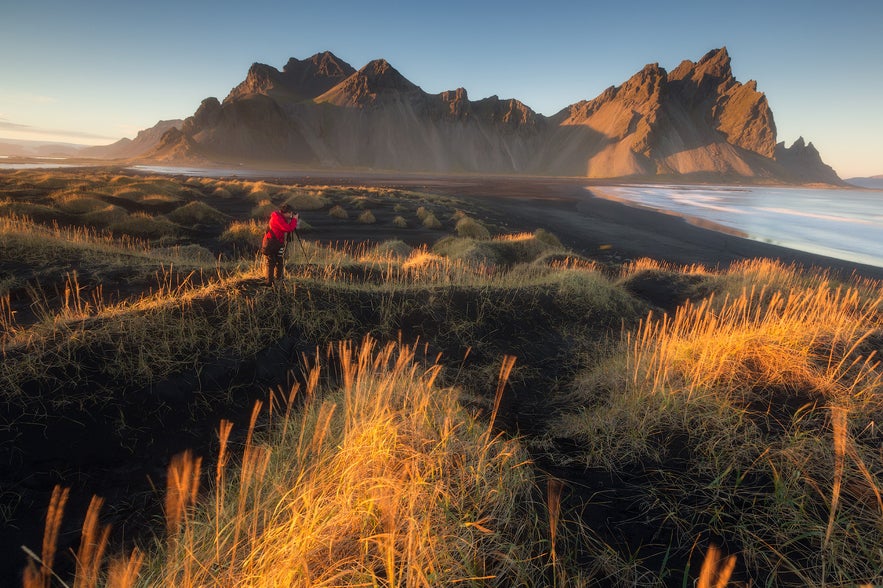
The easiest way to add scale is by putting yourself, someone else, or another object of a known size into the landscape. You can use elements such as trees, animals, cars, planes, or even buildings.
By deliberately featuring objects within your shot that the brain can recognise and relate to, you will be able to achieve a sense of scale and distance, whilst placing the size of different components back into proportion. So whatever you decide to use, whether it is yourself or something else, your subject needs to be the correct size in comparison to the Icelandic landscape.
 Use yourself or another element to convey a sense of scale. Photo by: 'Iceland Photo Tours'.
When adding scale, make sure that the difference in sizing is clear without too many distractions, otherwise the effect will be lost.
Pay attention to how objects are arranged within your frame and the distance between the foreground and the background. Ideally, you will want to place yourself or the object in the mid to far distance of your frame, in order to highlight the magnitude of the surrounding scenery.
If you will be using yourself or someone else for scale, then explore the location to find your composition first. Once you have found your composition, you can look for a place within it to position yourself that will be close to the area in which you want to demonstrate the contrast of size.
You could try standing in front of the mighty Skógafoss waterfall, overlooking the cliffs at Dyrhólaey or peering out of the giant mouth of an ice cave. Gazing into the distance will allow you to blend into the landscape, rather than focusing the attention on yourself.
 Standing in front of Skogafoss waterfall in south Iceland. Photo by: 'Iurie Belegurschi'.
After deciding where to place yourself, set your camera to take multiple photos for about 15 minutes in 5 second intervals with the timer setting after an initial ten-second delay. This will give you enough time to get to where you need to be within the landscape and to test how the scale changes when you place yourself in different spots within the shot.
Make sure to try a number of different positions — you’d be surprised at how just a small amount of variation can change the depth, throwing the entire photo off-balance.
Of course, you can always experiment by including interesting foreground elements or contrasting small and larger objects, such as in this photo. Here, you can see a person walking along a mountain ridge in the Highland area of Kerlingarfjöll, as well as the colourful rhyolite mountains behind him.
By using the elements within the scene, such as patterns in mountain created by moss and snow, the eye is guided through the images and is able to achieve a sense of the vastness of the surrounding landscape.
 Kerlingarfjoll is a great place to feature a person for scale. Photo by: 'Iurie Belegurschi'.
Choice of Lens
Another way of adding scale to your landscape photos in Iceland is to create depth by using different lenses to produce a sense of distance.
A telephoto lens will allow you to ‘compress’ the scene when you zoom in, separating the distance of your foreground subject dramatically from the background. In turn, this will make the background appear truly large. You can use this technique to photograph small objects in front of something massive, such as this farmhouse in front of a mountain range, which makes the mountain look as tall as it should be.
 A telephoto lens can compress the scene. Photo by: 'Iurie Belegurschi'.
On the other hand, using a wide-angle lens will allow you to capture more of the Icelandic landscape, though it will also make big things like mountains or rock formations look smaller. This is a direct result of the distortion effect of wide-angle lenses.
You can actually utilise this technique to make objects in the foreground look bigger, by focusing on something like a flower or leaf. In doing so, you will be able to draw the viewer into the scene and convey distance in a much different way.
 Wide angle photo of the flowers at Godafoss waterfall. Photo by: 'Edwin Martinez'.
Consider this photo below of Ingjaldshólskirkja, a famous white church on the Snæfellsnes Peninsula. Rather than enhancing the expansiveness of the landscape, the focus is on the purple lupines in the foreground. This type of scaling down allows us to connect with more intimate components, creating a different mood altogether.
Try tilting your camera either up or down slightly when using this technique, as it will either increase or reduce the effect.
 Tilting your camera can create a sense of scale. Photo by: 'Iurie Belegurschi'.
Now that you have an understanding of how to use scale in Iceland as a compositional technique for landscape photography, try all of the ideas and variations that might come to mind. Experiment with placing either yourself or another object within the scene. Select the best lens to use for either scaling up or scaling down the size of the landscape within your frame. Doing so will allow you to convey depth and distance in a meaningful and dramatic way. It will also expand your creativity and add another dimension of intrigue to any photos of already stunning scenes that you might take in Iceland.
About the author: Serena Dzenis is a landscape photographer based in Iceland. You can find more of her work on her website or by following her on Facebook and Instagram.
Are you ready to test out this compositional technique in the vast surrounds of Iceland? Check out our 3-Day Photo Workshop in the Icelandic Highlands!


