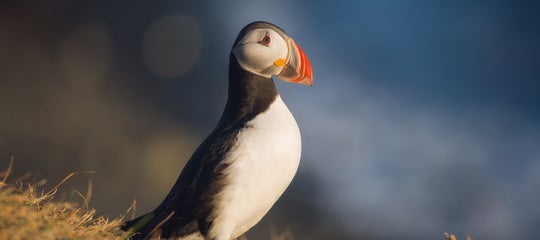
Photographing puffins in the Midnight Sun in Iceland… it’s daytime, they’re cute and photogenic, so it can’t be that hard, right?
- Immerse yourself in our Interview with Raymond Hoffman
- Check out this 5-Day Summer Photo Tour | Black Sand Beaches, Waterfalls & Glacier Lagoons
- Discover The Best Places to Photograph Puffins in Iceland
Unfortunately, as any seasoned wildlife photographer will tell you, photographing birds can be a challenging job! No less photographing them in Iceland, a place where even in summer, the elements along the coast can give you a battering. So how exactly does one locate these unbelievably quirky little birds, approach them and capture their personalities on camera without sacrificing a hand and a foot? Read on to find out!
Which Lenses Are Best to Photograph Puffins?
A major part of puffin photography is being able to sneak around without being noticed, so as not to distract or disturb the birds by causing them to fly away. Therefore, a long lens – such as a telephoto zoom – is the perfect length to quietly and successfully capture puffins on your camera.
Anywhere from a 70-200mm or a 300mm lens will be just fine. If you want to take it one step further then of course, you can always invest in a 400mm or a 600mm, depending on how far away you want to be and how close you want to get!
In addition to a long lens, keep in mind that when photographing puffins, you will want clear and sharp shots that bring out the details, while creating a soft out-of-focus effect for the background. As such, maintaining a fast shutter speed with low ISO is important. So when choosing a lens, pick one that has a faster aperture, ranging anywhere from f/1.4 to f/2.8.
- See also: The Best Lenses for Wildlife Photography
Keeping the Camera Steady
If you are using a telephoto lens ranging anywhere from 200mm to 600mm, then a good tripod system is a must, simply because you will find it very difficult to hand-hold a heavy lens like one of these without shaking!
Shooting on a tripod will allow you to maintain clear and sharp shots. It will also give you the opportunity to use a slower shutter speed if you want, as well as to reduce noise by shooting at a lower ISO. There is nothing appealing about a photo of a puffin that is soft, out of focus or noisy! Although noise can be dealt with in post-processing, lost detail cannot be recovered, so make sure to get your settings right in-field.
 Using a tripod with a telephoto lens will guarantee sharp and steady shots. Photo by: 'Iurie Belegurschi'.
Camera Settings for Photographing Puffins
Shutter Speed
Puffins are small birds that can move very quickly. To capture them at their best, you will need to maintain a fast shutter speed – particularly when they are in flight!
To create a feeling of motion, you can shoot at a slightly slower shutter speed to blur the puffin’s wings. However, if you want to freeze the action, then try setting your shutter speed between 1/1000 and 1/1600 of a second. In some cases, a slightly slower shutter speed may be okay, depending on how fast the puffin is moving or flying.
For puffins that are just sitting around and not being active, you can use a slower shutter speed. Anything around 1/250 to 1/800 of a second will be great to keep them sharp!
Depth of Field
When photographing puffins, the aim is to retain the bird in full detail, rather than just focusing on one eye or blurring its back or tail. So instead of shooting wide open at f/1.4, try stopping down to f/8 with a higher ISO, which will allow you to capture more parts of the puffin in focus without blurring other important aspects.
 Creating bokeh with a puffin. Photo by: 'Iurie Belegurschi'.
For a beautiful, clean background or to create a gorgeous bokeh effect behind the puffin, you will need to isolate the bird from the background. This can be difficult, simply because the puffin may not tolerate you walking around it to plan your shot and also because it may decide to walk around a lot by itself!
The first thing you’ll need to do is to make sure there is a good distance between the puffin and the objects behind it, such as a cliff face, rocks, grass or even flowers. The greater the distance, the better the background blur will be. You will also need to pay attention to the distance between yourself and the puffin as again, the greater the distance, the better the background will look!
You can also try laying down on the ground when the puffin is nearby to keep yourself steady and unnoticed whilst creating good subject isolation. Also, be sure to check the background for unwanted objects, such as another puffin’s wing poking out of the head of the puffin in the foreground, or other things that might be distracting!
RAW vs JPEG?
To retain enough colour and detail for post-processing, it is important that you shoot your puffin photos in RAW rather than in JPEG. Shooting in RAW also means that you don’t have to worry so much about the white balance, which you can fix later on in post-processing.
The only issue with shooting in RAW with puffin photography is that your camera buffer could quickly fill up due to the large file sizes, particularly when you are shooting in burst mode, causing your frame rate to drop to only 1-2 frames per second. Therefore, make sure to use fast memory cards, so that your images don’t get stuck recording.
How to Photograph Puffins Under the Midnight Sun
You might think it’s easy to photograph puffins with all that light, particularly when it’s beautiful and golden. However, unless you know what you’re doing, you might not be able to capture them under the Midnight Sun at their best!
When you think you’ve got your settings right, take a single image first, then have a look to make sure that it is sharp and in focus. If everything looks good, then shoot in bursts of 5-10 frames at a time, particularly if the puffin is moving. You might end up with hundreds or even thousands of photos just to get one amazing shot of a puffin with perfect details.
 Puffins sometimes move quickly, particularly when they're together! Photo by: 'Iurie Belegurschi'.
Given that the sun will be warm and glowing, try to position yourself with your back towards it. Sometimes, having the sun to the far left or right side of you is okay, but while it is behind you, it will give you the best light to photograph puffins.
Although you’ll be working with near 24 hours of daylight, try shooting during the “golden hours” around midnight or in the wee hours of the morning. You will find that this period of time provides the best opportunities for puffin photography, because fewer people will be around (let’s face it, they’ll all be in bed) and because the puffins will be active and busy looking for food.
Try not to take photos of puffins in flight during a cloudy day. Puffins are mostly black and white in colour, so they won’t look very good with white or grey backgrounds behind them either.
Capturing the Puffin’s Personality
To perfectly capture a puffin’s little (or sometimes huge) personality, be patient and wait for it to act naturally. Images where puffins are just sitting around sleepily can be boring, so try to capture the action instead. Sometimes they huddle in little groups, or even stand around looking quite aloof with their friends. Experiment with your shots – try to develop your skills and techniques by photographing them in different positions, such as nesting on cliffs, flying and coming in to land.
 Puffins have quirky personalities. Photo by: 'Iurie Belegurschi'.
As humans, our eyes intrinsically look for faces to fall upon first. So when you capture puffins, it is always best to focus on the nearest eye of the bird. For puffins in flight, set your focus to auto and aim it on their head or chest. This will ensure that you get enough of the front of their body in focus for the viewer’s eye to rest on.
Where to Find Puffins in Iceland
Now that you have your equipment set up, you need to find puffins to photograph. So where can you find puffins in Iceland?
Iceland is home to the largest colony of Atlantic puffins in the world. Over 6 million of these cute and clumsy birds return to nest here every summer. In fact, they nest in the same places in which they were born and only where there are other puffins around. So when you find one, you’re bound to find hundreds more!
The nesting period occurs throughout summer in Iceland, from June to September. There are some spots along the coast of Iceland where they colonise in vast numbers. One of these spots is Dyrhólaey, a promontory on the southernmost point of Iceland. With its dramatic and unusual basalt sea arch, this area is absolutely fascinating for capturing puffins in their thousands.
Another spectacular spot for puffin photography is at the Látrabjarg birdwatching cliffs in the Westfjords, the most westerly point of Iceland and Europe. Here, you will find many trails close to the cliff’s edge, where you can easily get close to puffins as they nest or fly out to sea, searching for food.
How to Approach Puffins
When puffins are nesting, they are often very easy to see and approach. In some cases, you can even get close enough to touch them. With such little fear of people, it is therefore your job to respect the puffins and to ensure that you don’t place their safety at risk.
To ensure that photographing them is as pleasant for you as it is for the puffins, always approach them quietly and slowly. If you are approaching them on a cliff, then pay heed to the safety markers and don’t get too close to the edge. This is because puffins dig their burrows into the sides of cliffs. If you get too close, then you might collapse one of their nests.
 Puffins nest in Iceland. Photo by: 'Iurie Belegurschi'.
Needless to say, never try to touch a puffin, unless it is in need of rescue. Don’t try to feed them either, as they are very capable of hunting for their own food supply. If a puffin starts moving away from you, then it is probably feeling threatened, so don’t try to approach it. They also feel threatened when you look directly at them.
Above all, different puffins have different levels of tolerance for human interaction. The key to successfully photographing puffins is to make them feel safe and natural. It’s all about patience and respect. If you disturb one puffin, then you might unsettle the entire colony. If one takes off in panic, then the others may follow. So in all cases, be mindful of the puffins and you will be bound to capture some beautiful shots to take home.
Good luck and have a fun time photographing the puffins in Iceland during the Midnight Sun!
About the author: Serena Dzenis is a landscape photographer based in Iceland. You can find more of her work on her website or by following her on Facebook and Instagram.
Are you ready to try your hand at photographing puffins in Iceland? Join our 11-Day Midnight Sun in the Westfjords Photography Workshop for your best chance to capture these beautiful birds!


