The Orton Effect was developed by Canadian photographer, Michael Orton. It adds a soft glow to photos and is usually applied when editing landscape photography. Originally, the effect was achieved by sandwiching a few pieces of film together. Nowadays you can replicate the Orton Effect without any difficulty by using post-processing software, such as Adobe Photoshop.
- Explore these articles on Photography Techniques
- Discover these 5 Simple Lightroom Post Processing Tips for Landscape Photography
In this article, I’ll walk you through one method of how to create this photoshop dreamy effect. First though, let's take a look at what it is, as well as when and why you might like to apply this luminous effect to your photographs.
What is Orton Style?
The Orton style is used predominantly by photographers who like to capture landscapes. It is achieved digitally by creating duplicate layers of an image. You can create the Orton effect in Lightroom using a single layer, though it’s more often produced with more than one layer.
The key is to have one or more layers blurred and merged so that the blending of them creates the desired effect.
Like most digital techniques, it is possible to create an Orton effect Photoshop action to make life easier. This can lead to images which all look very similar, even when the subject material is different. However, keep in mind that being in control of any technique used to enhance digital images is important. If you leave the creation of an effect to presets or actions, then you can end up with a portfolio of very bland photographs. As such, it's always best to apply the Orton effect sparingly, rather than to every single image that you produce.
In photography, it’s important to use any post-processing filter or technique well. You should never make use of these things just because they are popular. First, you must consider whether your photo will be improved by adding the enhancement. Don’t make edits using the Orton effect or any other technique just because they happen to be trending at the moment on 500px or Instagram.
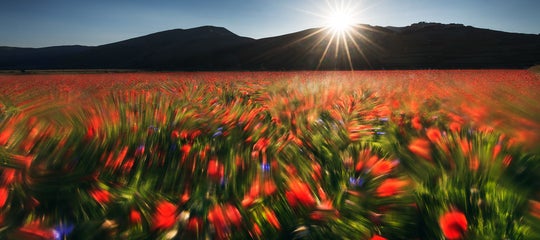
 The Orton Effect is a very popular technique in landscape photography. Photo by: 'Daniel Kordan'.
- See also: Ultimate Guide to Forest Photography
When to Apply the Orton Effect
Careful consideration must be given to each photo to which you want to apply the Orton effect. You must ask yourself if your photograph will benefit from the addition of the Orton style.
I encourage you not to use this effect to try make poor quality photos look better. Since the beginning of photography, there have always been photographers who want to salvage a bad picture by invoking some magic technique on it. This desire has only become exaggerated in the digital age. You don’t have to look far on websites like 500px to find less than interesting photos that have had the Orton effect applied to them.
So rather than using the Orton effect willy-nilly, think about how adding the effect may enhance a photo that you already like. If the photo does not already have a strong composition or interesting lighting conditions, then it will rarely end up looking much better.
Think of using the Orton effect as similar to applying too much sharpening to an out of focus photo. You should not do it because it will look terrible. Knowing when to discard photos that are poor quality will help you develop as a photographer. Wasting time on applying digital effects with the aim of fixing problems does not result in better photographs.
Real skill in using any photographic technique, either in post-processing or in-camera, is knowing which images are best for the application. We have seen with the prolific overuse of HDR that most of the time, the final effect is awful. With the increasing ease of creating HDR images, there has been a great display of kitsch photographs on every platform.
 Consider when and when not to use the Orton Effect for your landscape photography. Photo by: 'Daniel Kordan'.
Applying any technique to a photo just because you know how to do it, or because it’s easy, does not make it the right thing to do. Each image must be considered and the merits of applying a procedure to it weighed up. Oftentimes, the easier a digital manipulation is to apply to a photograph, the danger of it becoming cliched advances rapidly.
Most photographers want their photos to stand out and display their unique style. The poor use of the Orton effect, or any other method, will not result in your own style. This is because anyone can learn to do it. Bringing style to your photography takes time. Digital enhancements can add to style, but should not be relied on to create it.
- See also: Ultimate Guide to Landscape Photography
Applying the Orton Effect Well
Recognising the photos that will be improved by the Orton effect is the first step in learning to use it well. Once you’ve identified the right images, it becomes a matter of experimentation in applying the effect to see how well it will work. The more experience you gain, the easier it is to know which photos are likely to benefit from the effect.
Tasteful application of the Orton effect requires experience. When we want to learn something new, there’s usually more to it than taking a course or learning the correct procedure. These things are only part of the process. Studying the work of photographers who use this method, as well as the photos you like, can help you to build your skills. You will develop an appreciation for how to apply the technique and which photos will look best with it.
I would suggest starting by looking at the photographs of Michael Orton. He is the photographer that developed the technique, so he has the longest experience in using it. Many of the Orton effect images on his website are more like paintings. He has applied the effect in the extreme and it works.
You may disagree, as it comes down to a matter of taste.
 Lots of landscape photographers use the Orton Effect. Photo by: 'Daniel Kordan'.
Search for other photographers using this effect and find some you like. Study their photographs. It will be most beneficial to find photos of a similar style to your own. See what kind of photographs they apply the method to. Look at the degree of the effect to understand the amount each image is changed by the effect. Think about how obvious or how subtle the look is.
Doing this will help you develop your taste and decide how you want to apply the Orton effect to your own photography. If you only work through a tutorial on the steps required to produce the effect, then it’s likely you’ll not master the technique so well.
It’s all a matter of taste and each of us perceives this uniquely. Taste is a combination of qualities that are beyond analysis. The trick is to study the images of photographers who have a similar taste to you.
How to Generate a Luminous Effect in Photoshop
As with every digital post-processing technique, there are many ways to achieve the same results. Here I will outline one method of creating the Orton effect in Photoshop. Use it as a starting point and then experiment to make your own workflow.
Step #1. Duplicate the layer
Open the photo you have chosen to apply the Orton effect to in Photoshop and then duplicate the layer. Ctrl + J (Cmd + J) will do this.

With the top layer selected go to the top menu and choose Image>Apply Image.

When you do this a window will pop up. In this window select Screen in the Blending box options. Then click OK.

Step #2. Soft light
Duplicate the top layer. Then in the Blend mode option in the Layers Panel, select Soft Light. You can experiment with the blending modes as each of them will give a different result. I find Soft Light works well often, but you may prefer to use Multiply, Overlay or one of the other blend modes.
Once you have experimented with applying this technique, you will have more of a feel for the look you are wanting to create.

Step #3. Gaussian blur
Now you have three layers, select the top one. Then, in the top menu, go to Filter>Blur>Gaussian Blur. Adjust the radius of the blur. How much you apply will depend on the resolution of your image and how strong you want the effect to appear.

The lower resolution your image, the lower the radius needs to be to blur your photo.
You can turn the Preview option on and off and adjust the area in the pop up box. This will help you see what’s happening more clearly.

Select the top two layers, right click and select Merge Layers.

Step #4. Layer mask
Now the effect is clear. You will almost certainly want to make further adjustments. To do this add a Layer Mask to your new top layer. Brush away parts of the layer containing the effect until you are satisfied. I do this using a brush at about 30% opacity. This allows me to make the changes more subtly.
By turning off the visibility of the bottom layer you can see where the brush has had an affect on the mask.

Dark areas and shadows do not naturally glow. You will notice I have used the brush to erase or diminish the effect in the darkest parts of my photo. This is to keep it from looking too surreal.
The more painterly you want your photo to look, the stronger you can make the Gaussian Blur and the less you will adjust the layer mask. You can also control this when you choose the type of layer mask you use in Step 2.
This series of steps is by no means exhaustive; it's just enough to get you started. I hope you will experiment with the variables. Try to develop your own way of implementing the Orton effect to your landscape photography and as you experiment, make notes. It’s easy to forget what you have done sometimes, especially if you have many levels you have undone in the process.
Creating an Orton Effect Photoshop Action
Once you’ve played with this effect on many images, you may want to streamline your process. This is when you can create a Photoshop action.
Photoshop actions are used to speed up the repetitive parts of the process. Once you have created a basic action in Photoshop, then you can then further refine and customise the look of your image.

To make a Photoshop action, simply click the Create New Action icon at the bottom of the Actions panel. Name your action and click Record. Now work your way through the previous steps outlined above, right until before you start using the brush on the mask.
When you are at this point, click on the Stop Playing/Recording button at the bottom of the Actions panel. You have now created a one click action that you can apply to any photo you open. This will speed up your post-processing workflow.
You may like to create many Orton effect actions. Tweak each of them separately to give you different results.
Once you have applied the action to an image, you can continue to make adjustments. This will allow you to customise each image to the way you want it to look. If you have similar photos in a series, then using the same action will be okay. With photos that are very different from each other, you will need to do more customisation.
 The Orton Effect is a popular photography technique that you can use to create successful photographs. Photo by: 'Daniel Kordan'.
- See also: Ultimate Guide to Photographing the Moon
The Orton effect is a very popular landscape photography technique and there are many examples of it on websites like 500px. Take a look at what's out there and bookmark the ones that you like the most. Get a feel for what other photographers are doing. How are they making the best use of this effect to make the most attractive photographs?
As with any new technique that you learn, you may initially want to apply it to all of your photographs. Instead of being trigger-happy, be selective instead. Carefully choose the photos that you think will work well when the Orton effect is applied but don’t lock yourself into doing only what others have done before you.
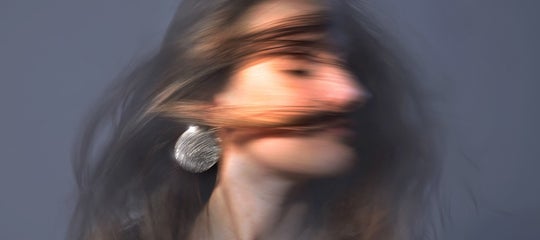
Once you have applied your personal method of using the Orton effect to some landscape photos, try it with other genres of photos as well. You can even use it on portraits, cityscapes and still life imagery. Be as creative as you dare.
About the author: Kevin Landwer-Johan is a photographer based in Thailand. You can find more of his work on his website or by following him on Facebook and Instagram.
Learn the post-processing techniques used by our award-winning photography guides. Join one of our landscape photography tours and workshops. Each of our guests will receive a free collection of post-processing tutorials, valued at over $1500!