
Photographing Waves in Iceland | In Field to Post Processing


Do you like seascapes? How about photographing the flow and motion of the waves? Yes? Read on to find out all about photographing the ocean's waves in Iceland.
- Join us on this 11 Day Iceland in Autumn Photography Workshop
Iceland is an island surrounded by oceans, making it one of the best places that you can practice seascape photography. The coastlines all around are stunning, though it is best known for the Snaefellsnes Peninsula and the incredible South Coast – home to the magical Jökulsárlón glacier lagoon and the Diamond Ice Beach.
In this article, I'll teach you the basics that you need to know for photographing waves in Iceland, all the way from taking the photo in-field to the post-processing that you'll need to do afterwards.
I personally love photographing seascapes more than landscapes. Being able to include the unique flow and movement of water makes an image more dynamic. Adding the thrill of photographing one plus the satisfaction it brings when I see the result on my camera’s LCD are only some of the reasons why I really love doing it.
 Be prepared for ice beach photography in Iceland. Photo by: 'Patrick Marson Ong'.
Before we proceed on the workflow, here are a few things for you to consider when photographing in wet conditions... be it by the sea, river or lakes.
-
Suit Up: Invest on neoprene waders or overshoes. It will keep you dry, warm and protected at all times.
-
Sturdy Gear: Mid to pro level tripods is a must. Travel series tripods specially those with light and very thin legs can easily break. They are not built to get bombarded by rushing waves.
-
Remote Trigger: Continuously pressing the camera’s shutter button will lead to camera shake.
-
Rain Cover: Protect camera from water sprays/splashes.
-
Cleaning Cloth: To wipe away unwanted sea and water sprays/splashes etc.
-
Common sense and timing: Above all else, look at how the waves behave, stand there and observe for a couple of minutes. Always check your surroundings. If in doubt, turn back. You can always try again. Swells and waves have a pattern, so keep in mind that there’s always a big one coming up between the smaller ones.
 Look at how the waves behave before you get out there in the midst of it. Photo by: 'Patrick Marson Ong'.
Now you’re ready for some action. Let’s begin.
I will be using my shot from Breiðamerkursandur, Iceland or more popularly known as, the Ice beach as an example for this workflow. Let's start from the beginning, which is how to actually take the shot in-field.
Step 1: Visualize your composition
Look for uncluttered foreground objects. Make sure that there is enough room for the water or waves to play in.
Here’s a sample image from the scene: Waves are coming from my left and receding back to the sea.
 Visualise your composition. Photo by: 'Patrick Marson Ong'.
Step 2: Plant your tripod
Make sure to place the legs of your tripod against a rock or deep into the sand. Why? This will prevent any unnecessary movement coming from the rushing or retreating water and waves.
Step 3: Set camera’s shooting mode to continuous/burst mode
This will enable you to capture movement of the water and waves continuously, frame by frame. Use the remote trigger to minimise shake as you're doing so.
Step 4: Look for the ideal speed
A wave’s motion depends on a lot of factors, such as wind and surface tension. The ideal shutter speed range to capture the wave is somewhere from 0.3” – 1.0” seconds, in order to gain the “swirling” pattern. Keep in mind that shorter shutter speeds will freeze the wave’s motion. Fire a few test shots until you get the effect that suits your taste.
Step 5: Get your background right
Focus first on capturing a well exposed background. Then you can shift your focus to anticipating that perfect wave for your foreground.
Step 6: Capture all of the motion
Press and hold the shutter button of your remote camera trigger, from the moment the waves enter and leave your foreground. This will enable you to capture the entire movement for a beautiful drawn-out effect.
Tip: Since water is white, and white is bright. Aim for 1 stop underexposed.
After following the steps above, I was able to capture a string of photos (below). Here are three workable shots from that series.
 Workable shots from a series. Photo by: 'Patrick Marson Ong'.
That’s it!
Does it seem too easy? If it does, then why not take it to the next level by combining the wave patterns coming from different shots within a series while bringing in a properly exposed background to produce one perfect image? It might sound hard but it isn't really. Here's how to do it!
I usually start by opening all of the images from the series simultaneously in ACR (Adobe Camera Raw), then making white balance adjustments, chromatic aberration removals and lens corrections. Make sure to synchronize the adjustments over all of the images before proceeding to PS (Photoshop).
 Synchronise your adjustments. Photo by: 'Patrick Marson Ong'.
For this series, I will be combining five different wave patterns for the foreground and blending in a properly exposed background.
 Five different wave patterns. Photo by: 'Patrick Marson Ong'.
After I have selected my foreground images, I will then stack them as layers in PS.
 Stack the layers in Photoshop. Photo by: 'Patrick Marson Ong'.
Next, I will use PS’s “Auto-Align layers…” function to perfectly align my foreground images. This is to avoid the unnecessary ghosting effects on my foreground objects caused by masking un-aligned layers.
 Auto-align the layers in Photoshop. Photo by: 'Patrick Marson Ong'.
I use PS’s layer masks to combine the waves together in one image. Make sure to flatten the image after.
 Make sure to flatten the image when you're finished. Photo by: 'Patrick Marson Ong'.
Last, I blend in the properly exposed background. To do so, I select (ctrl or cmd A) and copy (ctrl or cmd C) my desired background image and paste (ctrl or cmd V) over the flattened foreground image as a layer. Then I carefully combine both images together by hand using PS’s layer mask. Make sure to flatten the image after.
 Blend in the properly exposed foreground. Photo by: 'Patrick Marson Ong'.
Below is the combined multiple foreground pattern + properly exposed background.
 The combined image. Photo by: 'Patrick Marson Ong'.
From there, I will then apply necessary enhancements such as saturation and contrasts, to give my image the “pop” that it deserves. Here is the final, fully merged image:
 Finished image after enhancements. Photo by: 'Patrick Marson Ong'.
That’s all folks! Keep on shooting and Keep on practicing! Sharing is caring!
About the author: Patrick Marson Ong is a landscape photographer based in the Philippines. You can find more of his work on his website or by following him on Instagram and Facebook.
Would you like to practice wave photography at the Diamond Ice Beach in Iceland? Check out our 4 Day Winter Photo Tour, which will take you to the best sights within the Vatnajokull National Park, home of the magical Jokulsarlon glacier lagoon and the Diamond Ice Beach.


Other interesting articles
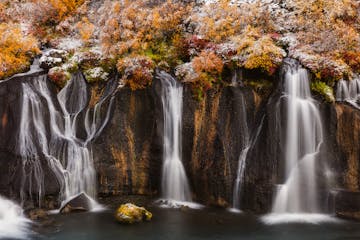

Complete Guide to Photography at Hraunfossar Waterfall in Iceland
There’s no doubt that Hraunfossar waterfall is one of the best places for photography in Iceland. Also known as the ‘Lava Falls’, this magical location is only a short detour between the Snæfellsnes...Read more
Understanding Metadata | EXIF for Landscape Photography
Rather than dealing with piles of labels and film in this modern age of digital photography, most of us have found ourselves working with numerous memory cards and hard drives, storing computerised...Read more
Ultimate Guide to Wedding Photography
If you are interested in photography or even work in the photography business, then you have most probably stumbled across wedding photography already, since this genre is becoming more and more pop...Read more


